Introduction – What happens with the images when exporting?
When we export a 3D model in FBX format in Blender, not only the geometry information is included, but also other elements are added, for example the UV map of the models, animations, materials and even the colors of the materials.
Most of the extra information defined in Blender can be recovered in other softwares, for example when we import the 3D model in Unity. However textures are not automatically included in the FBX file.
In this article you will find information and videos on how to export a 3D model with textures from Blender to Unity.
Update (2025): This is how I’m currently working with blender models in Unity 👇
Steps to export model with EMBEDED TEXTURES from Blender to Unity
To do in Blender
1. Select the models to be exported, making sure that they have materials with textures applied to them.
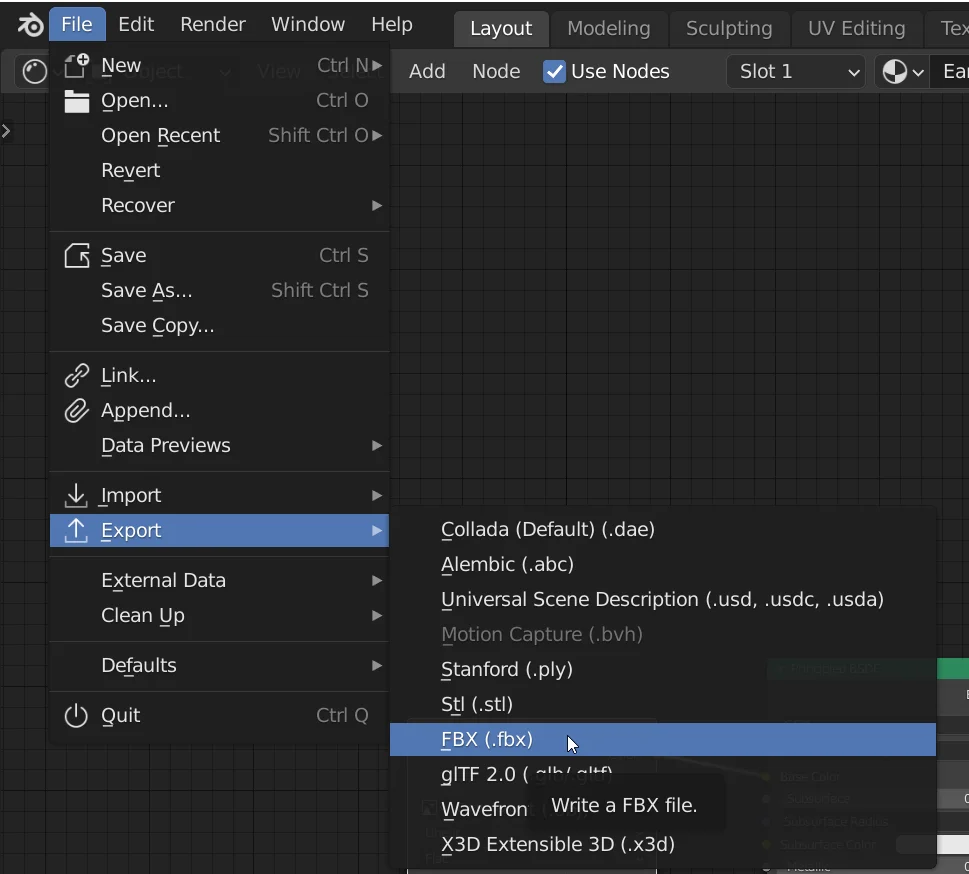
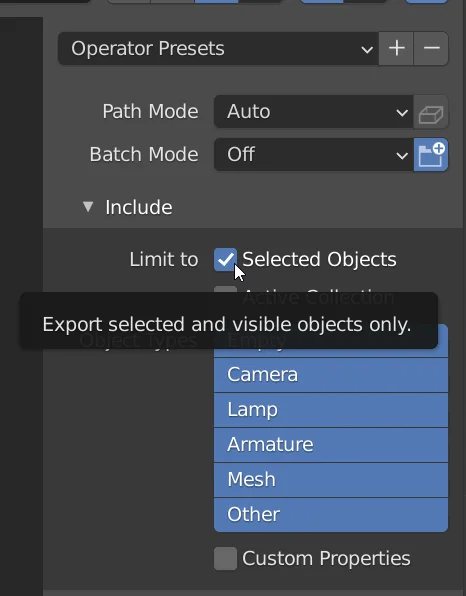
2. Go to File > Export > FBX and check the “Selected Objects” checkbox to export only the selected objects.
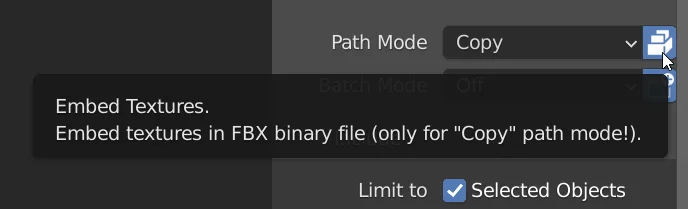
3. Change the “Path Mode” parameter to “Copy” and click on the “Embed Textures” button to the right of the “Path Mode” drop-down menu.
4. Give it a name, export and then transfer the file to Unity.
To do in Unity
1. Select the model and in the inspector go to the materials tab. Click on the “Extract Textures” option and choose the destination folder. This will extract the textures from the FBX file and in my case they are applied automatically, but if it’s not your case you can create a new material in Unity, assign those textures and replace that material in your 3D model.
Detailed process for exporting model with textures from Blender to Unity
Now let’s see in detail the sequence of steps above, it consists of two parts, one part that is done in Blender and another one that is done in Unity.
Export a Blender model with textures to use it in Unity
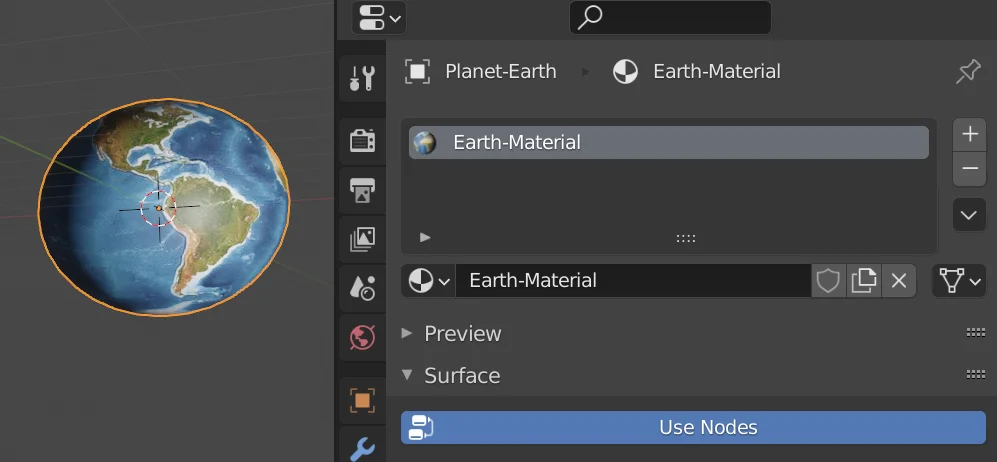
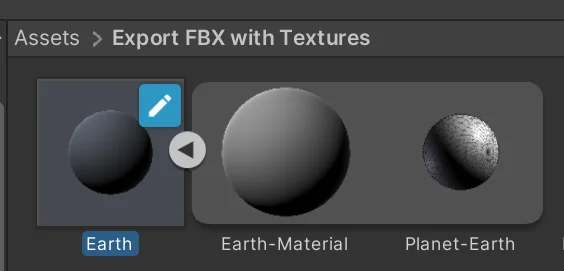
Let’s suppose we have a 3D model with textures applied like the one shown in figure 1.
We go to the File > Export tab and choose the format, in our case we will use the FBX format to export our model. The export window will open, there we can choose the destination folder and the file name, in particular I always check the “Selected Objects” checkbox so that only the models I have selected are exported, otherwise unwanted objects, such as lights and cameras, would be exported.
In order for the textures to be included in the file it is necessary to do two things, the first is to change the “Path Mode” parameter to “Copy”, as shown in figure 4. The second thing is to activate the button on the right of the Path Mode dropdown menu (as shown in figure 5), that will embed the textures in the FBX file.

Import in Unity a Blender model with textures embedded in the FBX file
Once the model is exported with the previous method, we import that FBX file to Unity, we should see something similar to what we see in figure 6. Inside the model we only see the meshes and materials that are included, notice that the textures are still not there.
With the model selected we go to the Inspector window and enter the “Materials” tab, figure 7. Inside Materials we have a button to extract the textures, we press it and choose the destination folder in the pop-up window.
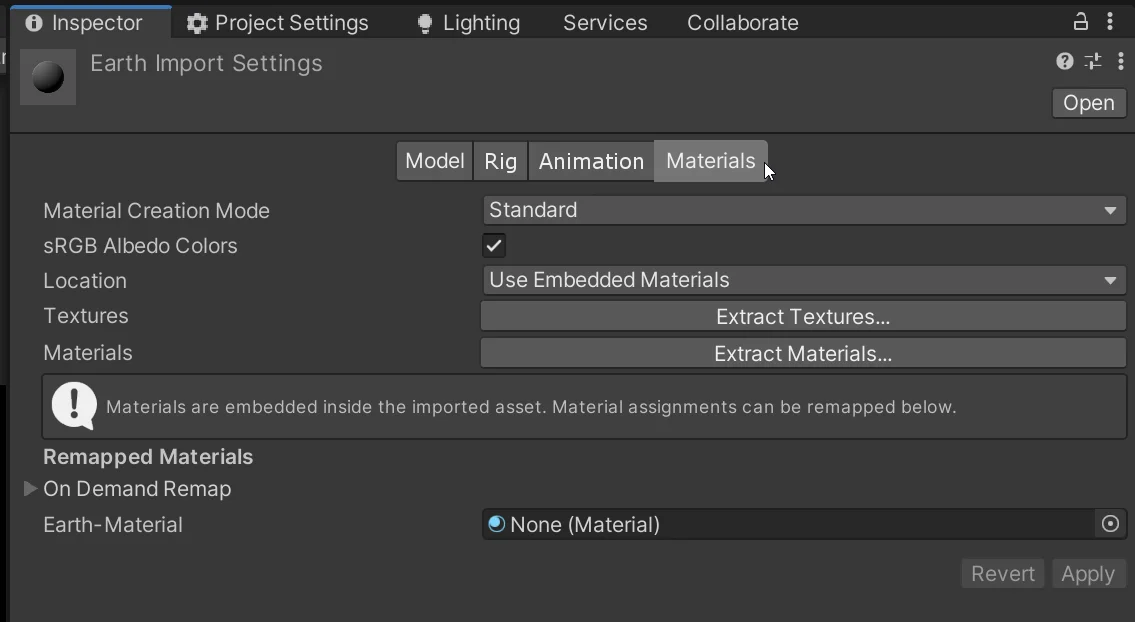
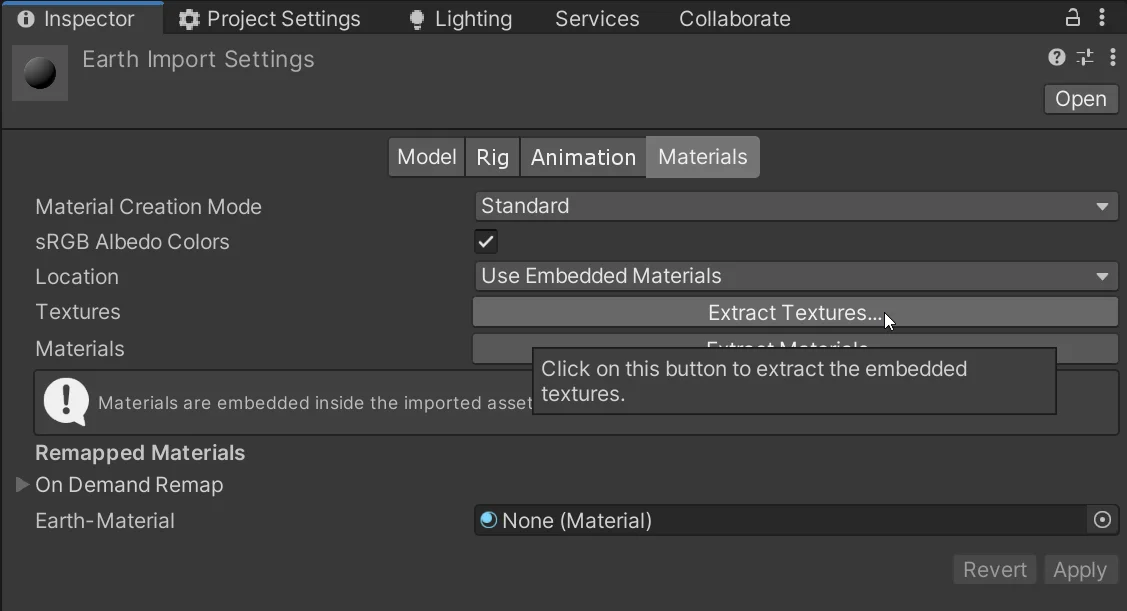
This extracts the textures that come from within the model and even applies them to the material.

Another video tutorial on how to export from Blender to Unity
Some tips before exporting from Blender to Unity
- Give meaningful names to your objects in Blender, because the names in the Outliner in Blender will be the same names in the Unity hierarchy.
- Make sure to remove duplicate vertices in your model.
- Take care of the number of polygons in your 3D model.
- Be sure to normalize the scale of your 3D model.
- Make sure that the dimensions of your 3D model make sense after normalizing the scale.
The following video is about packing textures in the FBX file
This is a very specific procedure and if you are not sure that this is exactly what you need I recommend you to follow the previous video.
You have reach the end of the article, if it was useful consider subscribing to the channel!