Introduction
Scale is a fundamental property of any 3D model, defining its dimensions and proportions. Ignoring scale normalization can lead to issues—from broken physics simulations to distorted UV maps. This becomes especially critical when assembling 3D environments, where consistent sizing ensures believable object relationships.
In this article, you’ll learn how to normalize scale in Blender effectively.
For a visual breakdown of this subject, you may find my video discussion helpful.
How to normalize the scale of a 3D model in blender
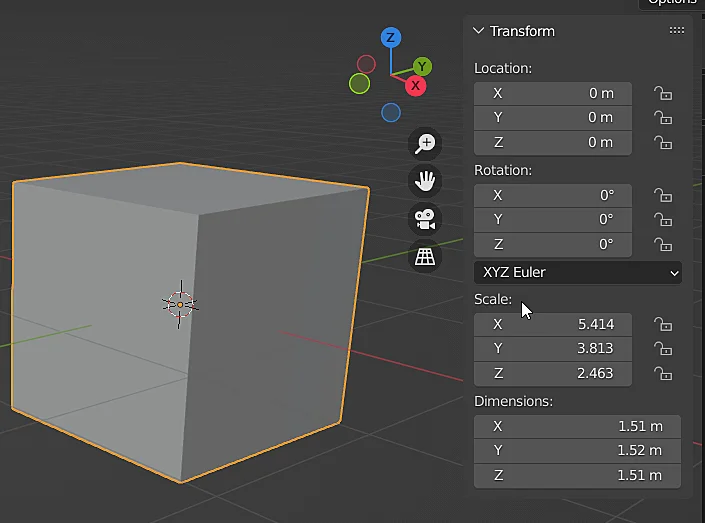
We begin with a 3D model exhibiting non-uniform scale, as shown in Figure 1. The cube’s scale values—(5.414, 3.813, 2.463)—indicate inconsistent transformations applied in Object Mode, likely from manual resizing or improper import settings.
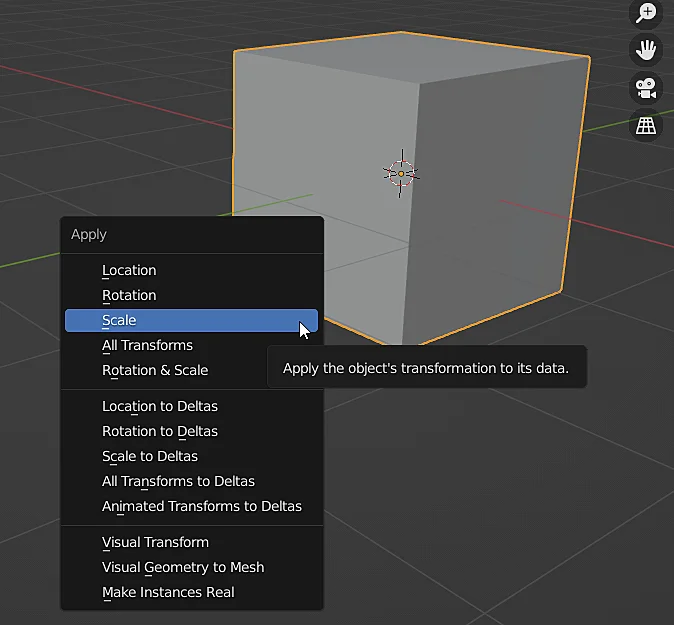
To normalize the scale of the model what we must do is to select it in the object mode and “Apply the scale“, with the shortcut CTRL+A the ” Apply” window appears as shown in figure 2, click on apply to normalize the scale.
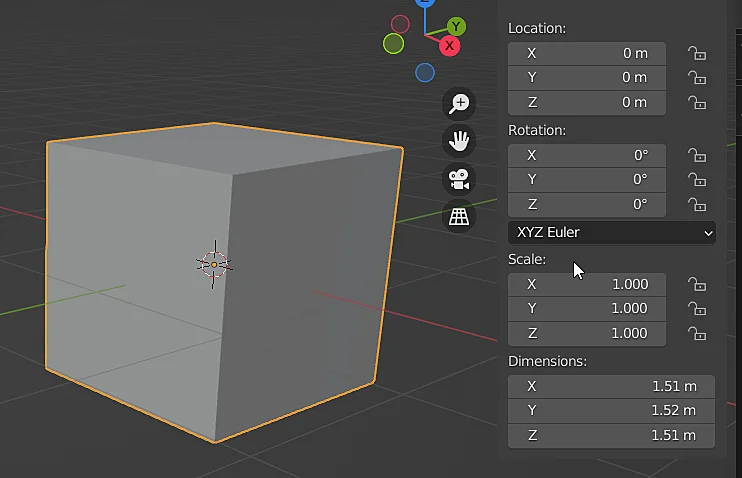
With this we are indicating that this 3D model is located in the scene in its real size. As seen in Figure 3, the scale of the model is now (1,1,1).