Updated information about this project
This article belongs to a series that consist on making a first person game about finding objects inside a maze. It’s one of my very first series from the channel. Now I reworked this project and you can download it to import in your own Unity project. Some day I will make a new series about this project, subscribe to my channel to see all the fresh content about Blender, Unity and programming.
Follow me on itch.io and download the source code of this project
YOU CAN TRY THIS GAME HERE, IT MAY TAKE A LITTLE WHILE TO LOAD
🔻
MOVEMENT: WASD CAMERA LOOK: MOUSE
Introduction of the old article
In this article we analyze the video 4 of the series My First Game in Unity. In this video we created the first Script that will be in charge of placing a Prefab randomly on the stage. The Prefab that we are going to place is the first person controller FPSController of Standard Assets.
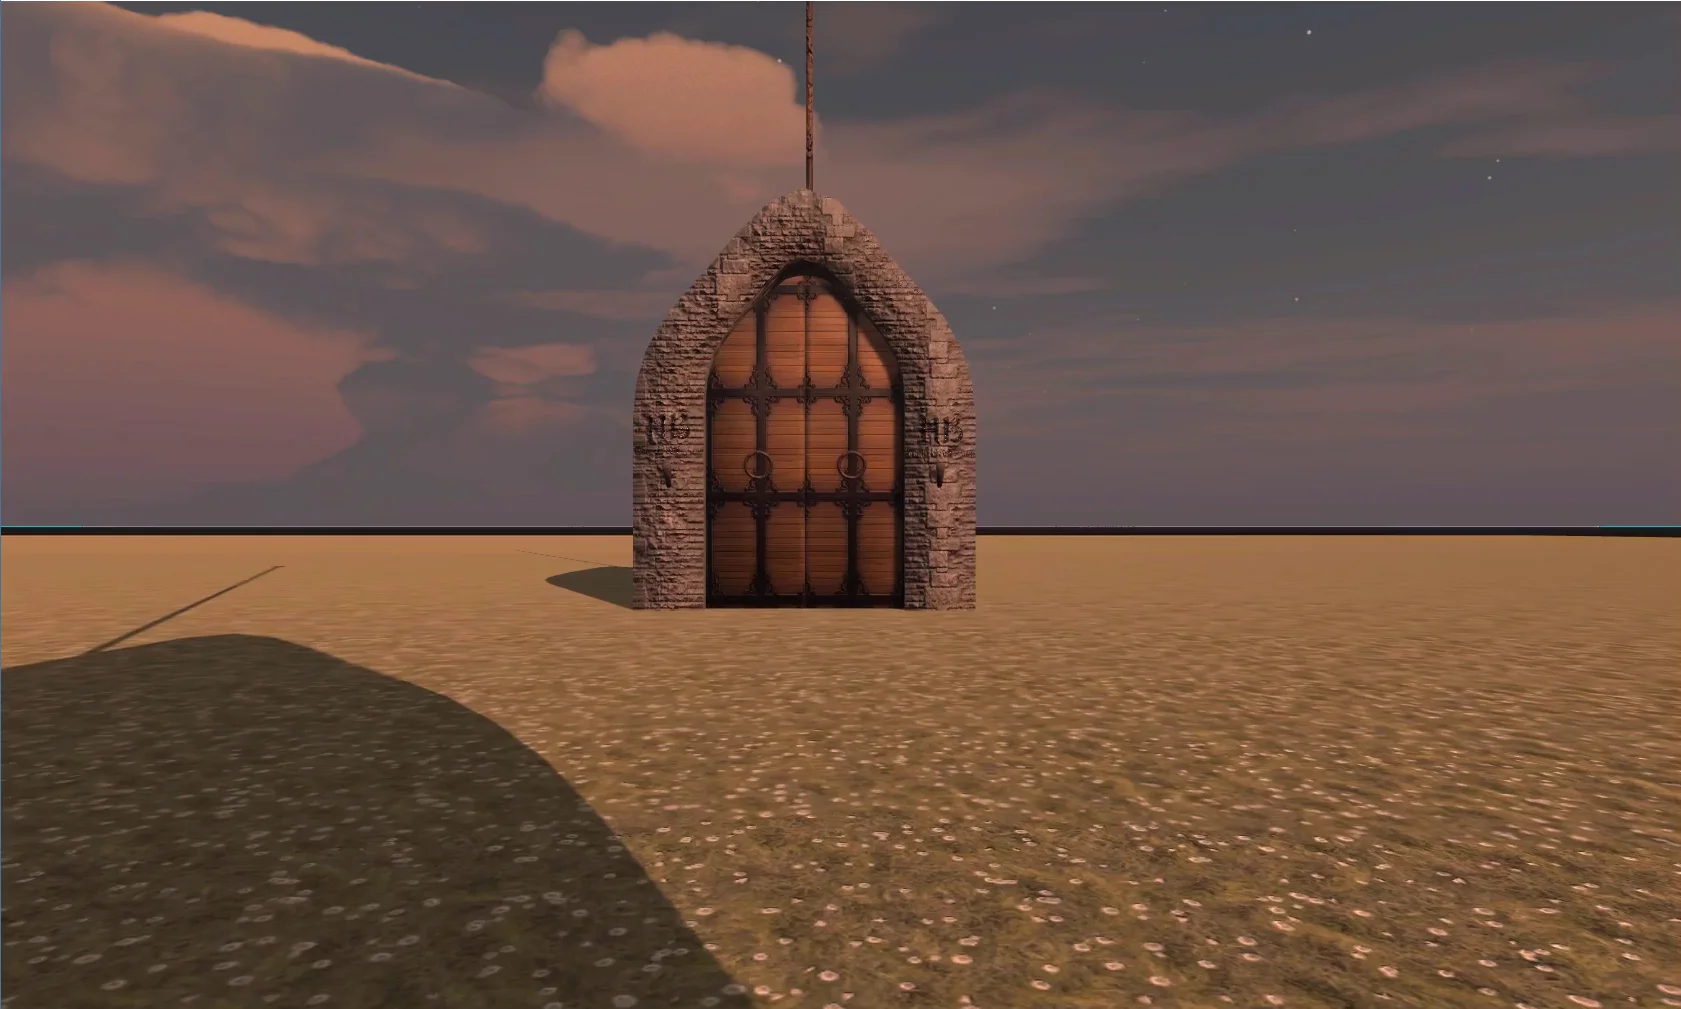
We will place the character in front of a door and as there will be several of them on the stage, we will have to make a random choice.
Go to the project’s Main Page
Video related to this article
Spawn point of the character
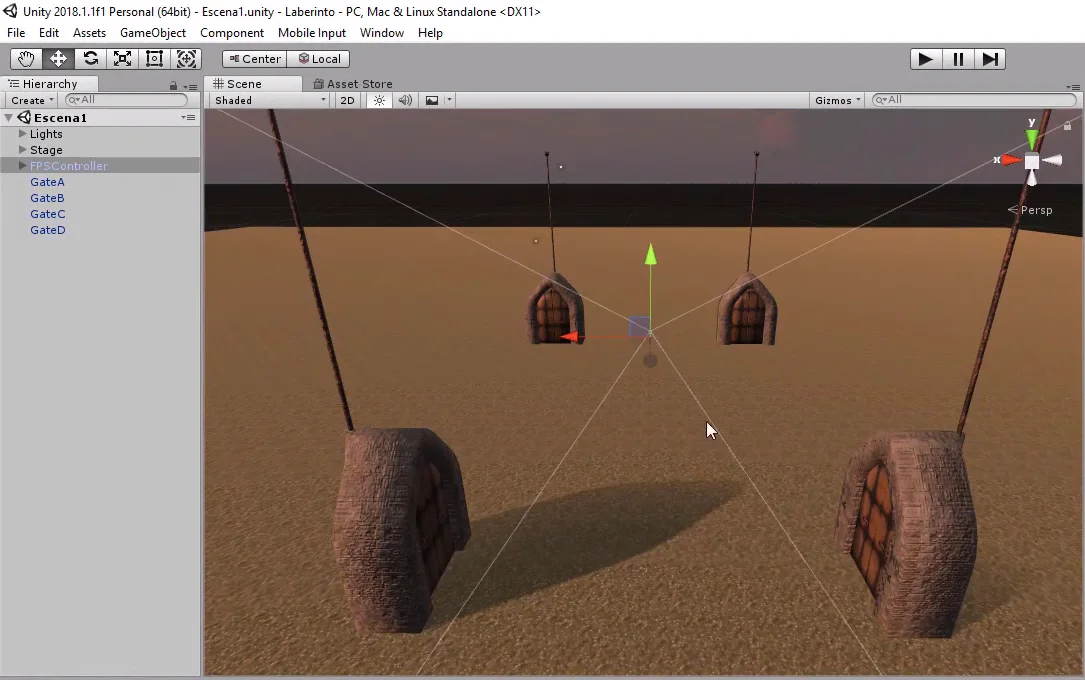
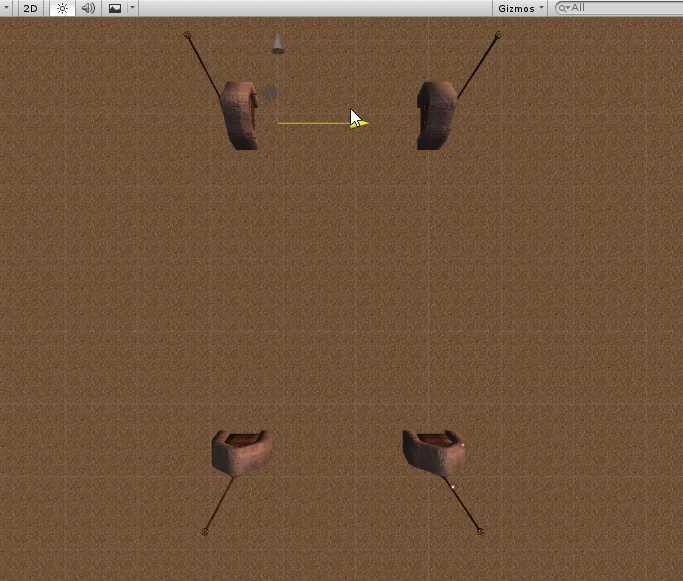
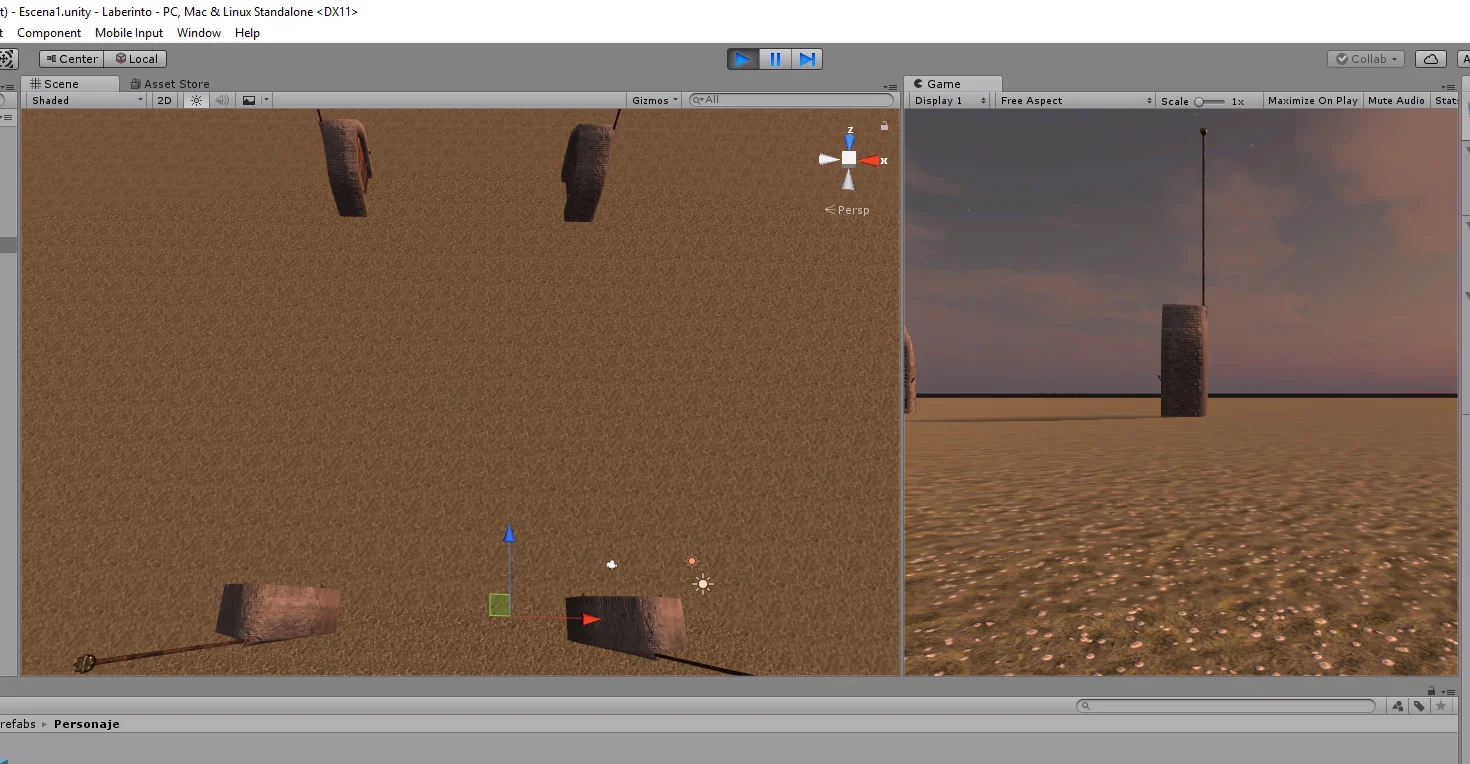
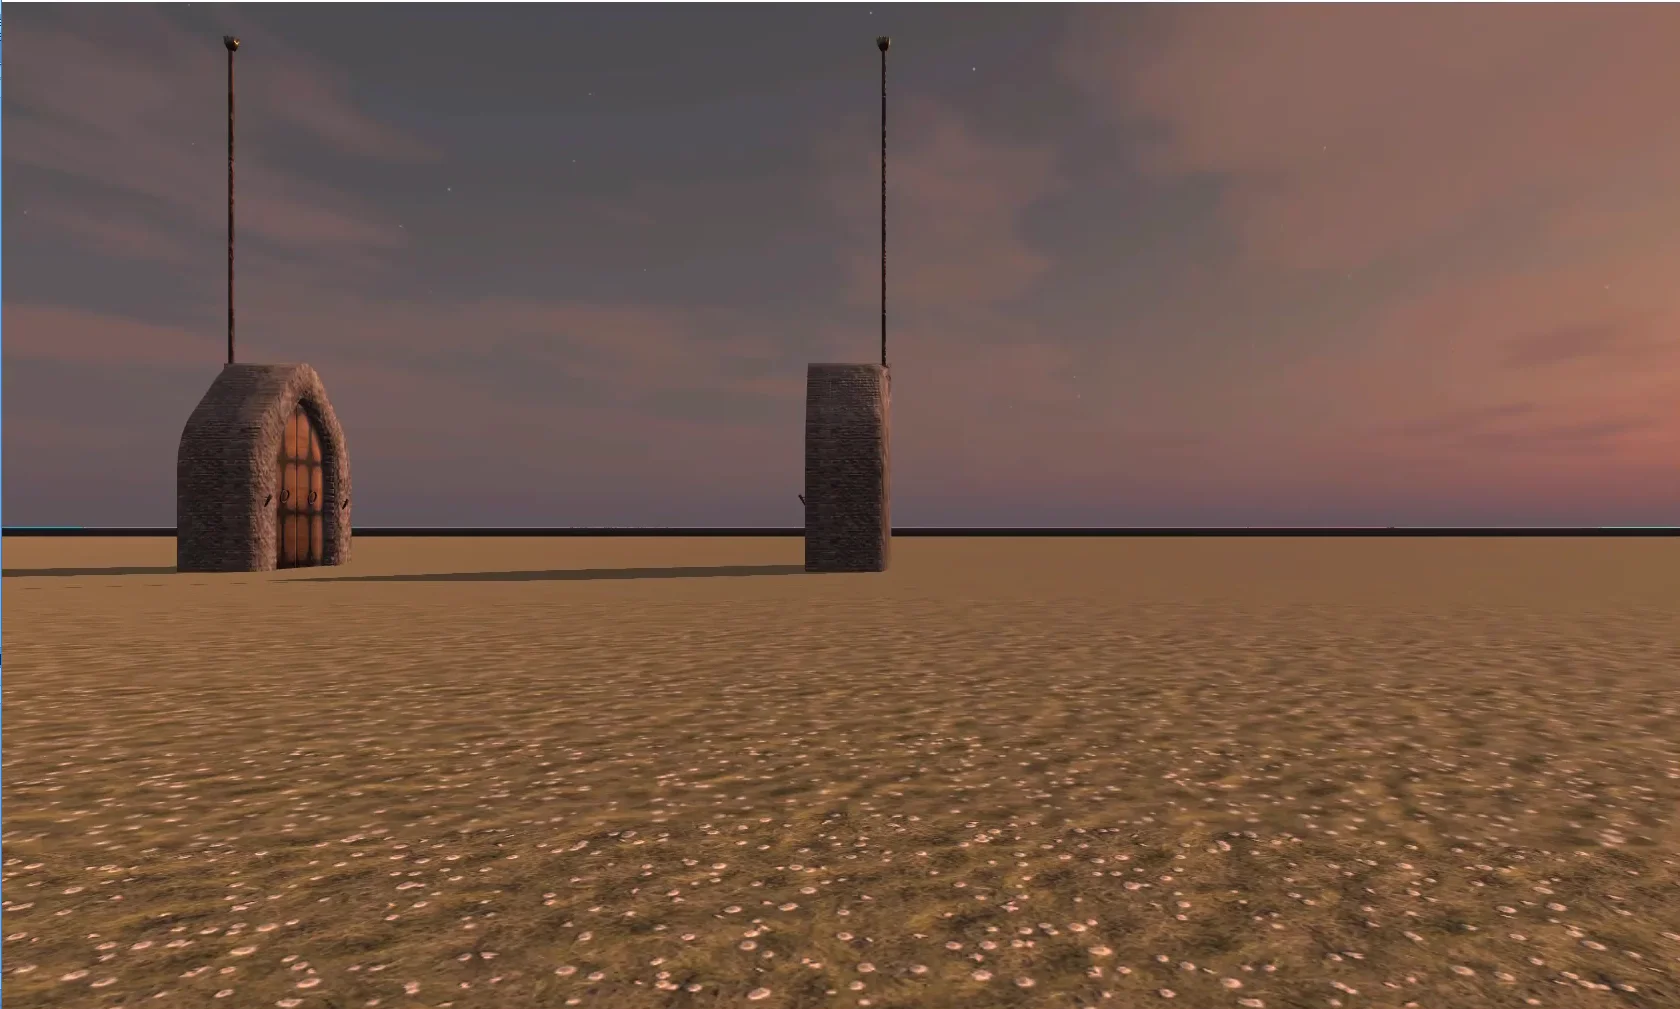
We began by assembling with the prefabricated a scene like the one shown in figure 1.
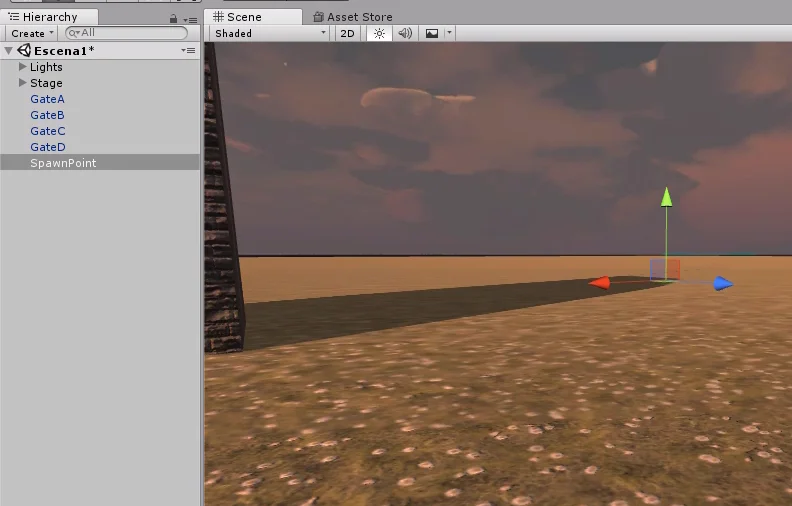
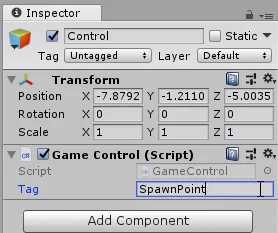
We created an empty GameObject that we’re going to use to mark the position where the player will appear at the start of the game.
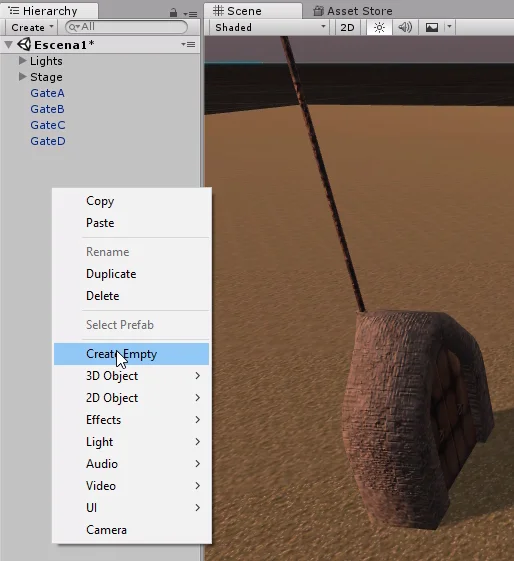
We are going to call this object “SpawnPoint”.
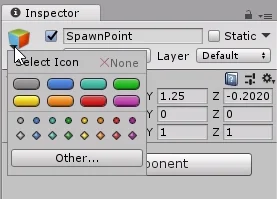
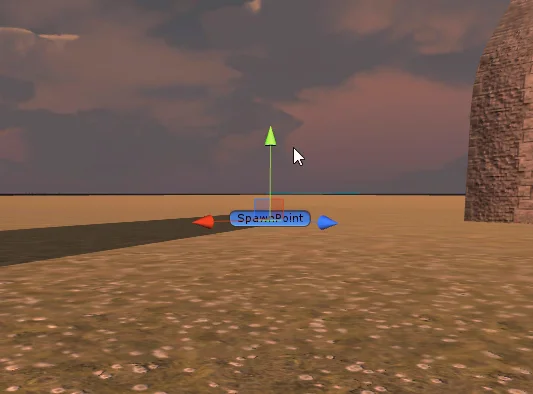
In the inspector we can choose an icon to better visualize the GameObject in the scene.
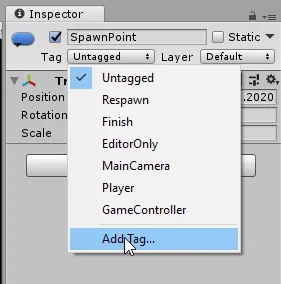
We will create a new Tag to assign to this GameObject. At the top of the inspector we have a drop-down menu called Tag, clicking allows us to choose a Tag to assign or create a new one with “Add Tag”. We click on this option.
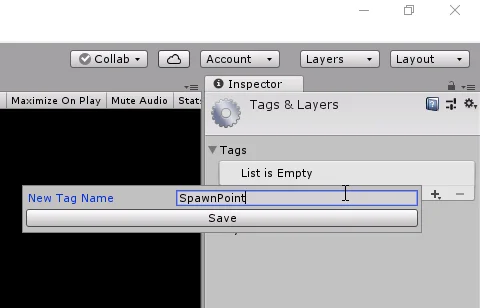
In the window that appears click on the plus sign and type the name of the Tag. It is important to note the use of capital letters.
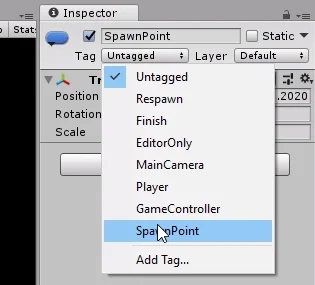
We select again the GameObject “SpawnPoint” from the hierarchy and in the Tag menu we select the Tag “SpawnPoint” that we just created.
Creation of the first Script
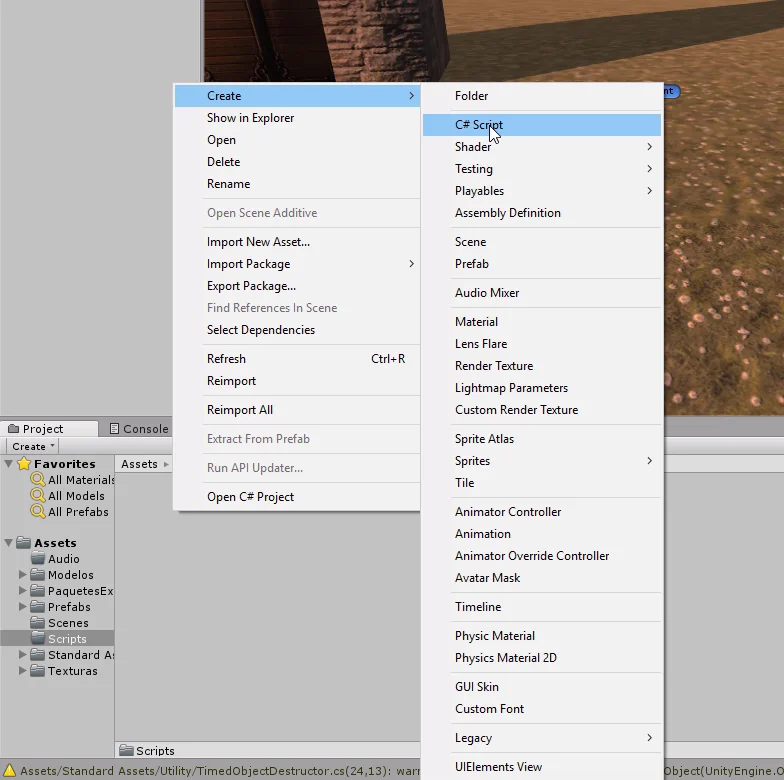
Finally we are going to start programming in C#. To start we need to create a C# Script, for this we right click on a folder in the project (I suggest the Script folder we created to organize ourselves), then we go to Create > C# Script, as shown in Figure 9.
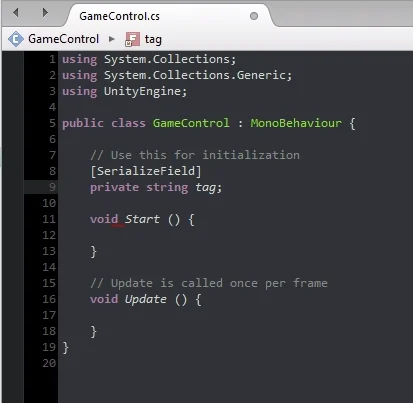
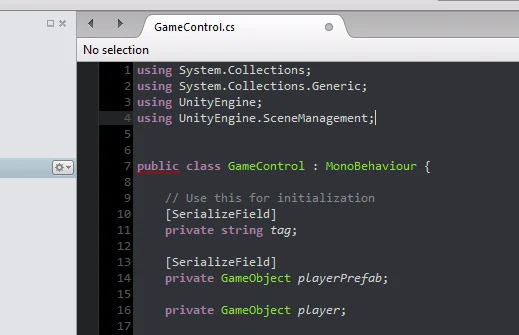
We’re going to name the file “GameControl” because it will control the fundamental aspects of our game. The file that is created can be seen in figure 10.
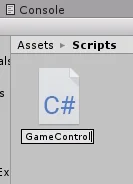
Programming usually uses a way of writing as shown in Figure 10, is known as Camel Case and consists of eliminating spaces and distinguish words using capital letters.
We use this notation for script names, variables and methods.
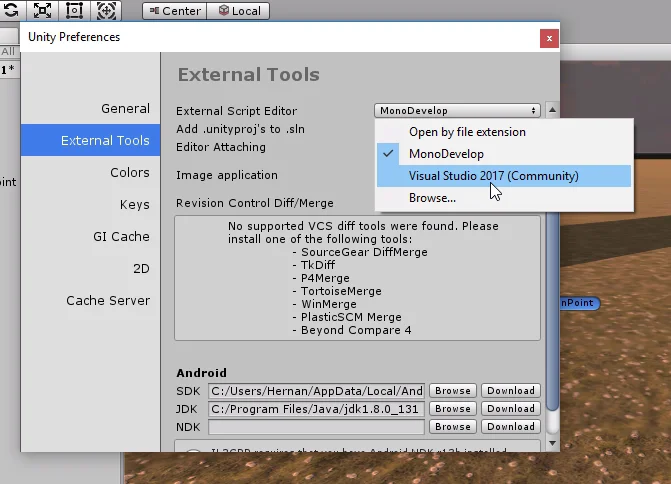
Before starting to program, let’s select a Scripts editor, click on Edit > Preferences.
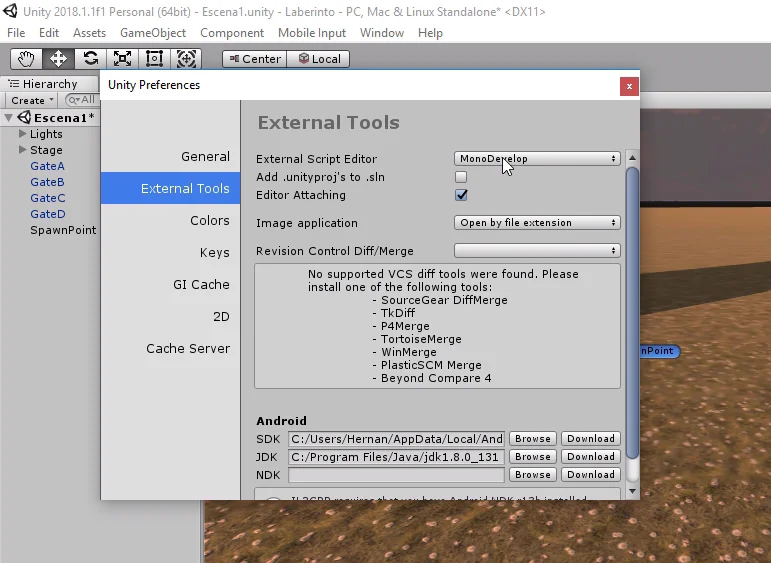
For the series My First Game in Unity we used the script editor MonoDevelop, this editor was discontinued, that’s why in the Fundamental Series of Unity Visual Studio is used.
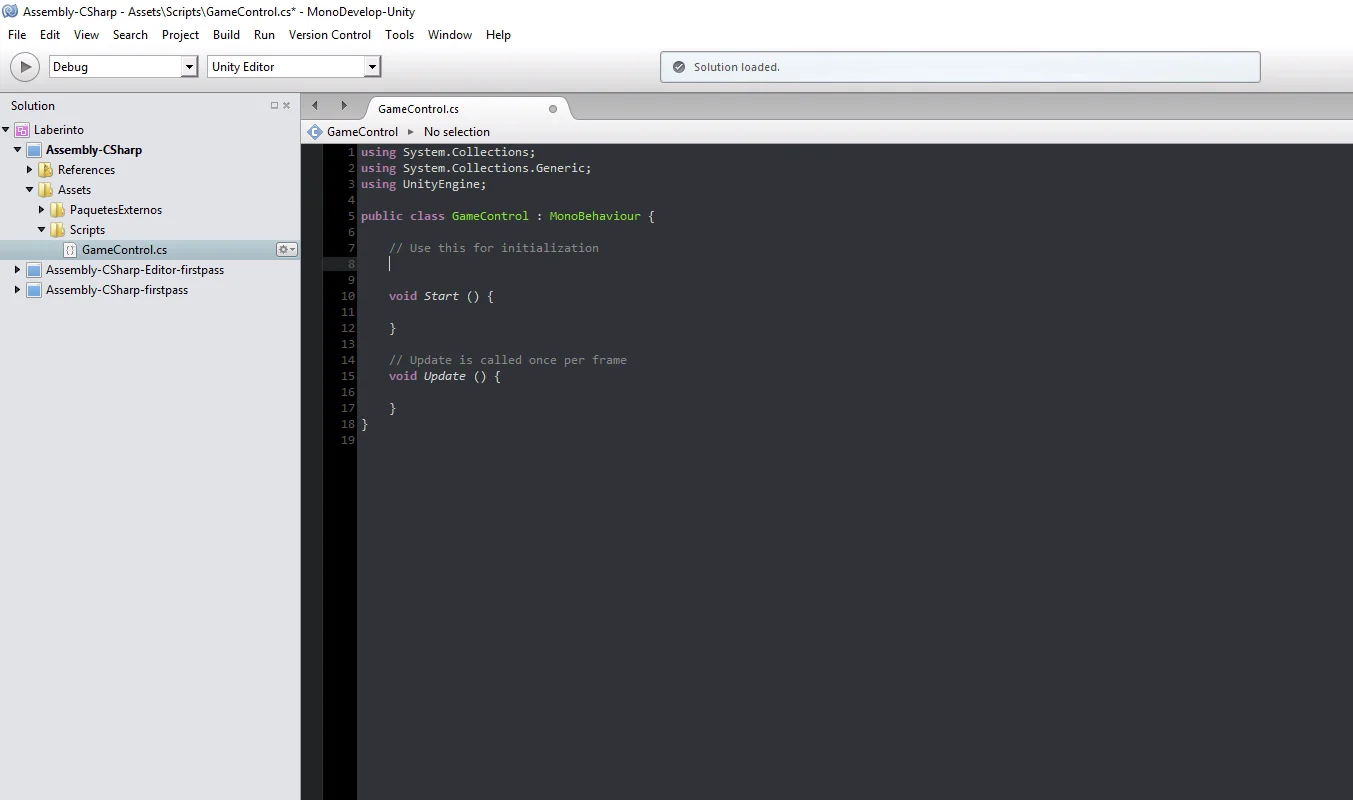
When opening the Script to edit we find some code already written.
In figure 10 the first 3 lines that begin with the word “using” are used to import libraries that will allow us to access certain functionality.
Then comes the definition of a class that bears the name we gave to the Script, in this case GameControl. It also indicates the super class, ie the class from which inherits its behavior, in this case MonoBehaviour. So all the attributes and methods of the MonoBehaviour class will be available for us to use.
The previous paragraph has several object-oriented programming concepts that do not make sense to delve into this article, because it is a fairly extensive topic. However, I believe that the mention of words such as “class”, “attributes” or “super class” may arouse curiosity and encourage the reader to investigate the subject further. At this time I do not have articles on object-oriented programming, although I wish to write them soon.
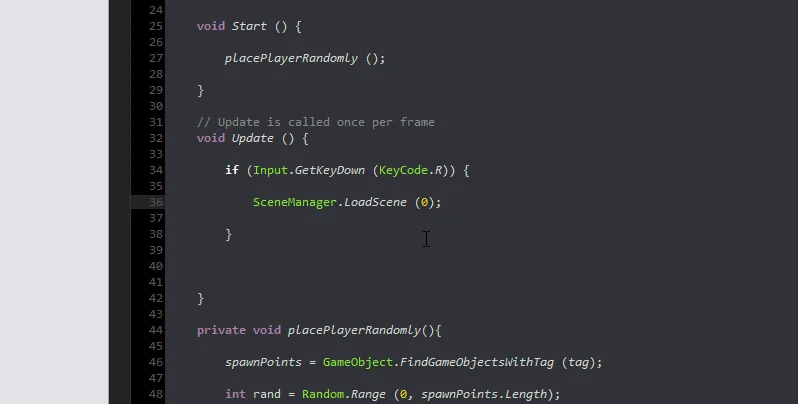
Then there are two methods defined, the Start method and the Update method. The Start method will run automatically once when the game starts and the Update method will run automatically once in each Frame in the game.
In the region that is between the definition of the class and the definition of the Start method we are going to place all the attributes of the class, that is to say all the variables and objects that we will use so that the Script fulfills its functionality. Some time ago I wrote an article about the basic types of variables that we are going to use in the tutorials.
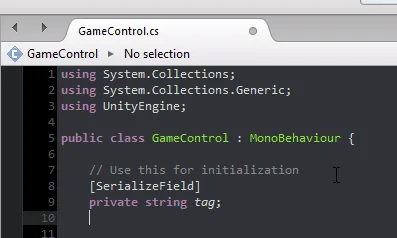
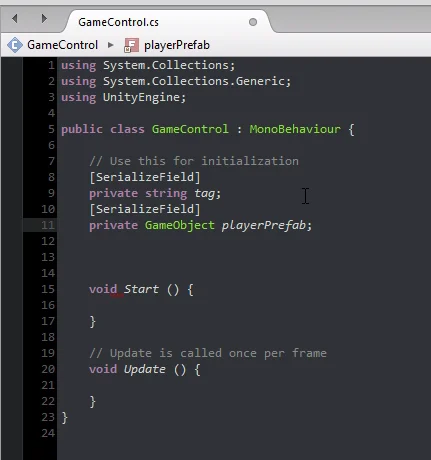
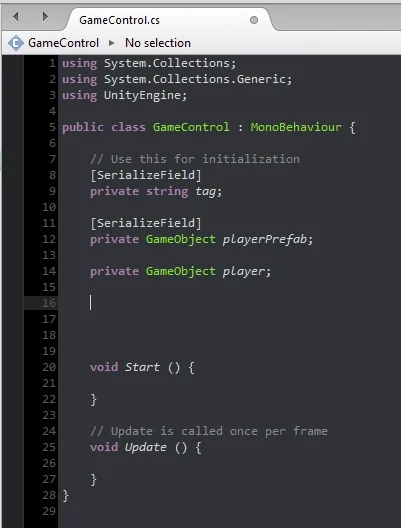
Let’s write two lines of code, the first is “SerializeField” in square brackets, this is to tell Unity that what comes next is a field to be serialized. Without going into detail this line will make private fields (variables or objects) appear in the inspector.
The next instruction is “private string tag”, with this we are declaring a variable of type string of name “tag” with private visibility.
Visibility is also an object-oriented programming theme, used to hide attributes or methods that are not accessible from a context outside the class. Attributes or methods with public visibility are accessible from other classes.
Asignar Script has a GameObject
For the code to be executed it is not enough to create a Script, we must assign it to at least one GameObject of the hierarchy.
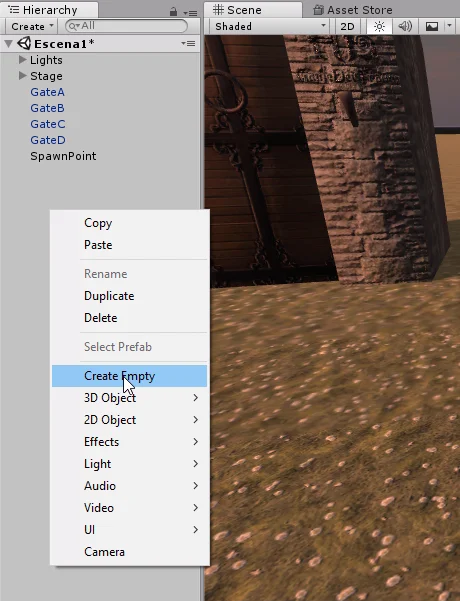
GameControl will be in charge of controlling the basic aspects of the game. In principle it could be assigned to any GameObject that is present during the whole game, but for a better organization we are going to create an Empty GameObject that we will call “Control”.
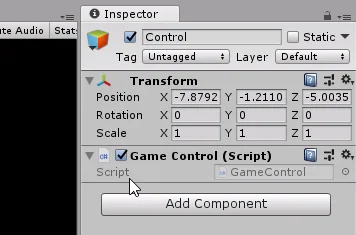
With the new GameObject selected, we drag the GameControl Script into the inspector to add it as a component.
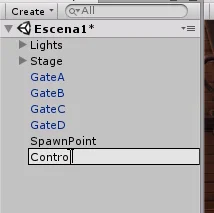
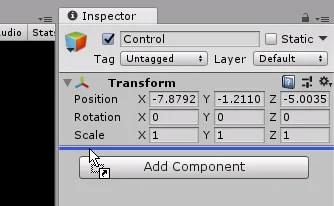
Figure 18 shows that the script has been added as a component to the Empty GameObject Control.
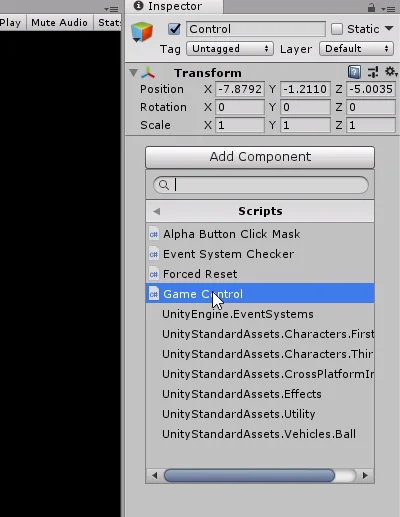
Another way to accomplish this is by using the Add Component button and searching for the GameControl Script.
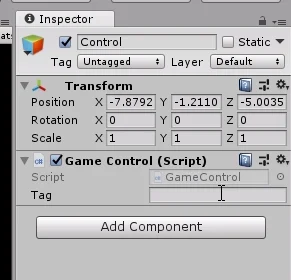
The reason why in figure 18 we don’t see the String “tag” that we define is because we don’t save the changes in the Script. In figure 20 you can see that in the Script tab there is a circle instead of a cross, this means that there are unsaved changes, you can easily save by pressing CTRL-S.
It is advisable to save frequently enough so that in case of possible failures we do not lose our work.
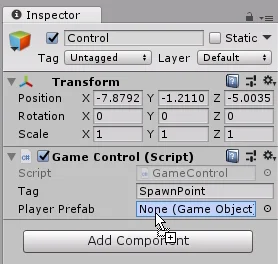
After saving the changes we see in the inspector the string “Tag”. In this field we are going to write “SpawnPoint” which is the name we gave to the tag we assigned to GameObject SpawnPoint (figures 5 to 8).
Place character prefab randomly
The character will definitely be a GameObject, in particular the Prefab FPSController from Standard Assets. We have to tell Unity somehow which prefab we want to put on stage.
For this we are going to define a private GameObject that we will call “playerPrefab” and we will indicate it as serializable so that it appears in the inspector.
Figure 23 shows the two instructions that allow you to do this.
In previous videos we had created a Prefab of the FPSController and we had placed it in Assets > Prefabs > Character. This is the Prefab that we are going to place on the stage.
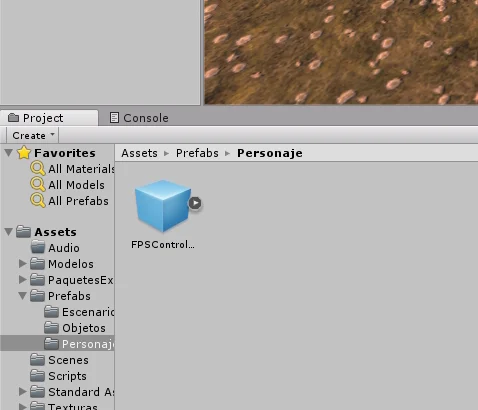
We take the Prefab FPSController and drag it to the new field in the inspector, as shown in figure 24.
It’s very important that we keep the reference of the player’s GameObject, for example to destroy it when the game is over. We are going to do this by defining a new private GameObject that we will call “player”.
In this case we will not mark this field as serializable, because it is for internal use of the GameControl Script.
Then we need to know where we’re going to put the character on stage. For this we created the Empty GameObject that we call SpawnPoint (figures 2 to 5). We are going to make it the son of a door and create a Prefab of the door with the object SpawnPoint.
So each door will have its own SpawnPoint. If we have only one door in the stage, the character will appear in that place, but if we have four doors (as it will be in our case) the character will be able to appear in any of them randomly.
First we need the GameObject SpawnPoint reference, but how many? Since we don’t want to limit the functionality of this script to a fixed number of doors, we’ll simply make it automatically detect how many points of appearance there are and choose one of them randomly with the same probability.
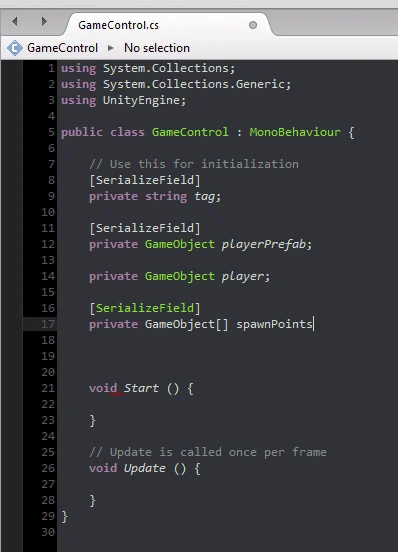
We are going to define a vector or array of GameObjects, that is to say a structure of data that contains several ordered GameObjects, which we will be able to access with an integer value that will indicate its position in the array.
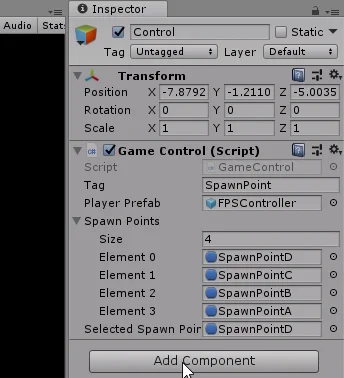
To define this array we use the word GameObject followed by square brackets, as illustrated in figure 27. As this array will contain all the points of appearance of the scenario I will call it “spawnPoints” and I will also define it as private and a Serializable field.
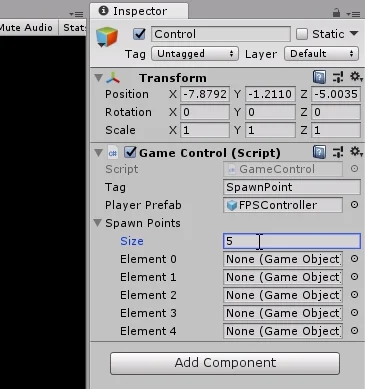
In the inspector you can see what this data structure looks like. It appears as a drop-down menu that has an integer value called “Size”, which will indicate the size of the array.
As can be seen in figure 29, if we write a number in this variable, we see that there are that many GameObjects fields.
En este punto podríamos hacer que la variable Size sea igual a 4 y asignar manualmente todos los puntos de aparición, pero no queremos estar limitados a eso, queremos lograr que cuando agreguemos o quitemos una puerta, la selección del punto de aparición se haga automáticamente.

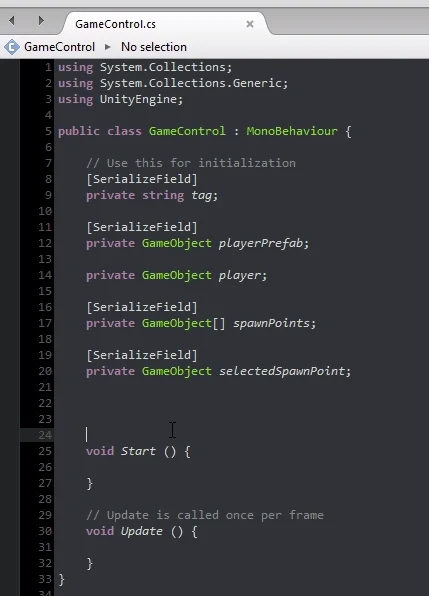
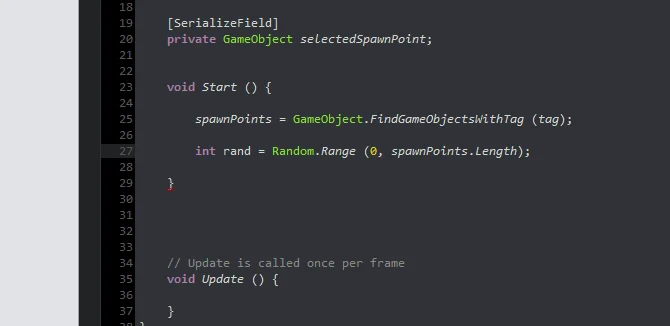
We will define a new GameObject that will have the reference of the chosen point of appearance, we will call it “selectedSpawnPoint” and we will make it private and serializable to be able to observe it in the inspector.
Programming the behaviour
Until now we have been defining the objects we will need, now we will begin to write instructions that are the ones that will make things happen in our game.
The first instruction will be placed in the Start method and will be responsible for finding all the points of appearance on the stage and save them in the “spawnPoints” array.
Figure 31 shows that the editor helps us by suggesting code as we write. If this doesn’t happen it could be for two reasons, the option “code-autocomplete” is deactivated in the configuration.
The other reason may be a bug in the editor, or that Unity is not connected to the editor. If this happens, try to solve it because not only will we not have the code suggestion but we will not have syntax analysis.
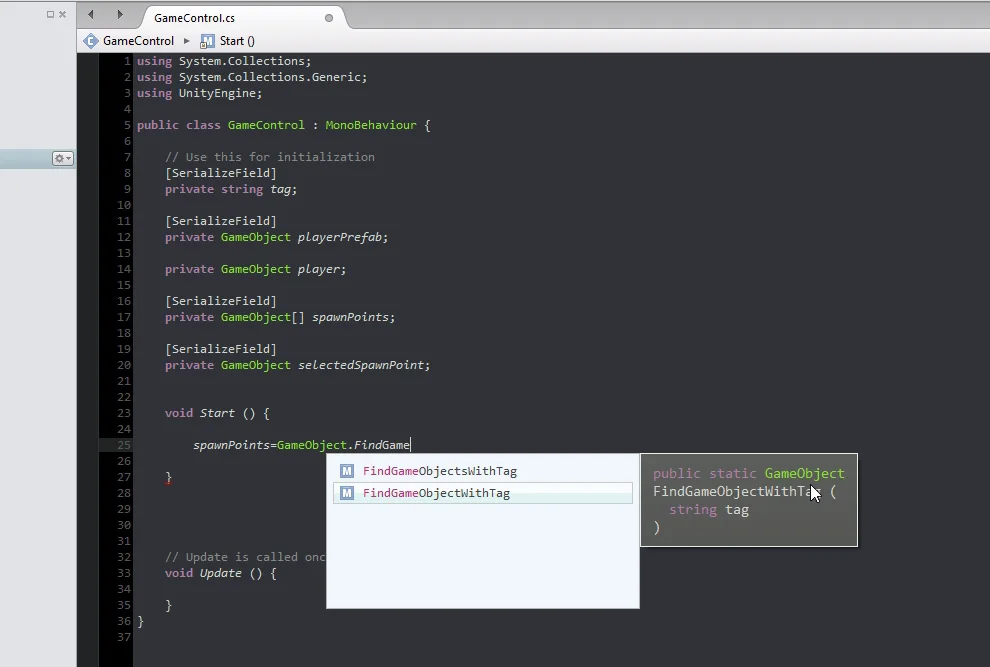
To find the references of the points of appearance we are going to use a method of the GameObject class that will allow us to find objects using its tag.
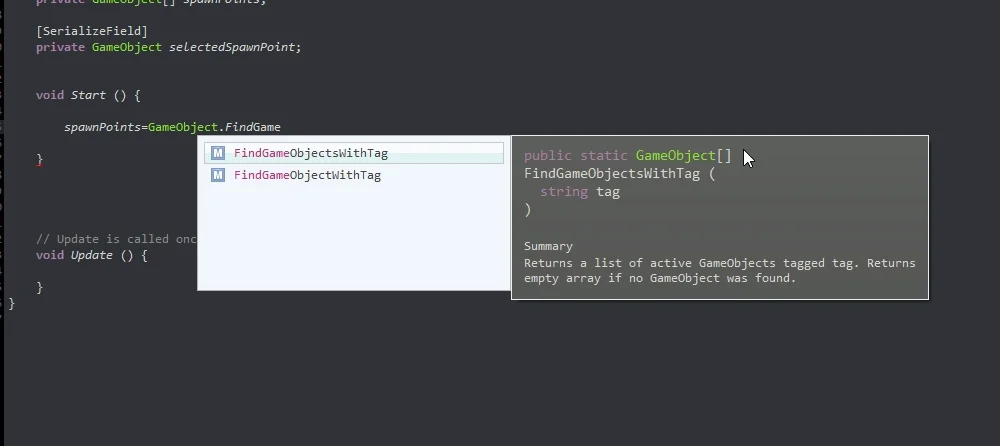
In figures 31 and 32 we see that there are two variants of this method, one returns a single GameObject (figure 31) and the other returns an array containing all GameObjects that have the tag we indicate (figure 32).
Notice how these two methods are only differentiated by an “s” letter.
The instruction would then be as follows:
spawnPoints=GameObject.FindGameObjectsWithTag(tag);

In the second video of Unity’s fundamental series I analyze this way of finding GameObjects references and four other ways. I also wrote an article about that video going deeper into the information.
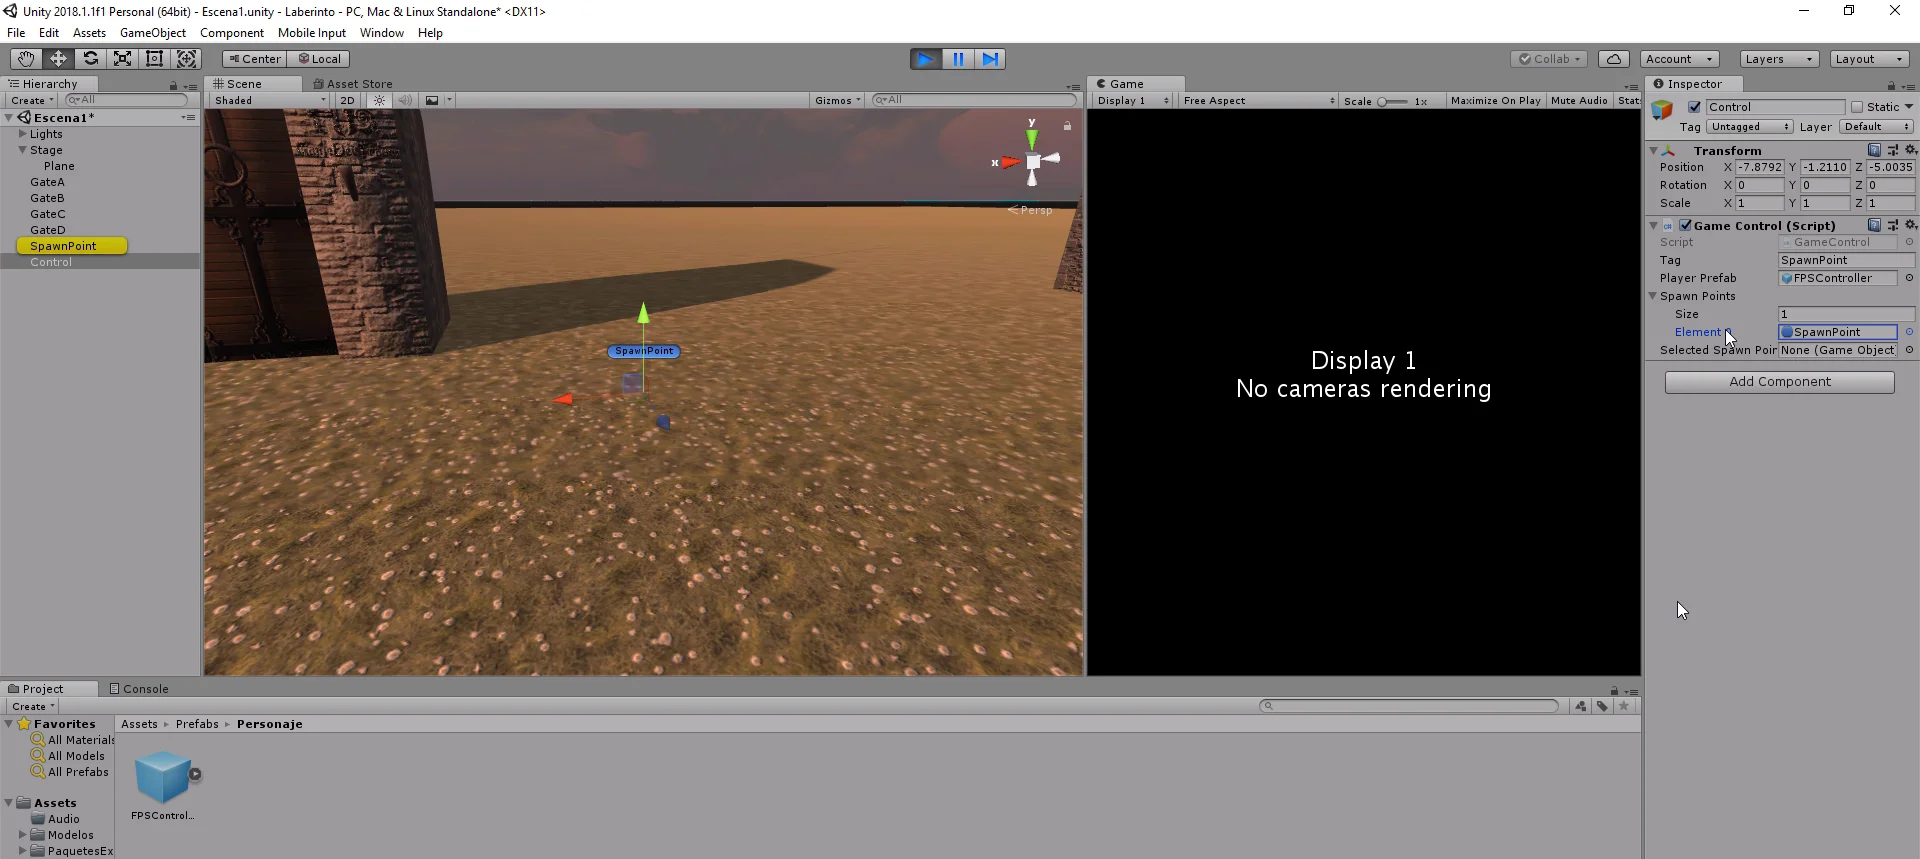
Figure 34 shows that when entering game mode, our array is size 1 and contains the GameObject SpawnPoint reference of the hierarchy (highlighted in yellow by Unity itself).
Let’s create some copies of this GameObject with CTRL-D and go back into game mode.
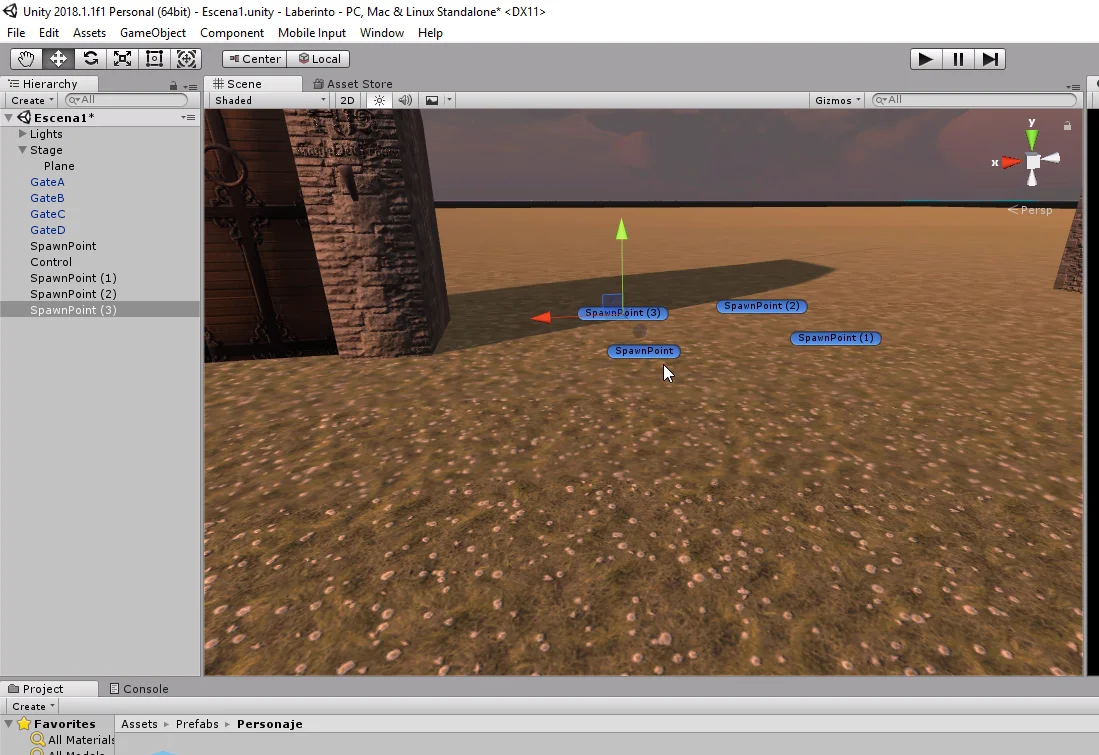
Now we can see that the array is of size 4 and contains all the references of the GameObjects.
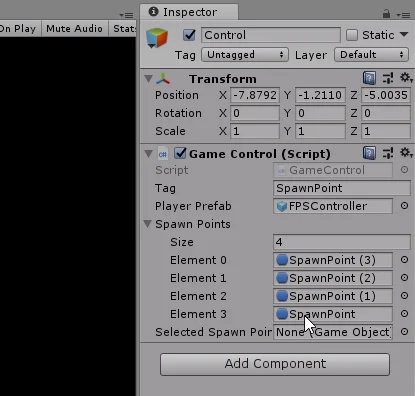
We put a SpawnPoint in every door.
Select a random element from the array
To choose a random spawn point we need to randomly choose an element from the array. This will be done by defining an integer variable named “rand” that will be equal to a random number between 0 and the number of elements of the array minus 1.
This last part is so because in C# the first element of the array has the position 0 and the last one the position “Length-1” (size of the array minus 1).
To generate a random integer we use the Range method of the Random class and indicate two parameters, the beginning of the interval (value that is included) and the end of the interval (value that is excluded). As shown in figure 38.
Notice how the range of values for this number will automatically adjust to the number of occurrence points in the hierarchy.
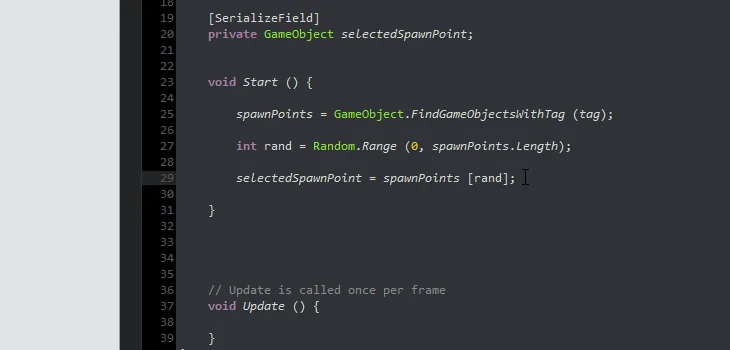
The next step is to obtain the reference of the point of appearance that is in the position that defines that random integer. To access the component of an array we use the name of the array and between square brackets the whole number of the position.
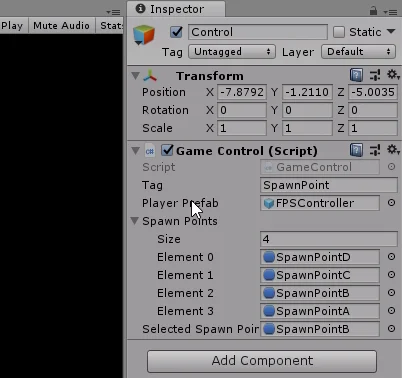
The element of the array is assigned to the GameObject selectedSpawnPoint previously defined. We can see this in figure 39.
In figures 40 and 41 we see two tests of the game in which a different point of appearance has been chosen.
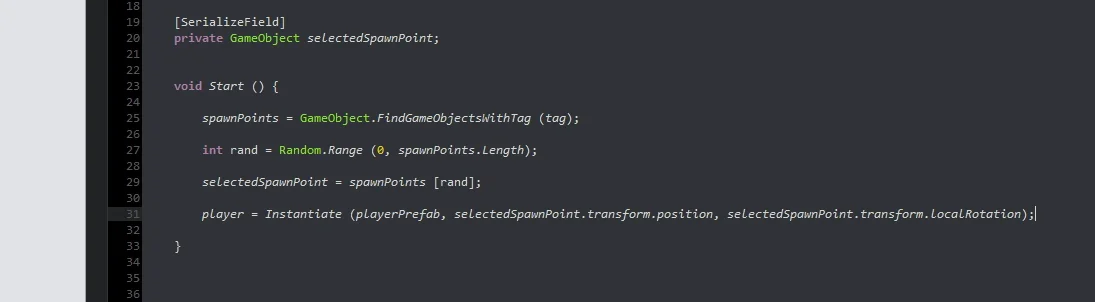
The next step is to place the character’s prefab in the position of the selected appearance point.
For this we are going to use the Instantiate method of the MonoBehaviour class (super class of GameControl).
The fourth video in Unity’s fundamental series is about the Instantiate method, although that video is somewhat strange, the article explains in detail how the method works.
The Instantiate method has several versions, we are going to use one that requires the Prefab to instantiate, the position where it is going to be placed and the rotation it will have.
For the prefab we had defined the GameObject “playerPrefab”. While the position and rotation will be read from the GameObject “selectedSpawnPoint”.
The execution of the Instantiate method will return a GameObject which will be the reference of the created GameObject, i.e. the reference of the player. We are going to save this reference in the GameObject “player”, because we will probably use it later.
What was explained in the last three paragraphs is illustrated in the last instruction in figure 42.
As an observation, we can mention the use of the point operator to access the position and rotation attributes, which are defined in the Transform component.
In principle it is not so simple to understand, but as we acquire practice and study a little programming will become something trivial.
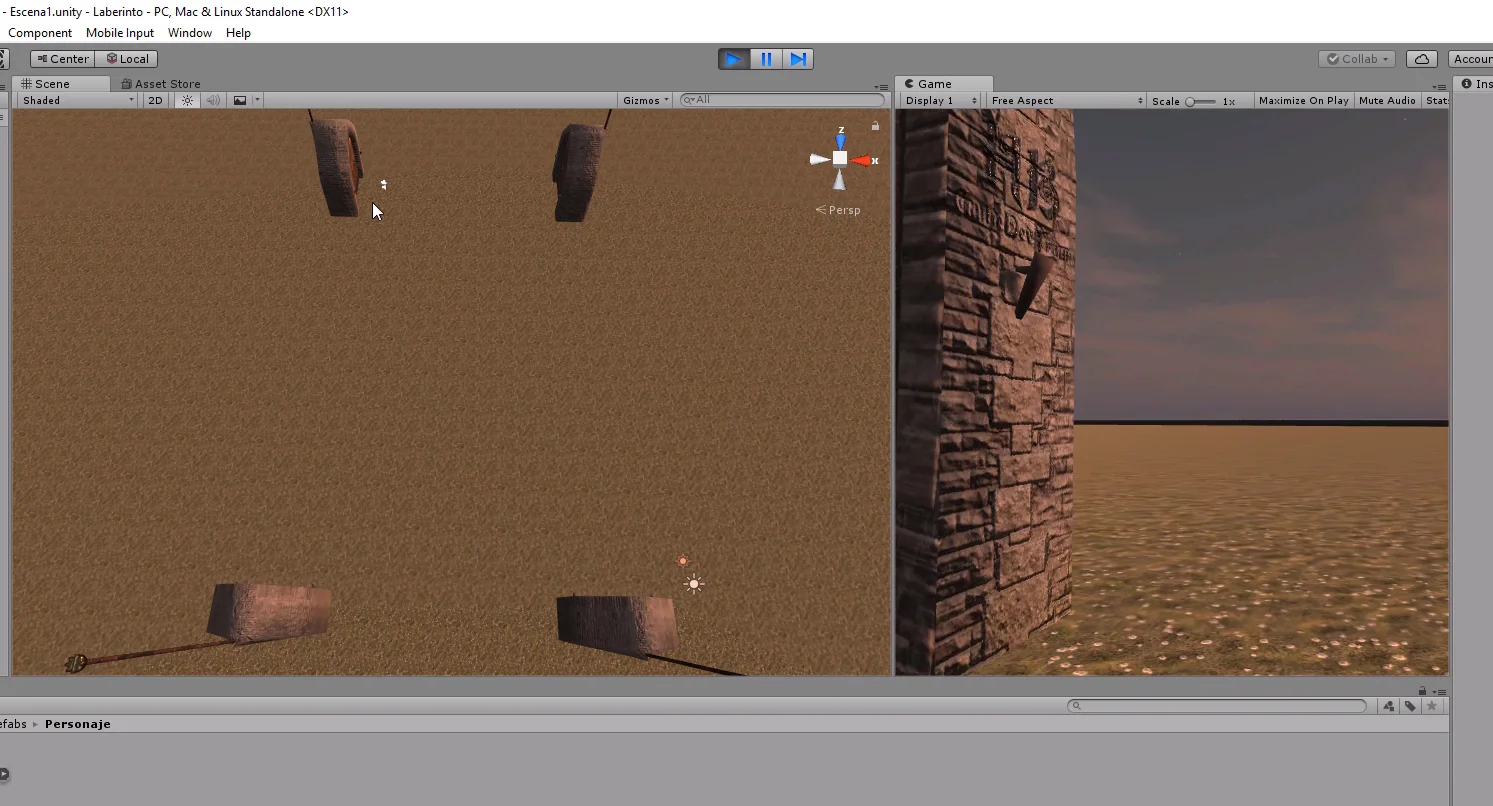
Figures 43 and 44 show two tests of the game in which the player appears in different positions.
Modularization
These four instructions that we have created place the character in one of the doors randomly.
It would be great if we had an instruction called “placeCharacterInARandomDoor” and do all the work. Then we could put a single instruction into start instead of four.
Luckily we can do exactly this by defining a new method.
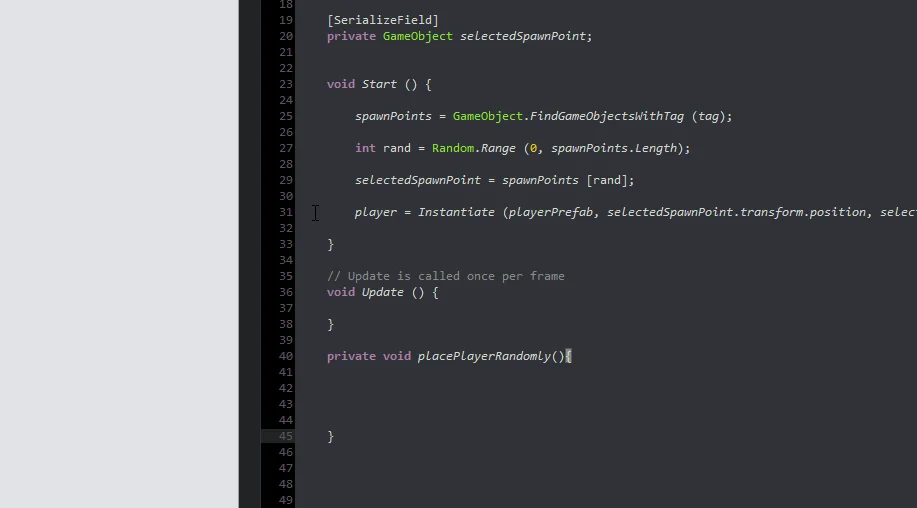
The method will be called “placePlayerRandomly”, will not require parameters, will not return data, and will be private. The definition of a method with all the enunciated characteristics is illustrated in figure 45.
In the first two videos of this series I used Spanish names, but I think it’s better to get used to using English names, as well as making it easier for me to translate.
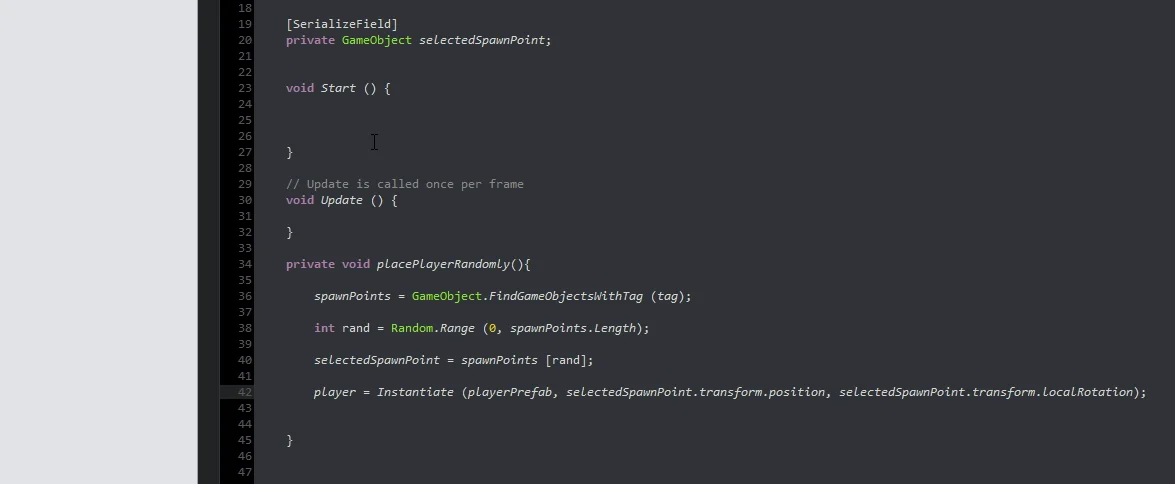
We are going to select the four instructions that we put in the Start method, we are going to cut them and paste them in this new method, as can be seen in figure 46.
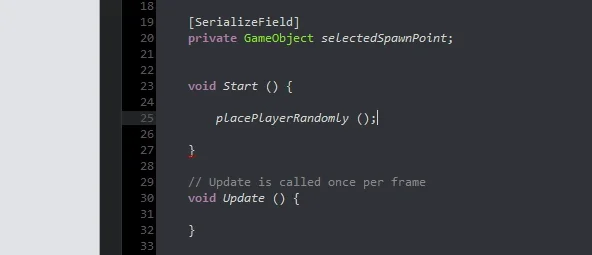
Then in the Start method we make the call to the placePlayerRandomly method, as we see in figure 47.
Reset Scene
To easily test the random position feature, I’m going to restart the scene by pressing the R key.
For this we need to add the Namespace UnityEngine.SceneManagement, a Namespace is simply a collection of classes grouped under a name, in this case they are related to the management of scenes in Unity.
We added the Namespace in line 4 shown in figure 48.
To read the keyboard we use an if sentence and the Input class. Video 1 of the Unity Fundamental Series is about reading the keyboard and mouse inputs, in the video article the information is deepened.
Inside the sentence if we execute the static method LoadScene of the class SceneManager and we pass as parameter the number zero, indicating that the scene 0 is loaded. This scene would be the first scene declared in the window Build Settings. In our case we only have one scene so it will just restart.
Final details
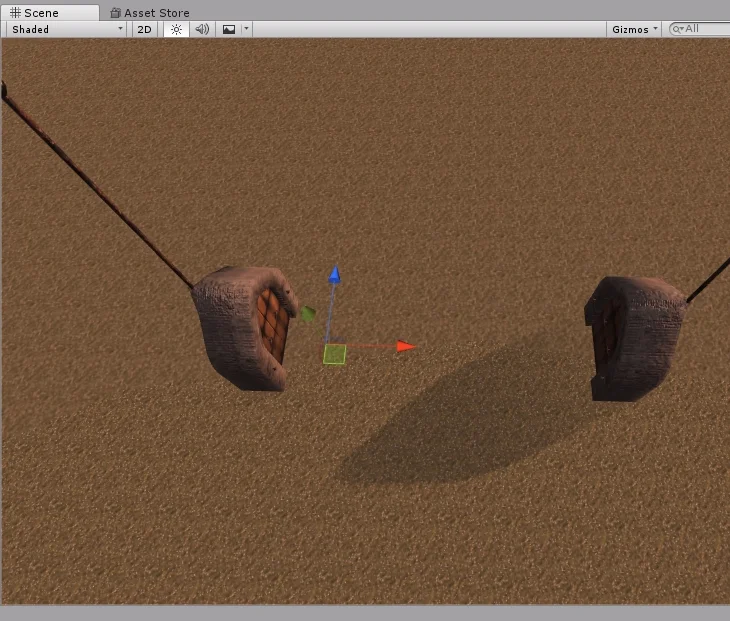
The last thing we’ll do is modify the rotation of the Empty GameObjects SpawnPoint, so that the blue arrow pointing in the direction opposite the door.
With the E key we select the rotation tool and keeping the SHIFT key pressed we make that the modifications of the angle are with fixed step, if I am not mistaken of 15 degrees. That way if the Y axis angle is for example 0 degrees, we can take it exactly to 90 degrees thanks to that fixed step.
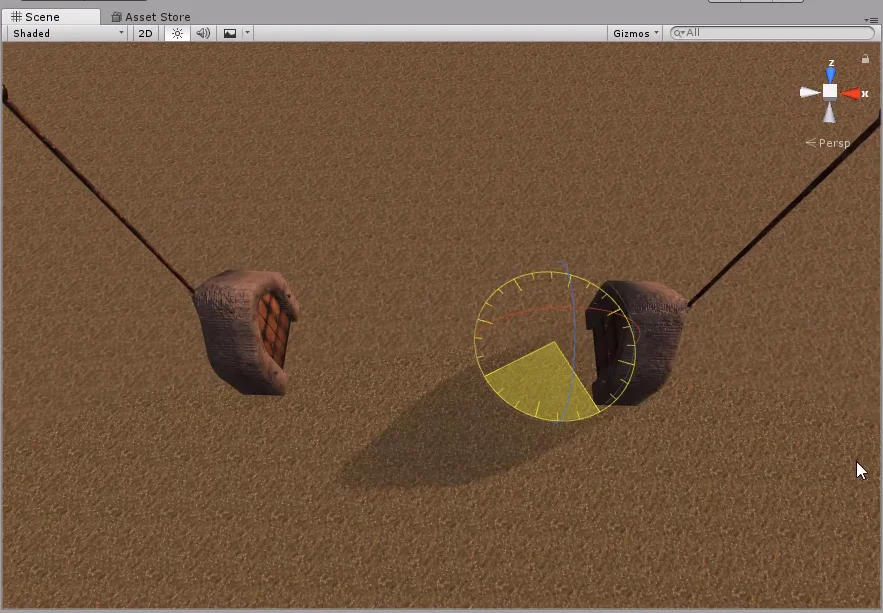
To conclude we make a compilation. In the figures 53 and 54 there are two different starts of the game, in each one the player appears in a different door.
Conclusion
In this article we saw how to create the first C# Script that will place the character in a random position on the stage.
All the attributes were analyzed to meet the objective and it was explained what each one was used for.
Modularization is a useful tool to organize our code and make it more intuitive.