Introduction – Why mirror objects in Blender?
In this article we are going to see how to prepare a 3D model to use the “Mirror” modifier in Blender, which allows us to model with symmetry with respect to one or more axes.
When mirroring an object in Blender we can focus on creating just one side of the model and then Blender, in a procedural way through a “modifier”, will produce the rest of the model based on one or more symmetry axes, this makes it much easier to create symmetrical pieces, as it could be the basics of a human face, once you have covered the basics you can apply that “modifier” and continue working with the full 3D model, introducing asymmetries if needed.
Prepare a model with mirror modifier
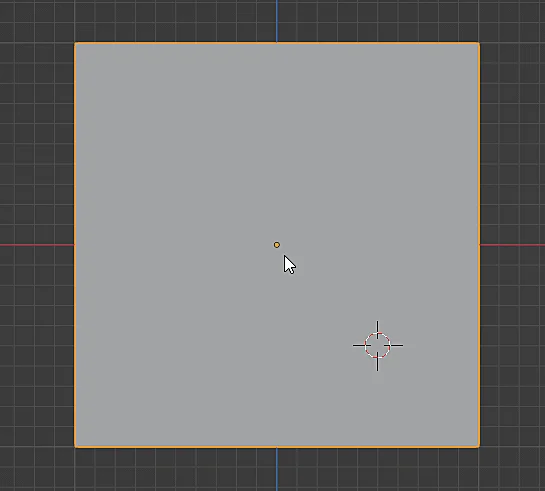
Given any 3D model that we want to mirror, the first thing we have to do is to see where its origin is located, this is very important because the origin is the point from which the geometry will be mirrored, so it is important to place the origin in a consistent position.
In this particular case we are going to use the cube shown in the figure, notice that the origin of this object is in an unusual position, what we are going to do is to place the origin in the geometric center of the object.

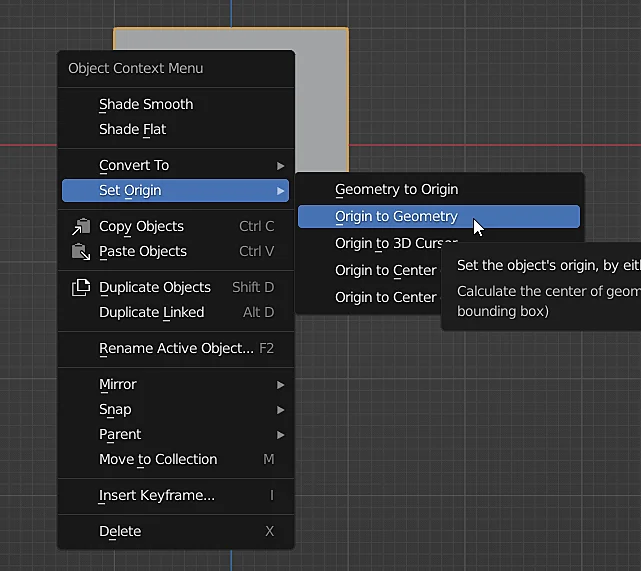
To do this we select the cube, right click on it, go to “Set Origin” and choose the option “Origin to Geometry”, as shown in figure 2. This, as the names indicate what it does is to move the origin of the object to the geometric center of it, the result in figure 3.
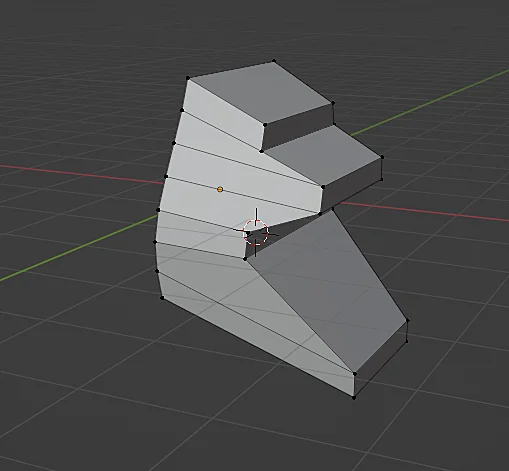
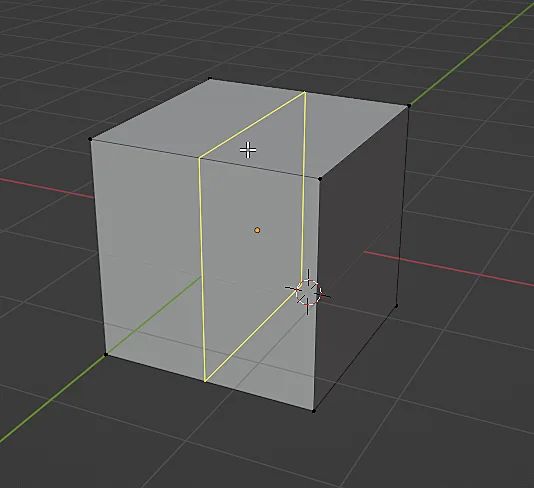
The next thing we are going to do is to make a cut in half using the command CTRL+R and bringing the mouse to the object, when the cut lines appear as shown in figure 4 we click to confirm. This adds an edge loop as shown in figure 5.

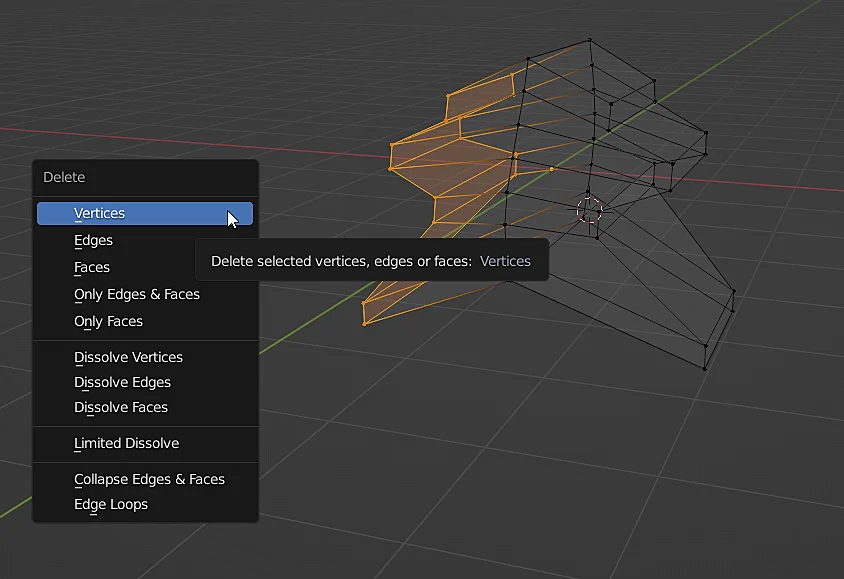
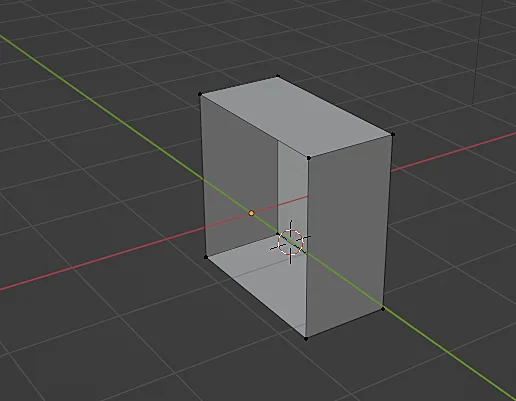
I did this to obtain a symmetrical piece with respect to the X axis and eliminate one of the halves of the cube, for this I enter Wireframe mode, select the vertices that are in one of the halves of the object (do not select the ones in the center) and with the X key we eliminate those vertices, as shown in figure 6.
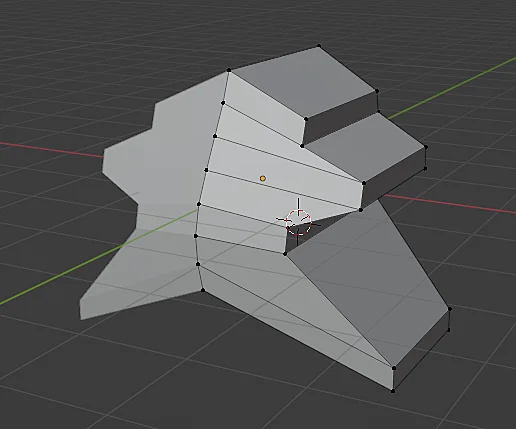
With this we obtain the piece shown in figure 7 and we are ready to apply the mirror modifier.

How to mirror a model in Blender – Mirror Modifier
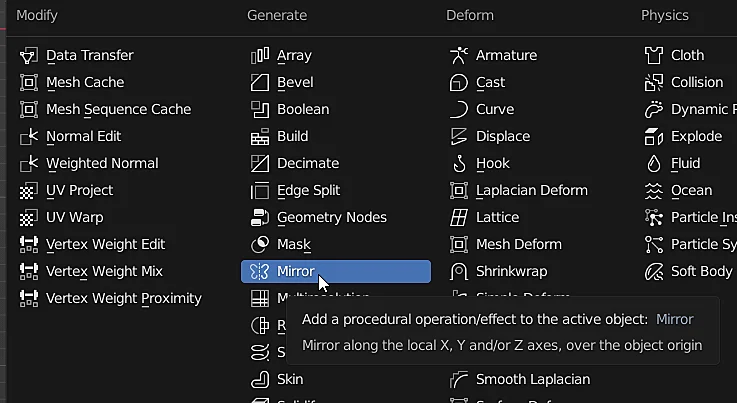
With the model we want to mirror selected we go to the modifiers tab by clicking on the icon in figure 8 and add the “Mirror” modifier (figure 9).

Immediately we see that the missing half appears and if we go into edit mode and modify the position of a vertex we see how the change is reflected symmetrically (see figure 10), note that in one of the halves the vertices do not appear, it means that the other half of the model is being generated procedurally.
You can change the symmetry axis or add more symmetry axes in the modifier properties.

The model going through the mirror
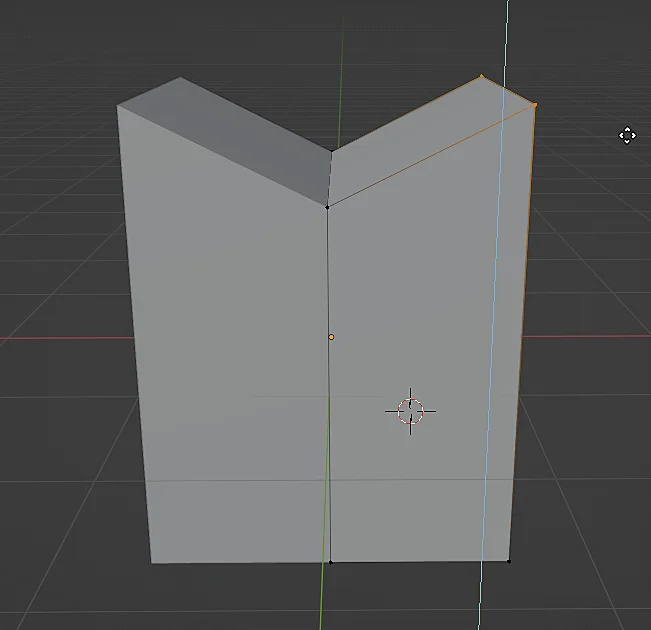
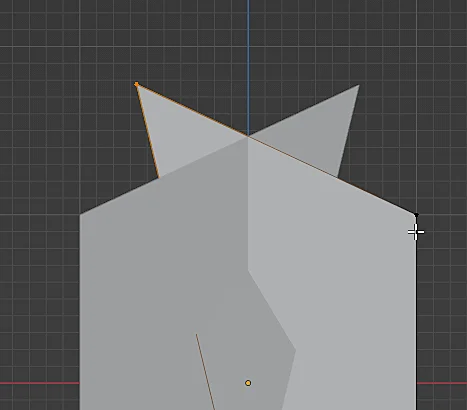
In this particular case, as we have configured it, the mirror would be like a vertical plane perpendicular to the Y axis and located at the origin of the object, which in this case coincides with the origin of the scene. Normally if we take a vertex we can make it cross the mirror plane, as shown in Figure 12.
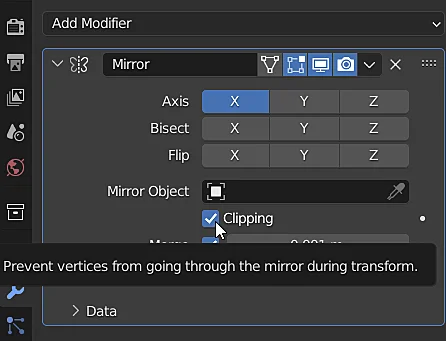
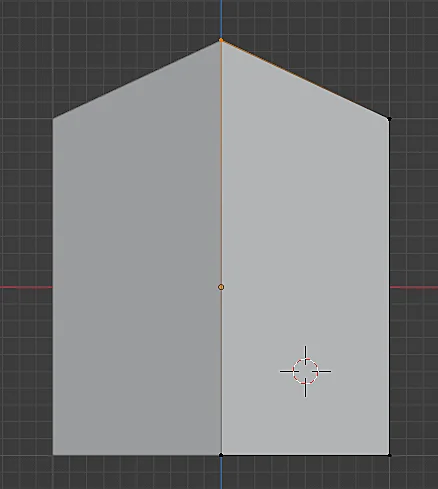
To prevent this from happening there is the “Clipping” check box shown in figure 13, when this option is activated the vertices that touch the mirror plane will remain attached to it and can only move in the two directions of the plane, in figure 14 the selected vertex is on the mirror plane and cannot move in the X axis, only in the Y and Z axis. If we need to remove a vertex from the mirror plane we can uncheck the box “Clipping” remove the vertex and then re-enable it or leave it disabled.
How to apply the mirror modifier
In case we need to work on the geometry of the object and add asymmetric details we will have to stop using the mirror modifier and switch to working with the complete geometry of the object. Before applying the mirror modifier it may be a good idea to save a backup copy of the model, for example by duplicating and hiding it or moving it to another collection.

To apply the mirror modifier we click on the arrow icon to the left of the cross to remove the modifier and choose the “Apply” option, as shown in Figure 16.
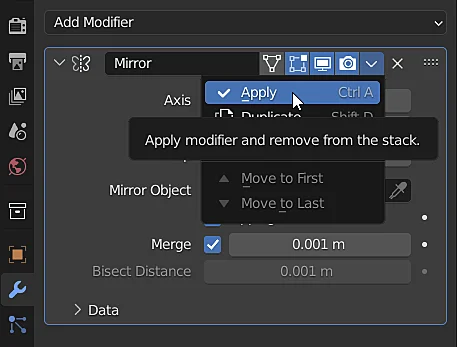
Now the model whose geometry was being procedurally mirrored became a full 3D model with all its vertices and faces that can be repositioned without being mirrored.

How to revert a Mirror modifier that has already been applied
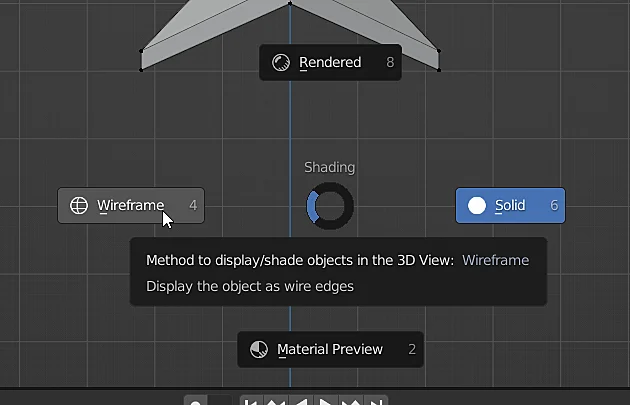
It often happens that we apply the Mirror modifier, we do several actions and then we regret it and we want to undo the changes until we have our object with the Mirror modifier applied but it turns out that we ran out of actions to undo, for this reason it was a good idea to save the backup copy of the model, However there is a very simple way to remove the vertices of the model and reapply the Mirror modifier, for that we select the model, enter the edit mode, switch to Wireframe mode (figure 18) and arrange the view in a convenient way to see the mirror plane vertically and have both parts of the model well separated.
Then we draw a selection box as shown in figure 19, in such a way that we select all the vertices of one of the halves of the object but without selecting the middle vertices, the result of the selection is shown in figure 20.
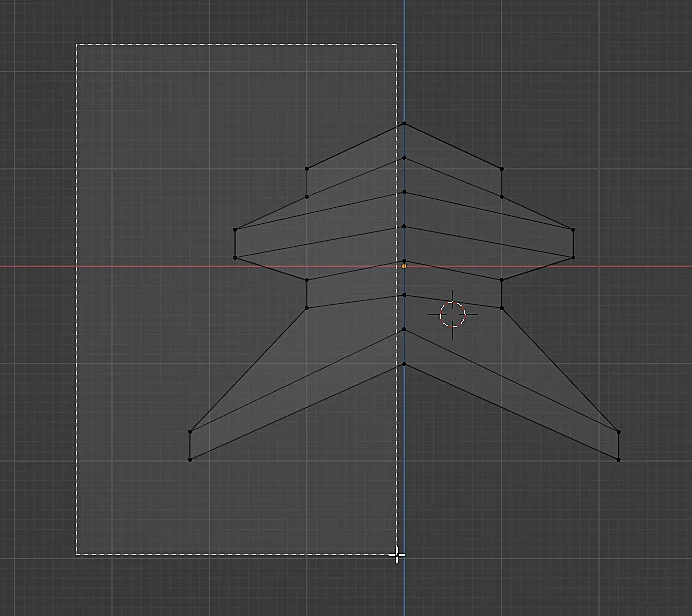
Finally we delete those vertices and we have one of the halves of our symmetrical object, ready to reapply the Mirror modifier.