
Introduction
In this article we will see how to set up a Unity project to create builds for Meta Quest 2, for this we will use the “Oculus Integration SDK” package for Unity which contains everything you need to start creating virtual reality apps for Oculus, it also comes with 3D models and useful examples. Let’s go through each necessary configuration, create a build and run it on an Meta Quest device.
All the IMPORTANT information is summarized in the following TUTORIAL FROM MY YOUTUBE CHANNEL
Prerequisites
Android modules installed in Unity
In order to compile applications for Meta Quest you need to have the Unity engine installed with the Android modules, which consist of the following three applications:
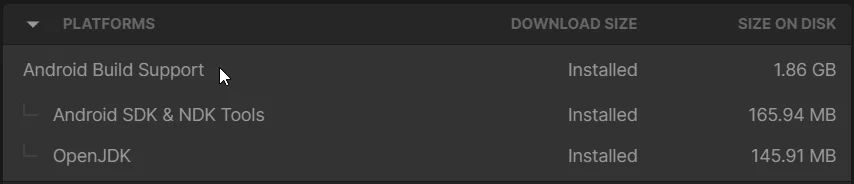
Oculus Quest SDK – Oculus Package for Unity
Let’s download and import the Oculus Quest SDK package for Unity which comes with many useful Assets that will help us to create VR applications for Oculus.
Create a developer account for Oculus
An Oculus developer account is required to be able to publish applications in the Oculus Store.
Oculus Developer HUB (Auxiliary software to develop and publish applications for Oculus)
Oculus Developer HUB allows you to recognize the Oculus device from your computer, configure it, access to captured images and videos, and publish applications to the Oculus Store.
Android App
The Oculus mobile app allows us to configure our Oculus device and enable developer mode for our device.
Oculus App for PC (Optional)
The Oculus app allows us to use PC virtual reality applications with our Oculus, which can be done via cable or with the AirLink connection.
How to configure Unity to export applications for Meta Quest (Oculus Quest)
Now let’s see what parameters we have to configure in the Unity engine to be able to export for Oculus, for this we will create a new project and see the step-by-step.
Set Android platform as build target
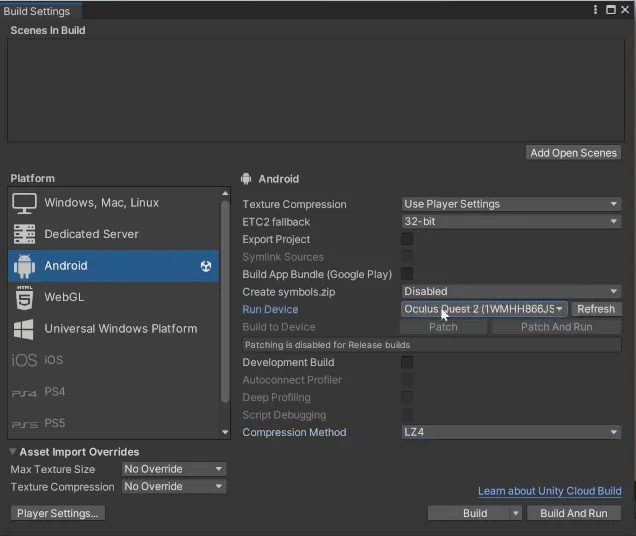
Oculus Quest devices use Android as the operating system so first let’s go to File > Build Settings and change the target platform to Android, as seen in Figure 2.

In this case I am going to use the Oculus Quest 2 device, with the device connected I open the Oculus Developer HUB application to check that the operating system recognizes the device, if we are successful we should see our device as in figure 3.
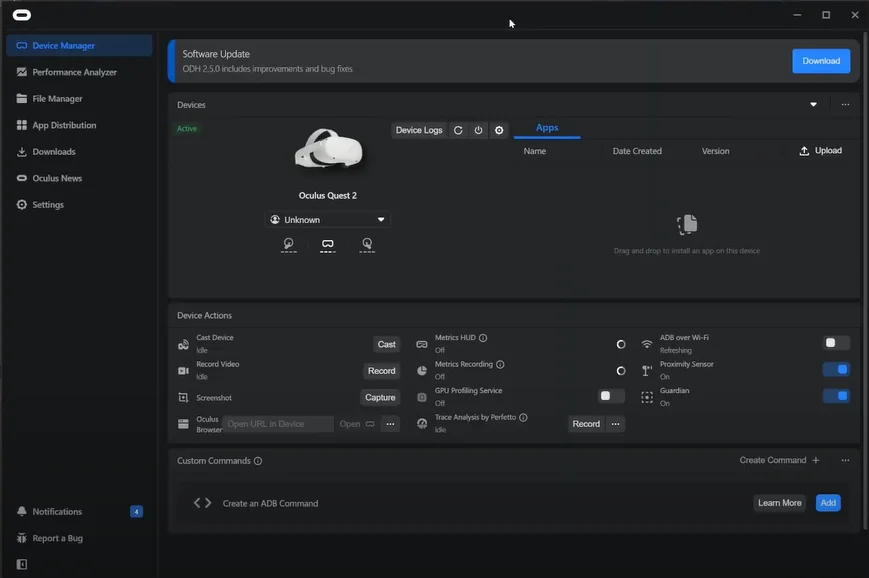
Also in Unity, in the Build Settings tab you should see the device in the “Run Device” field, as shown in Figure 4. If you do not see the device you have to go back to the prerequisites part, probably you have not enabled developer mode or you have to enable USB debugging inside the Oculus device.
Import of the Oculus SDK package for Unity
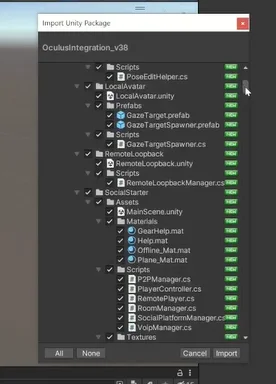
Import the Oculus SDK package (download link at the top of the prerequisites). In this case we are going to add all the files that come in the package.
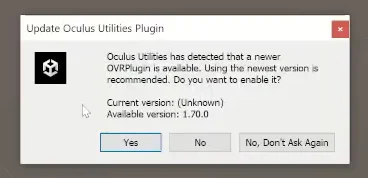
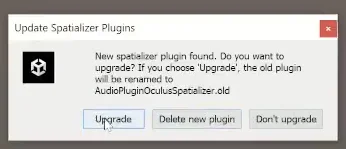
At this point, several dialogs appear asking us how we want to proceed.
In general for all messages I choose the recommended and most up to date options, in the case of figure 6 we click on “Yes”, in the case of figure 7 we click on “Use OpenXR”.

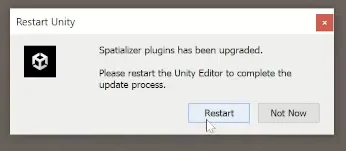
You may be prompted to restart the Unity editor, in which case restart the editor.

Figures 9 and 10 are another example of messages that may appear, I apply the same criteria, choose the most up to date options and restart if necessary.
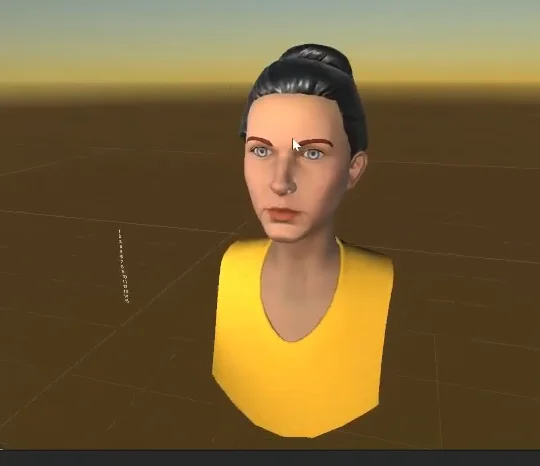
At the time of recording the video and writing this article, when going through the whole process of configuring the Oculus SDK package for Unity, after restarting the editor for the last time an example scene opens showing an Avatar with LipSync (lip sync with microphone input, Figure 11). We are going to compile this same scene so we open the Build Settings tab (under the File tab) and click on the “Add Open Scene” button to add the open scene to the compilation we are going to create.

Setup of the XR Management plug-in
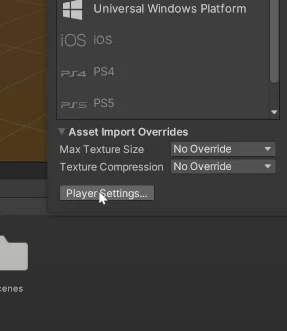
The next step of the configuration is to go to the “Player Settings” window, we can do it from “Edit” and we also have a shortcut from the Build Settings window as shown in figure 13.
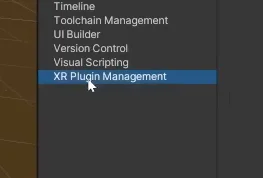
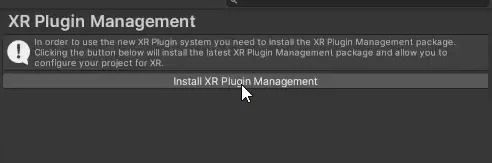
In the Player Settings window go to the “XR Plugin Management” item and click on the install button shown in Figure 15.
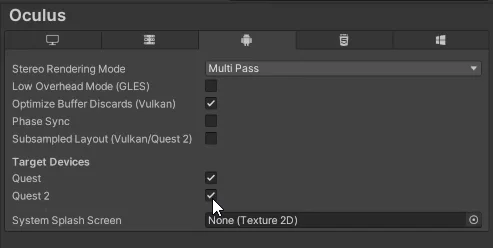
Once the plugin is installed, click on the “Oculus” checkbox that appears and this action causes a new element called Oculus to appear below the plugin (figure 17), click on the Oculus element.

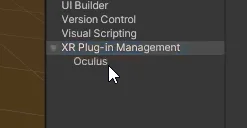
We make sure that the Quest and Quest 2 checkboxes are checked so that the plugin is applied to these devices.
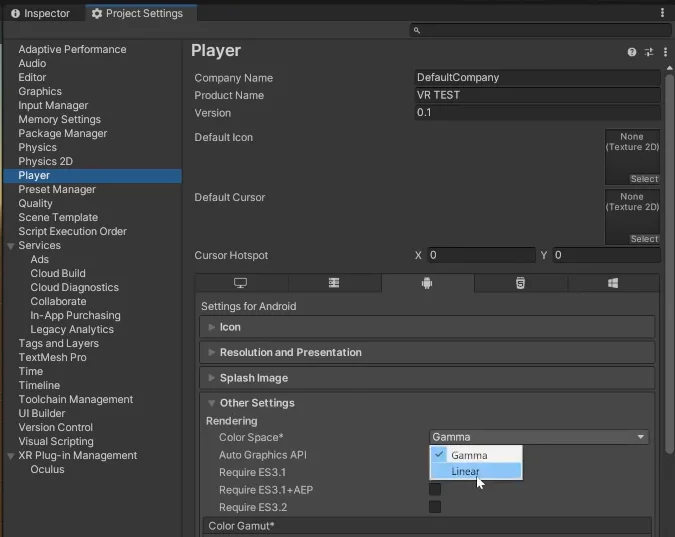
Configure appropriate Color Space
Before compiling an application for Oculus Quest in Unity we have to make sure to change the “Color Space” parameter found in the Project Settings/Player window and within the “Other Settings” drop-down menu, as shown in Figure 19. If this step is not done we will have errors in the console when compiling the application.
Virtual reality application compilation and testing in Meta Quest 2
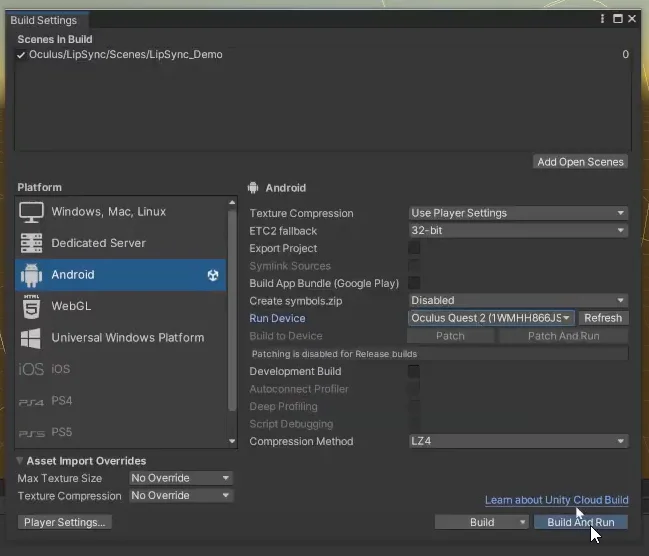
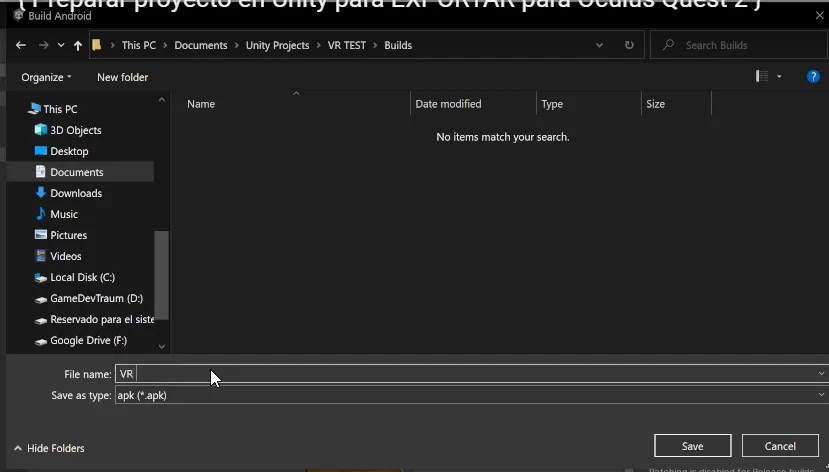
Once we have configured everything in the Unity engine we proceed to create a build of the virtual reality application and test it on a device such as the Oculus Quest 2, for that we go to the Build Settings window and making sure that in the “Run Device” parameter we have our device (make sure the device is connected via USB or AirLink), we click on Build and Run, choose the destination folder of the APK file and give it a name, as shown in Figures 20 and 21.
IMPORTANT: If the device does not appear in the “Run Device” field you can click the Build button, export the APK file and then install that file via the Oculus Developer HUB software by dragging the APK file to the window shown in Figure 3 at the beginning of this article.
When the process finishes the application runs automatically on the Oculus Quest 2 device, the result of this is shown in the following image:

Where is the Unity application installed on Oculus
As we are doing a test, this virtual reality application was not validated by the Oculus store and therefore our device places it in a separate section of applications with “Unknown origins”, in that section we can find the application that was installed from Unity, see figures 23 and 24.

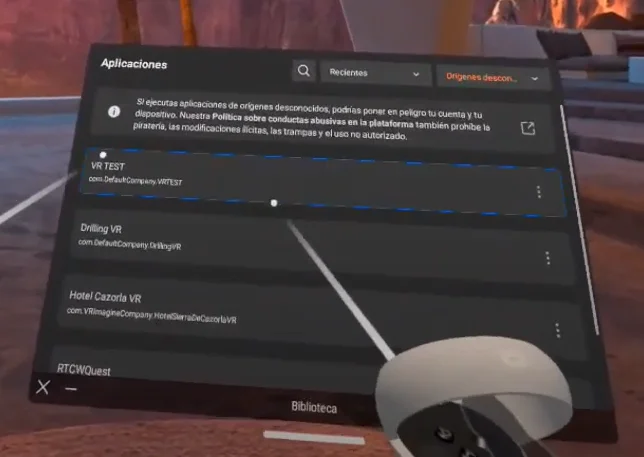
For the applications to appear in the main section we must upload them to the oculus store.
