Introduction – What is Occlusion Culling in Unity?
The Unity engine has a system called “Occlusion Culling” that allows to automatically hide objects that the camera is not seeing directly. In this article we are going to see how to prepare a project in Unity so that Occlusion Culling is applied, some details about its operation and configuration parameters.
Important Detail – Pre-calculations (BAKE) are made in Occlusion Culling
Occlusion Culling works with objects that are marked as “static” in the scene and it is necessary to pre-calculate all the data, this is known as “bake”, this implies that every time you introduce a new object that should be turned off if the camera is not seeing it, or if you change the position of one of these objects, you must precalculate again the data for Occlusion Culling, if you don’t do it some objects that are behind the camera or behind some object may not disappear or even worse, you could have objects that disappear in front of the camera when they should remain visible.
Where is the Occlusion Culling configuration window in Unity?
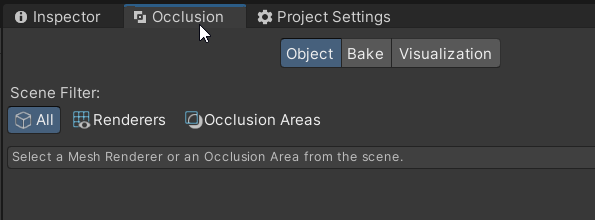
The Occlusion Culling configuration window is located in Window > Rendering > Occlusion Culling, in my case I usually place it next to the inspector window for convenience, as shown in image 2.
How to add objects to the Occlusion Culling system in Unity
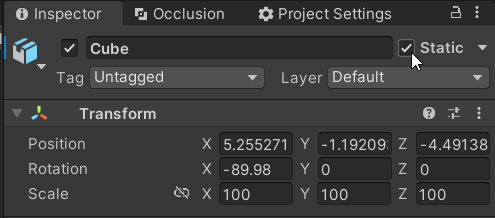
For an object to belong to the Occlusion Culling calculations and therefore disappear when the camera is not looking at it, each object must be marked with the “Static” parameter in the inspector, as shown in image 3. In general, the important objects to mark as static are those that have some kind of Renderer component assigned to it, such as a Mesh Renderer component or a Sprite Renderer component, since these objects are the ones that have a visual representation on the screen.
IMPORTANT: Objects that are part of the Occlusion Culling system must not change position at any time and if they do, the data must be recalculated as we will see below.
How to apply Occlusion Culling in Unity
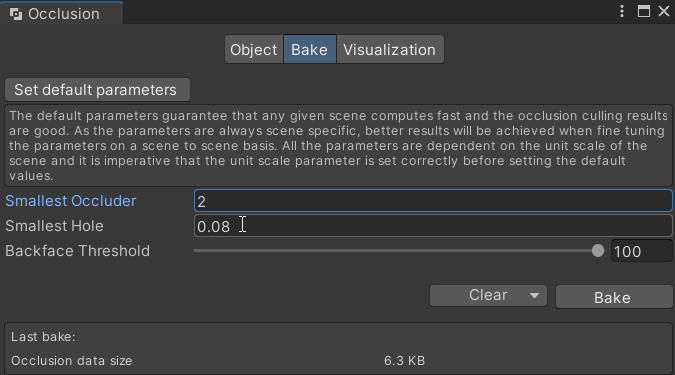
Once the previous step of marking all the static objects we are going to make a “Bake” of the information to apply Occlusion Culling, for this we go to the “Occlusion” window that is observed in image 4, in case of not seeing the window consult above in this article.
In this window basically we are going to configure two parameters, “Smallest Occluder” and “Smallest Hole”, the first parameter refers to the smallest object in the scene (in scene units) that can obstruct the camera and make everything behind it not to be rendered, the smaller this parameter is the longer the calculations will take so we will have to do some tests to determine an appropriate value, in principle we can consider the values of the image 4.
TO APPLY THE OCCLUSION CULLING CALCULATIONS IN UNITY CLICK ON THE BAKE BUTTON TO THE RIGHT OF THE CLEAR BUTTON
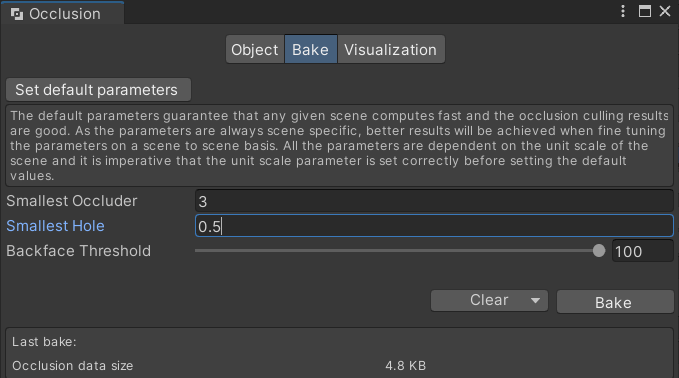
The “Smallest Hole” parameter is used in case of having open spaces in a 3D model, consider the example illustrated in image 5-A, in which Occlusion Culling has been applied with the parameters of image 4.
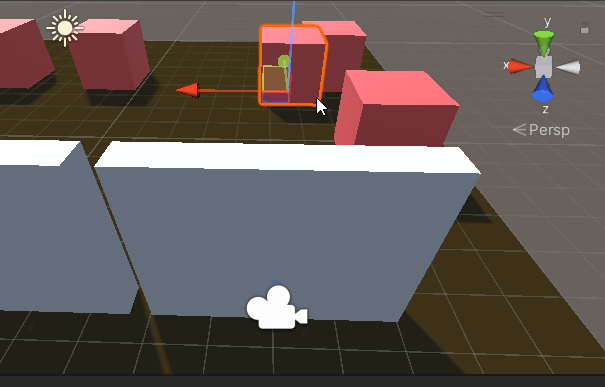
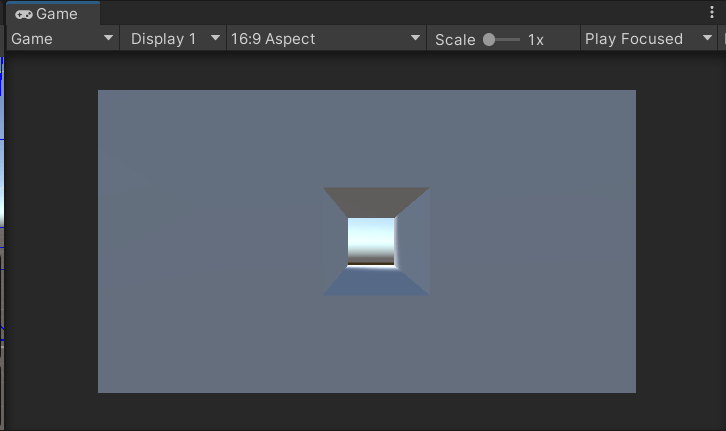
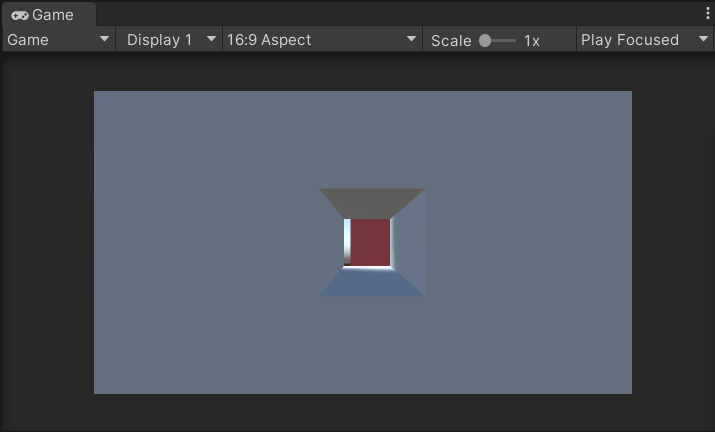
As we see in image 5-B the camera can see through the hole, however the cube that is selected in image 5-A is not visible, this is because the Occlusion Culling system is considering that this cube should be hidden, since the smaller hole is set to a size of 0.5 Unity units (image 4), while the hole in image 5-B has a size of 0.1 by 0.1 Unity units.
Modifying a bit the parameters taking into account these particular models and the fact that we should be able to see objects through that hole, we make a new Bake with the parameters of image 6 and as seen in image 7 now the Occlusion Culling system does not hide that object because the camera could see it through that hole.