IMPORTANT UPDATE
I have created a more complete and simple to use solution, it is a Unity package to download and import, with a prefab that when dragged into the Canvas automatically produces the fade effect, you can customize several parameters in the inspector. You can download the Unity Package in the link below:
In the following video we see the FADE IN/OUT effect for Unity
New Fade IN/OUT solution for Unity here!
OLD ARTICLE BELOW
Introduction
In this article we’re going to see a simple way to darken the screen in Unity using an image component. This can be very useful for example to use as a transition in a scene change.
In the video below I explain how to use it, but I do not explain how it works, if you are interested in knowing about programming level operation continue reading this article.
🟢 Fade In – Fade Out Effect for Unity
Download Unity Package and Import
Download GameController and UIManager scripts.
Step-by-step solution
Elements of the hierarchy
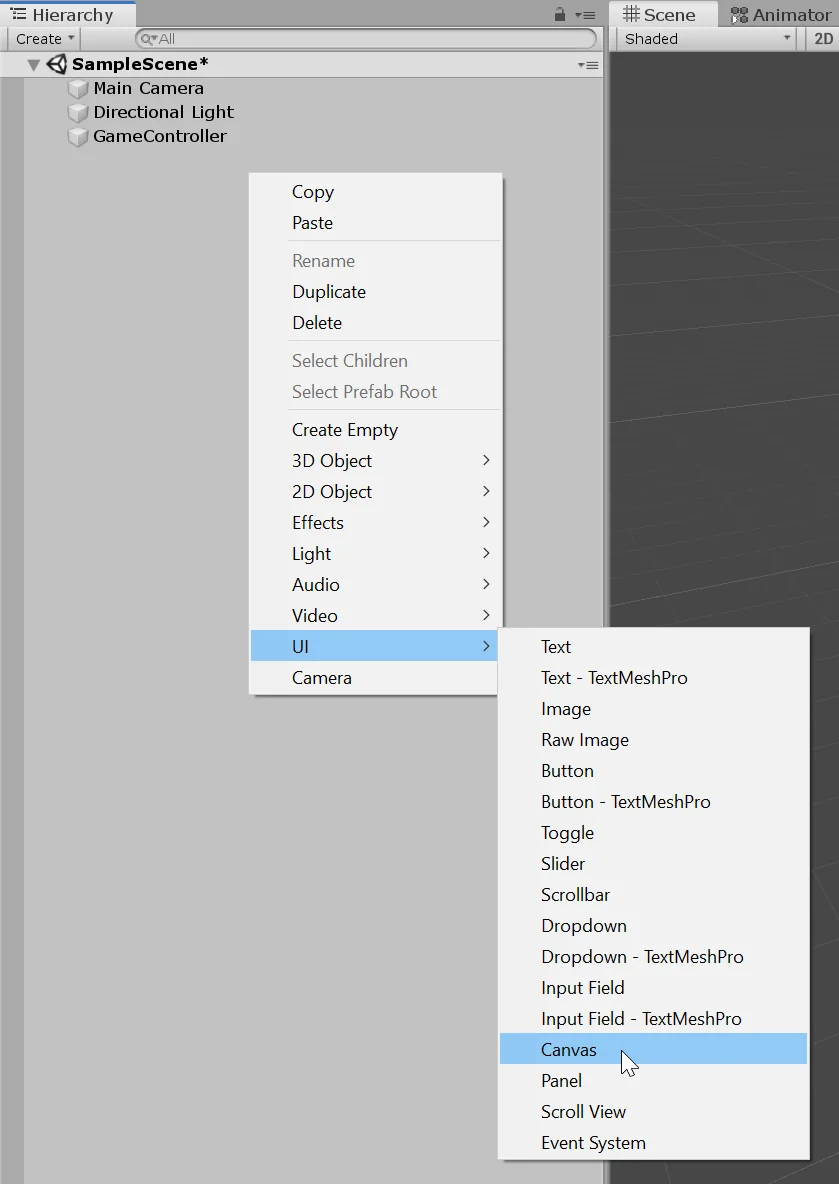
We will create all the elements necessary to solve the problem. First an empty GameObject that we will call “GameController” and a GameObject type Canvas that is the one that will contain all the elements of the graphical interface.

In figure 3 we see these elements created and placed at the beginning of the hierarchy.
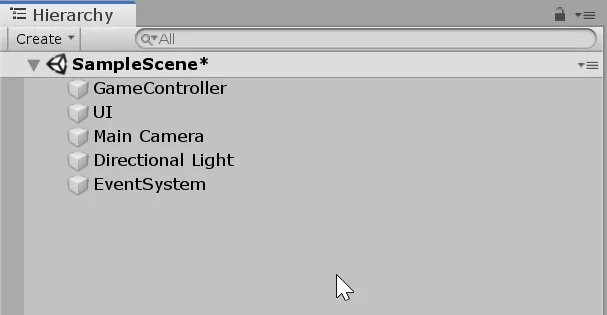
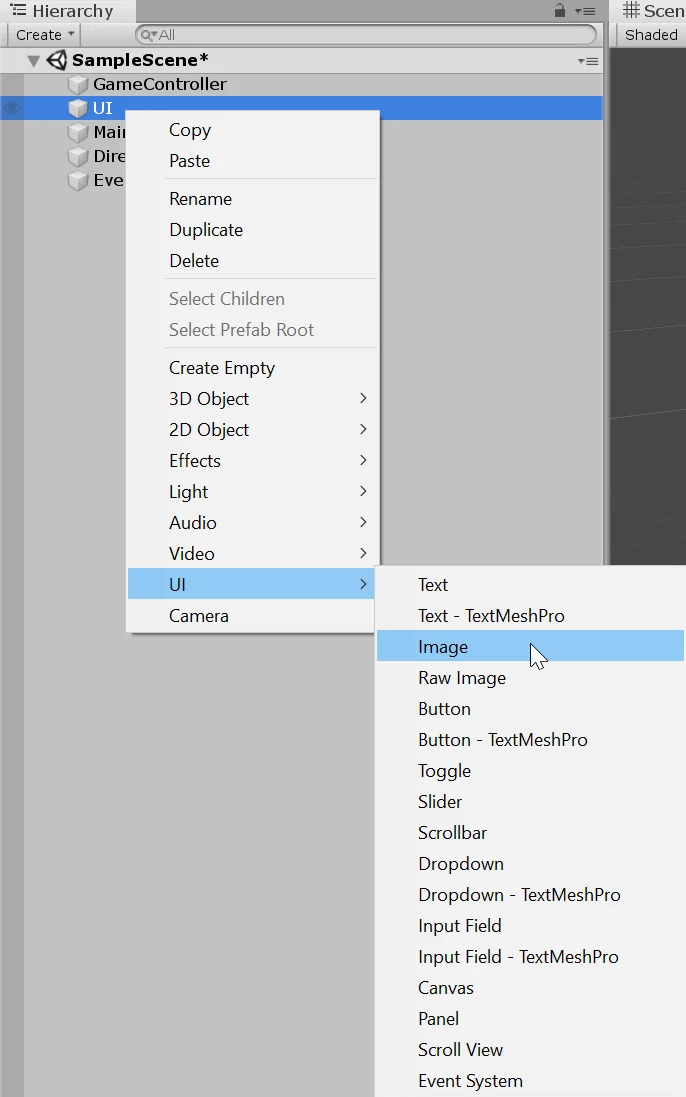
Image to dim the screen
The next thing we do is create an Image as a child of GameObject UI. This image will be used to block the vision of the camera.
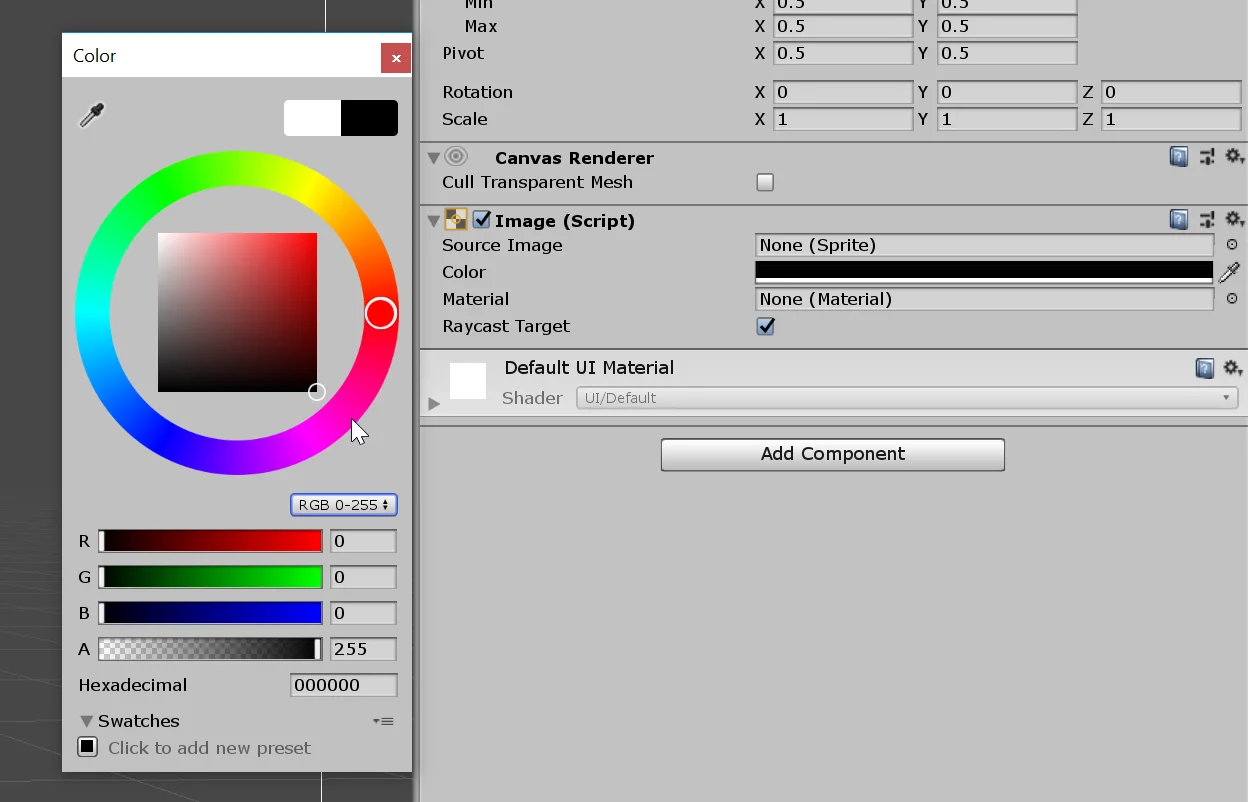
In the inspector in the image component we make the color black.
Canvas Scaler Setup
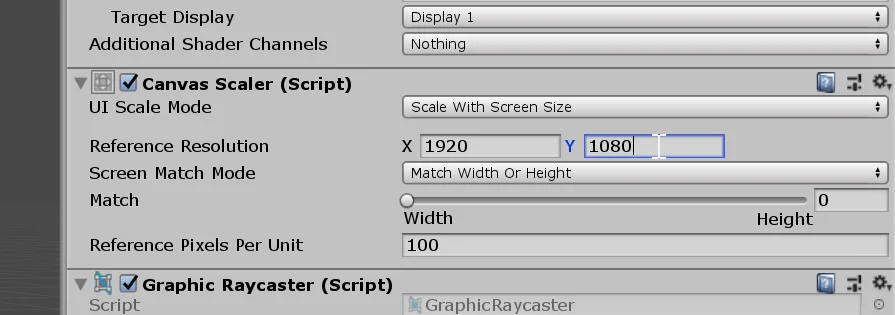
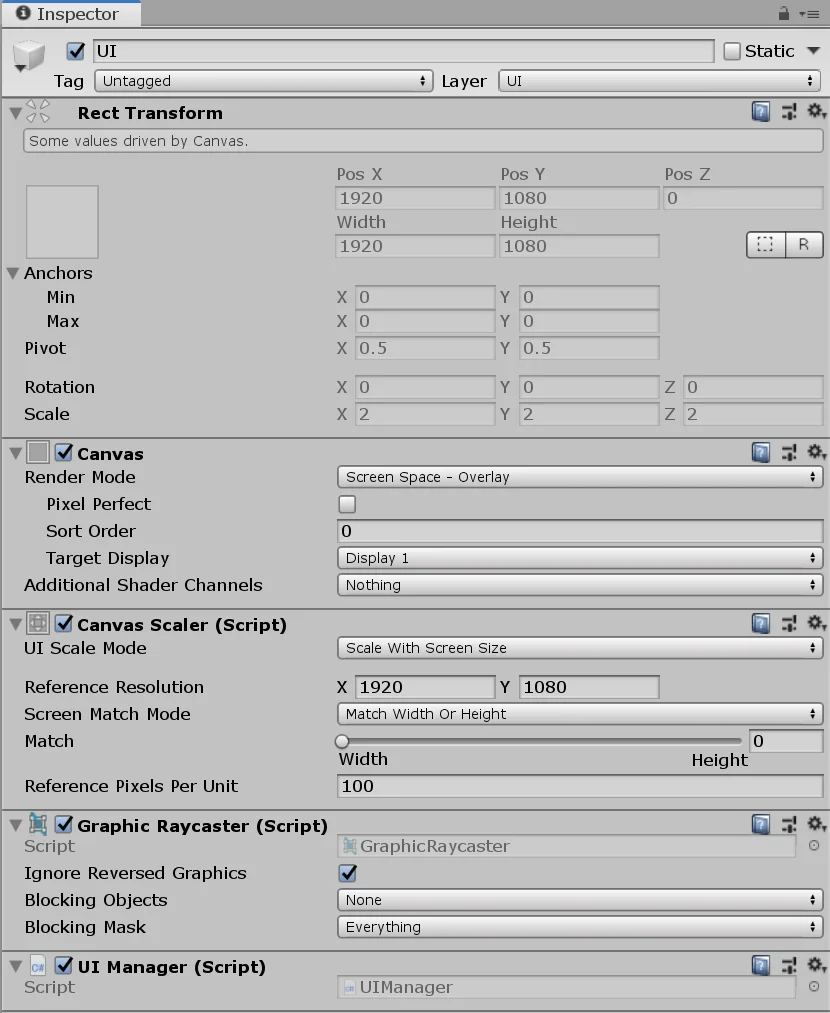
Let’s go to the GameObject UI and in the inspector, in the component CanvasScaler we select the mode “Scale with screen size” in the field “UI Scale Mode” (figure 6). With this we can make the elements of the graphical interface modify their size according to the size of the screen.

For the reference resolution we are going to use 1920 x 1080 pixels, which is known as FullHD resolution.
The configuration of the CanvasScaler should be done at the beginning, before placing the elements of the graphical interface. Otherwise we will have to modify all the elements again to adjust them to the new configuration.
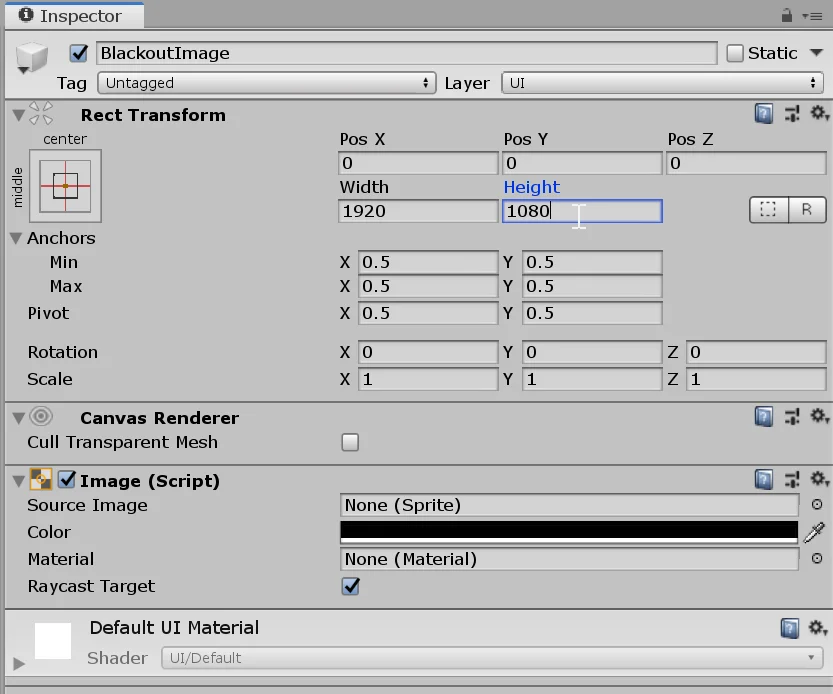
We return to the GameObject image and adjust its size to 1920 x 1080 to cover the entire screen. If everything works well the screen should look like in figure 9.

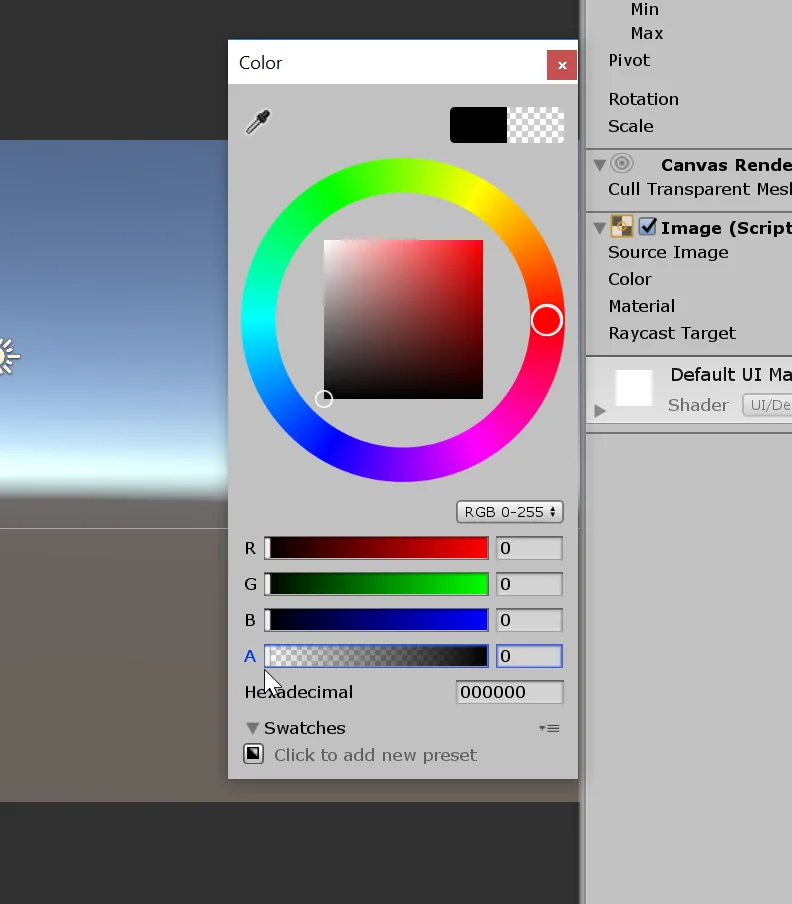
In the black color of the image we are going to make the Alpha component 0, this way it will be transparent.
Now we are going to create a couple of buttons to execute the functions that we will later define in the Scripts.
Buttons
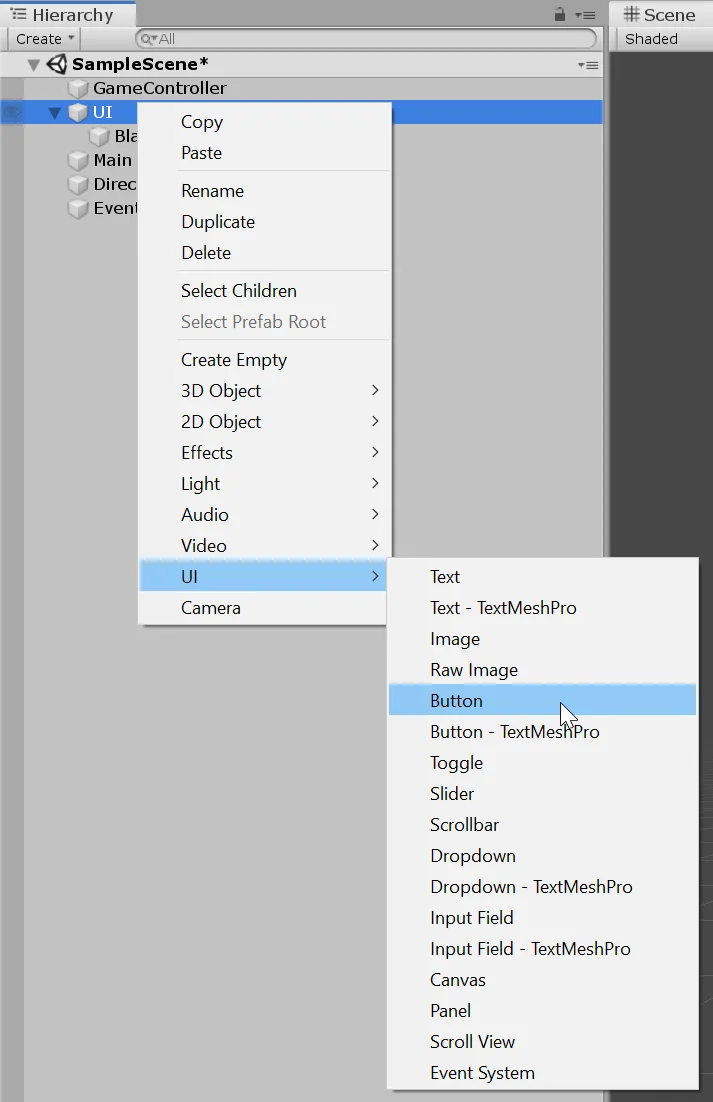
We are going to call the first one BlackoutButton which is the one that is going to take care of darkening the screen completely.
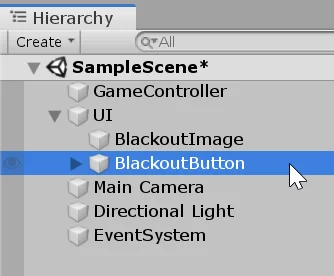
We adjust the sizes and colors to taste.
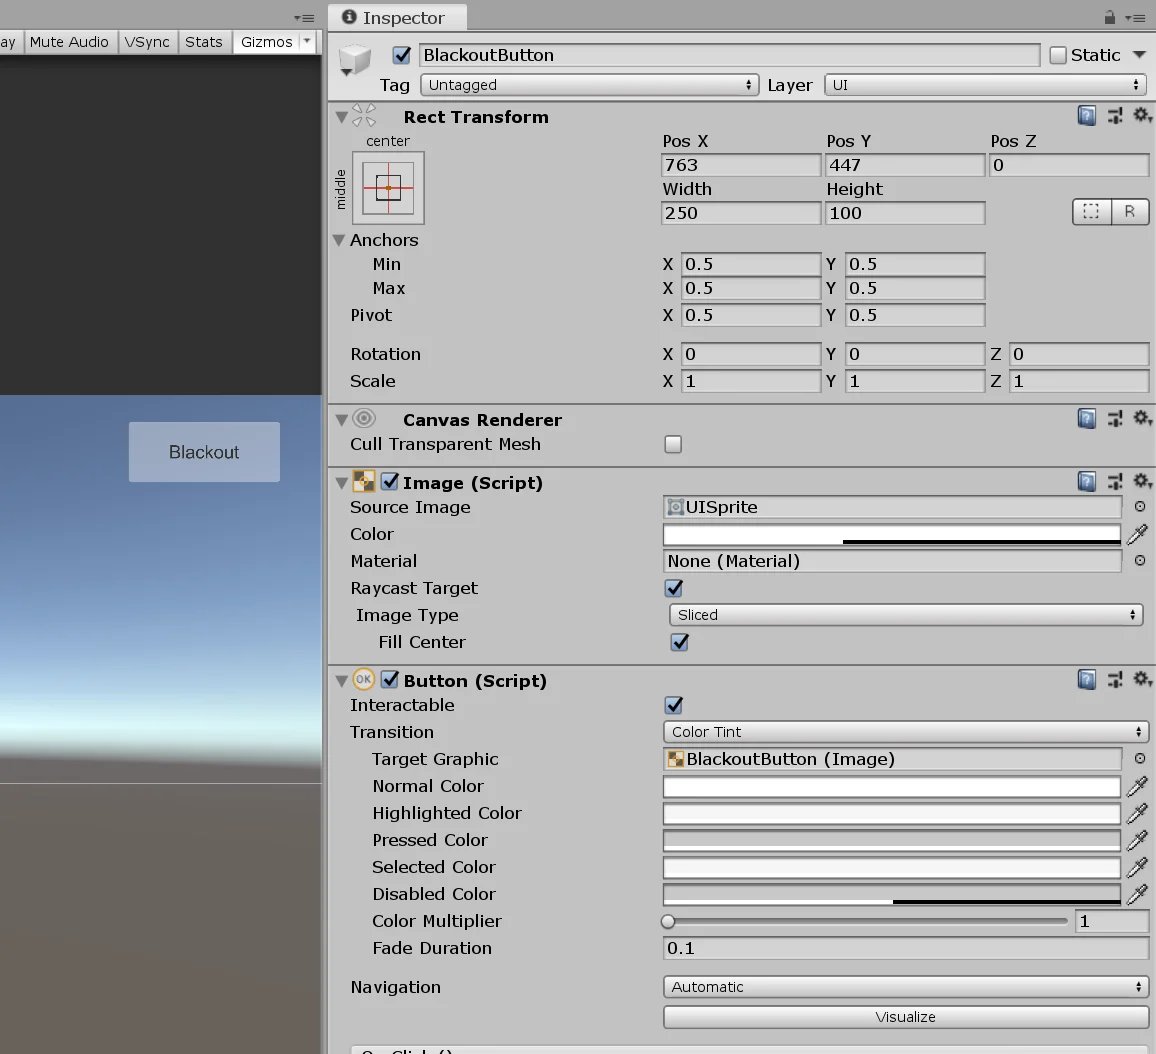
We must make sure that the button is below the image in the hierarchy, that way the black screen will be drawn first and then the button, as we see in figure 14.
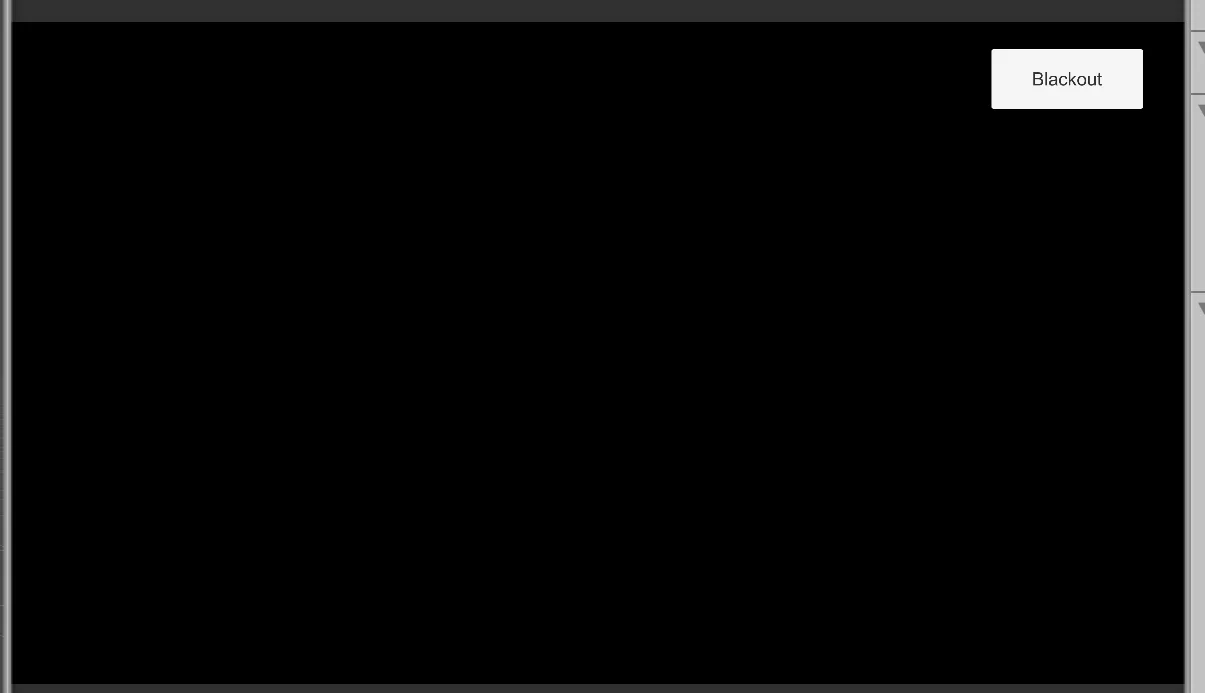
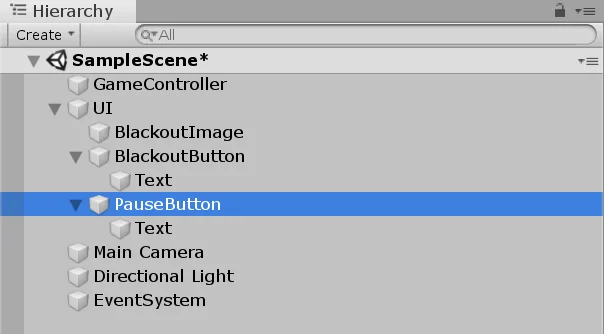
Once we configure the Blackout button we are going to duplicate it and give it the name “PauseButton”, we accommodate it where we like on the screen. In figure 16 is my result.

C# Scripts
Now we are going to create two C# Scripts, the first one we will call “GameController” and the second “UIManager”.
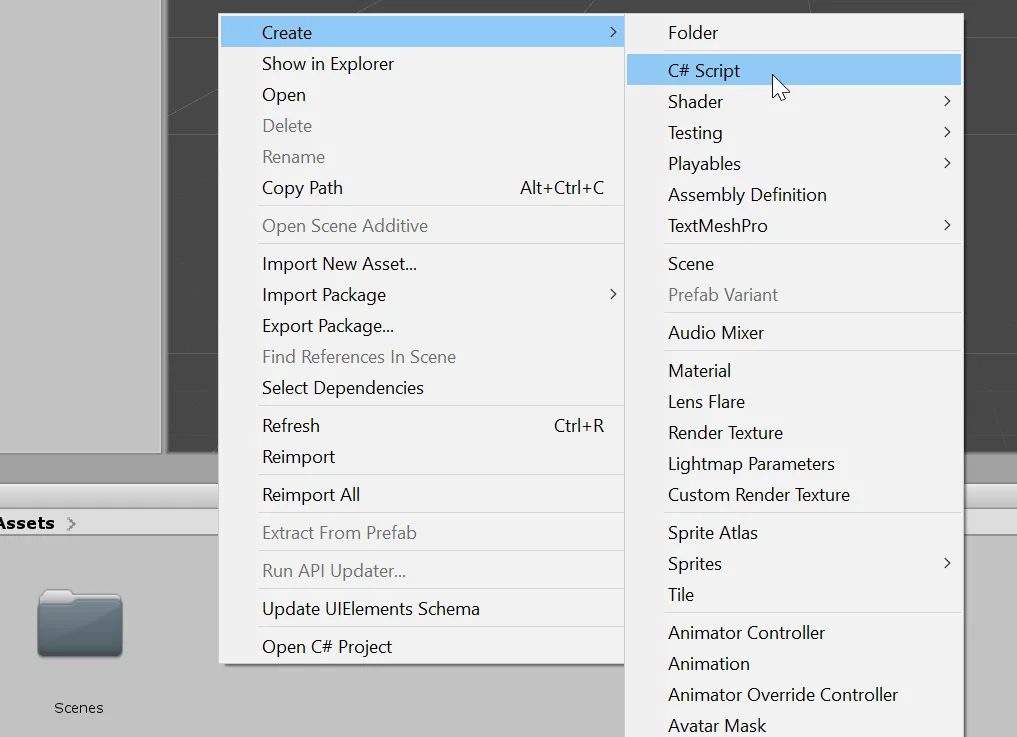

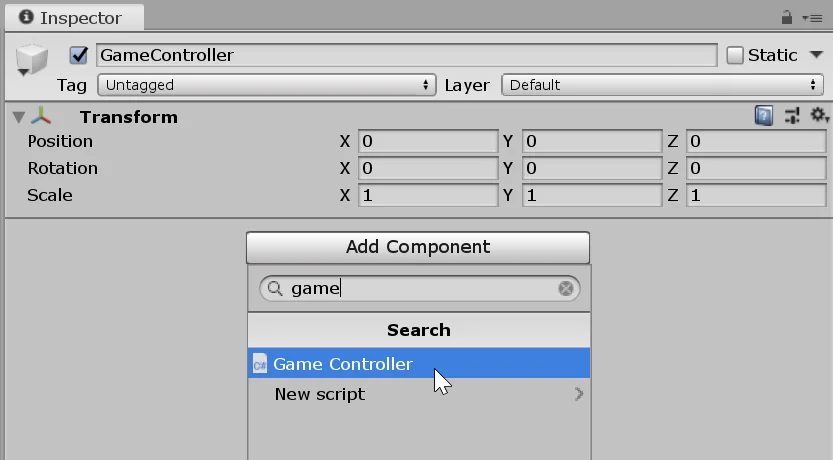
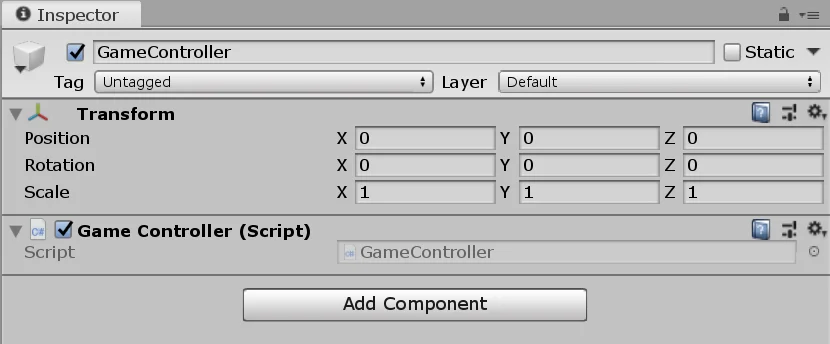
The GameController Script is assigned to the GameObject with the same name. We can select it and drag it to the inspector or use the “Add Component” button.
The UIManager Script is assigned to the GameObject “UI”.

GameController Script
The GameController Script is responsible for indicating when the screen should be darkened and at what opacity value it should be set. It does not control the image object directly, this is the responsibility of the UIManager.
GameController will have two functions, one will be the Blackout function which will tell the UIManager to completely darken the screen and the other will be the Pause function which will cause the screen to darken 50%.
Fields and Initialization
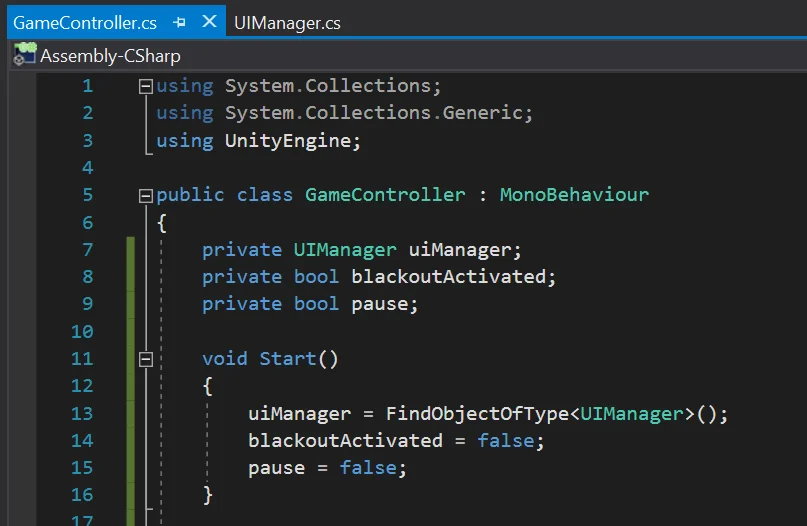
We are going to define a UIManager type object to have the reference of the UIManager Script assigned to the GameObject UI in order to be able to access its public methods.
We’re also going to need two boolean variables to indicate if blackout and pause are enabled.
In the Start method we find the reference of the UIManager Script assigned to the GameObject UI with the instruction 13 shown in figure 23. Then we put in false the boolean variables.
Methods
So that the Script fulfills the two functions that we said, we are going to define two public methods, one will be called “BlackoutFunction” and the other “Pause”. These methods will be executed when pressing the buttons of the graphical interface.
If you want to know more about methods I invite you to read this article I wrote earlier, talk about what a method is intuitively, there is also a video on the channel.
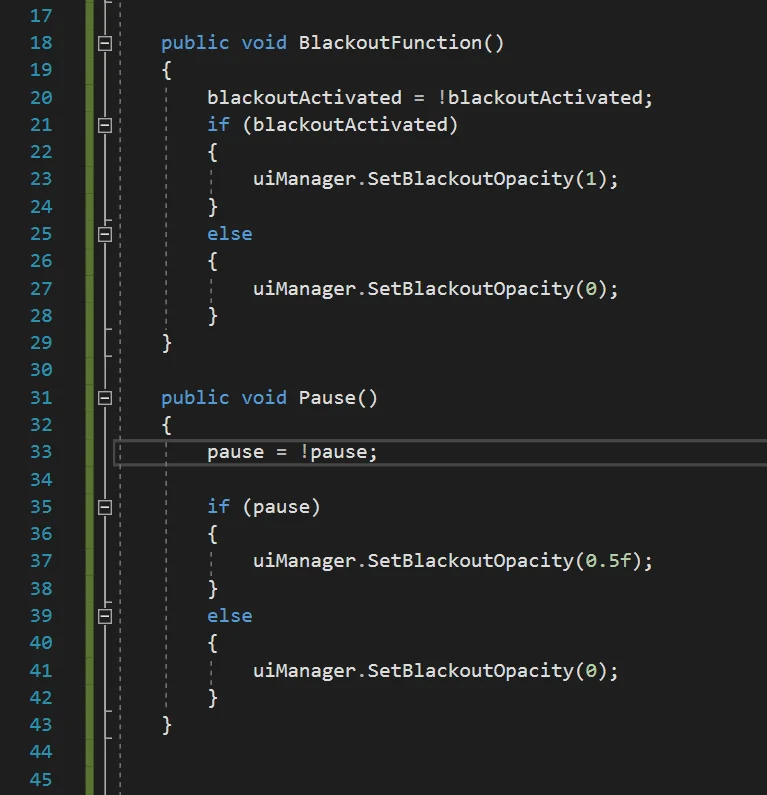
In the BlackoutFunction method the first thing we do is invert the state of the boolean variable blackoutActivated, so if it was in false now it’s going to be true and visceversa.
Then we check the state of that variable and we will execute a UIManager Script method with the appropriate parameter. At this point we have not yet written the “SetBlackoutOpacity” method of UIManager, so if you write lines 23 and 27 of figure 24 you will have an error.
In the Pause method we are going to do the same thing but instead of completely darkening the screen we are going to make it darken to half the opacity.
Lines 23, 27, 37 and 41 can be written after working on the UIManager Script.
UIManager Script
This script will control the parameters of the image to dim the screen.
In order to do so, it will constantly execute the Blackout function that will gradually modify the opacity of the image. In addition it will have a public method called “SetBlackoutOpacity” that will allow to tell the level of opacity wished, 0 means invisible black screen, 1 is completely visible black screen.
Fields and Initialization
To solve the behavior we are going to need an Image type object that we call “blackoutImage” and that we will mark with “SerializeField” so that it appears in the inspector.
We define a float called “blackoutOpacityChangeStep” to indicate the magnitude of opacity change in time, we also serialize it. Finally we define a float called “blackoutTargetOpacity” that will be the value that the opacity will tend to approach in each step of time.
In the Start method we make the objective opacity 0. We can see all this in figure 25.

Methods
We are going to define two methods, Private Blackout and Public SetBlackoutOpacity. Within the FixedUpdate method we will call the Blackout method, as shown in figure 26.
In the Blackout method we first read the current state of opacity of the image object (instruction 29 in figure 26).
If the opacity of that object is less than the objective opacity we will make it increase, if the opacity of the object is greater we will make it decrease. We achieve this with the “if” and “else if” of lines 31 and 39 respectively.
In order for the opacity to gradually increase or decrease we will create a new color to which we assign the same RGB components but to the alpha parameter we add or subtract the float “blackoutOpacityChangeStep”. In figure 26 we can see how to solve this.
The SetBlackoutOpacity method will be public and will take a float value as parameter. Simply assign this value to the variable “blackoutTargetOpacity”, as shown below in figure 26.

We change the opacity value in the FixedUpdate method because we don’t want it to happen instantly but gradually to have a Fade In/Out effect.
Last settings
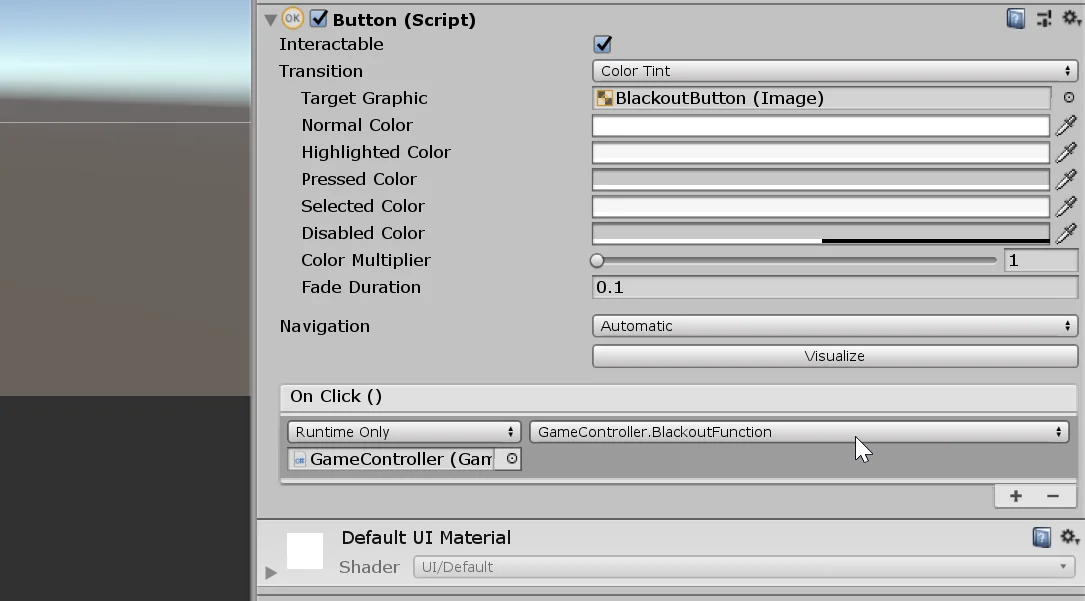
To be able to execute the GameController methods using the buttons, we have to do it in the OnClick() function of the button component.
Drag the GameObject GameController to the field under “Runtime Only” and using the drop-down menu select the “BlackoutFunction” method.
If it doesn’t appear in this list, we probably haven’t defined it as public.
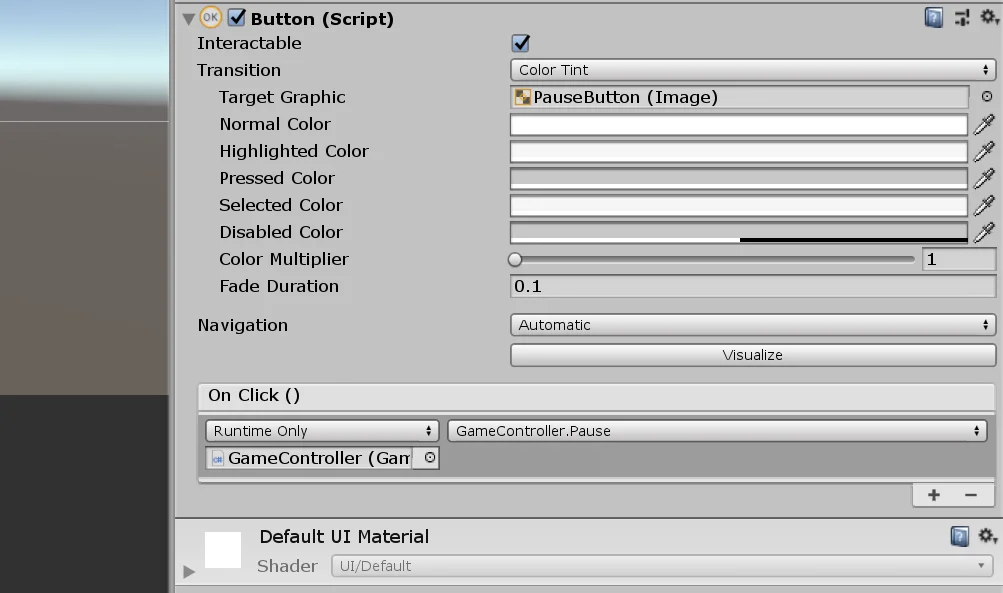
With the button of Pause we do the same thing only that choosing the method Pause of GameController.
Finally select the GameObject UI and drag the GameObject BlackoutImage (with the image component, see figure 12) to the “Blackout Image” field. For the float “BlackoutOpacityChangeStep” we enter the value 0.1.
The result is shown in Figure 29.

Conclusion
In this article we saw a way to darken the screen in Unity. To achieve this we used a black image and modified the value of Alpha, which determines the opacity of the color. If the alpha is equal to 1 the color is totally opaque, if it is equal to 0, the color is totally transparent.
We configure two buttons to execute public methods of the GameController Script, which tells the UIManager object how should be the opacity of the black screen. UIManager finally makes the changes in the alpha value of the black screen.
