Introduction
In this article I will show you how to capture sound from your PC using Audacity, a free software that allows you to record and edit sounds. Here is the link to download Audacity.
Being able to record audio from the computer in my case is very useful because it allows me to easily get sound effects, I usually search on YouTube: “sound effect of …” and then capture it quickly using this technique. It is also very useful to record a conversation or a virtual class.
In the following video you can see the process I use to record the internal audio of the computer with Audacity.
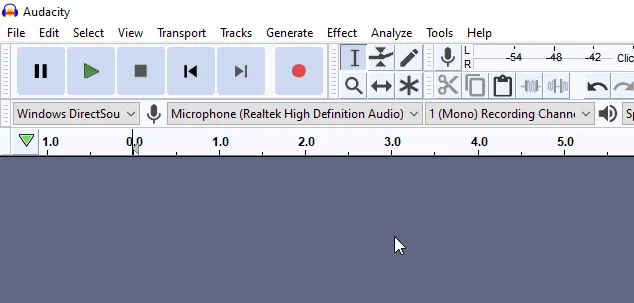
In the following figure I show an example of how Audacity can be configured by default. This configuration is used to capture the audio from the microphone, but to capture the audio from the computer we must make some adjustments.

Steps to record PC sound with Audacity
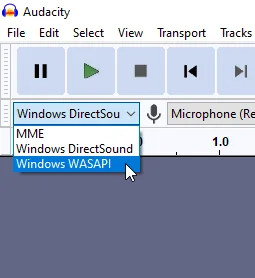
1. Select the “Windows WASAPI” option from the drop-down menu shown in figure 2.

2. Select the audio capture device, in my case the sound from the computer is output through the “Speakers” device, figure 3.

3. Change the recording mode from “Mono” to “Stereo”, this is very important since we are capturing the audio from the PC and it is an audio that has two tracks, left and right, if we leave it in “Mono” the recording WILL NOT WORK.

This should be enough, to make sure it works I usually do a test recording by pressing the speaker icon in the lower right corner and changing the volume, windows emits a sound to indicate the volume level, in figure 5 you can see this captured sound.

