
Introduction
In this article we see how to make a character selection menu in Unity, analyzing a prototype that implements this system which consists in two scenes, the first one is like a main menu where you can switch characters, the second scene is like a game scene where you can play with the character you selected in the previous scene. In addition you can download the Unity Package to import it in your own project.
All the IMPORTANT information is summarized in the following TUTORIAL FROM MY YOUTUBE CHANNEL
Character Selection Menu – Unity Package for download
Below you can download the Unity package to import it into a project and get the functional prototype.
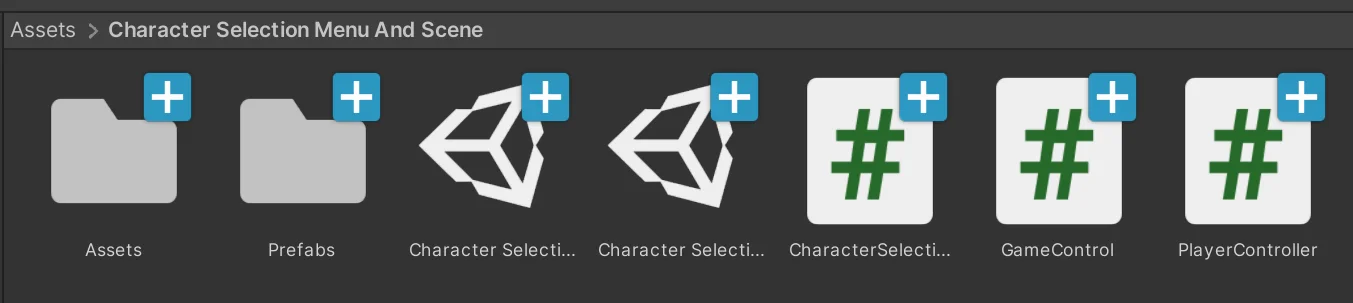
In figure 1 you can see the Assets contained in the package, there are two scenes, one for the character selection menu and another for the game scene where the character chosen in the menu appears.
There are three Scripts, CharacterSelectionMenu takes care of the logic of the selection menu, GameControl takes care of the logic of the game scene, i.e. placing the chosen character in the scene and the PlayerController Script allows to control the character in the game scene.
In the Assets folder are the Sprite sheets of the characters and the animations and in the Prefab folder the GameObject of the characters that appear in the menu and in the game scene.
Important – Prototype testing
When importing the Assets it is necessary to add the scenes from the selection menu and the game to the build, otherwise the button that changes to the game scene will not work. To do this we open the scene from the menu, go to File > Build Settings and click on the “Add Open Scene” button, then we do the same for the other scene. If both scenes are added you should see something like what you see in figure 2 in the Build Settings window.

Scene from the character selection menu
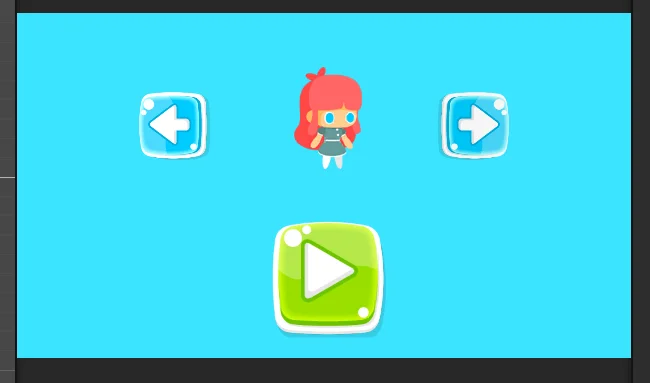
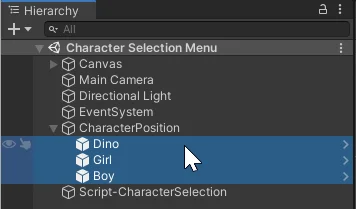
The selection menu scene is illustrated in figure 3, it consists of a character located in the center of the screen, two buttons to move to the next character or return to the previous character and a button to start playing.
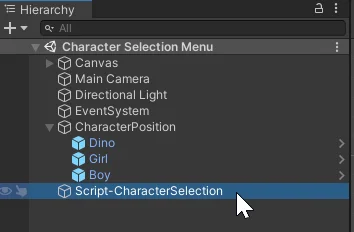
In the hierarchy we have an object that has a script assigned that has the control logic of the character selection menu, it is the object highlighted in figure 4.
In the inspector we can see the script with its public parameters, we have an array called “Player Objects” that is used to store the different characters that the player can choose. You can indicate the size by modifying the “Size” value and then drag the objects of the characters to the fields that appear.
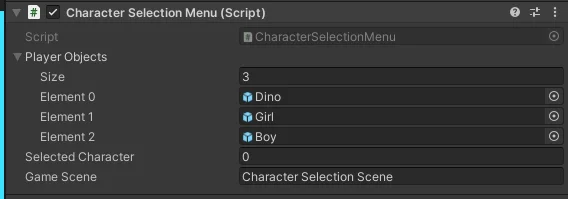
This prototype works in the following way, in the scene we place all the available characters, then we give the size to the array so it can store those objects and then we drag the objects of the characters from the hierarchy to the slots of the array.
In figure 6 we see the objects of the players that are assigned in the spaces of the array in figure 5.
Game Scene
When the green button shown in figure 3 is pressed, the game scene will load and the chosen character in the menu will appear, as shown in figure 7.
You can control the character with the WASD keys and to return to the main menu you can press Escape or the blue button in the corner.

In the hierarchy of the game scene we have an object called GameControl that has assigned the “GameControl” script with the logic to make the chosen character appear in the scene.
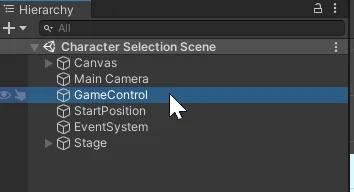
In the inspector we can see the parameters of this script, again we have an array of GameObjects for the characters.
In this case we are going to place the prefabs of the characters, that is to say GameObjects that we need to place in the Assets folder, the Script will be in charge of instantiating the chosen character. It is important that this array has the same size as the menu array and that the characters are added in the same order.

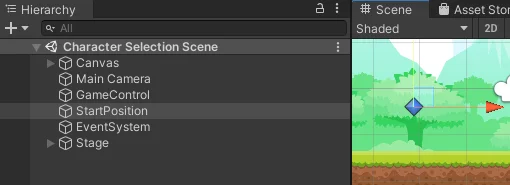
The chosen character will be placed in the position of the GameObject that we assign in the “Player Start Position” field in figure 9, in this case I have created an empty object called “StartPosition”, we can see it in figure 10.
Character Selection Menu Control Script
Let’s analyze the script that handles the logic of character selection.
Fields
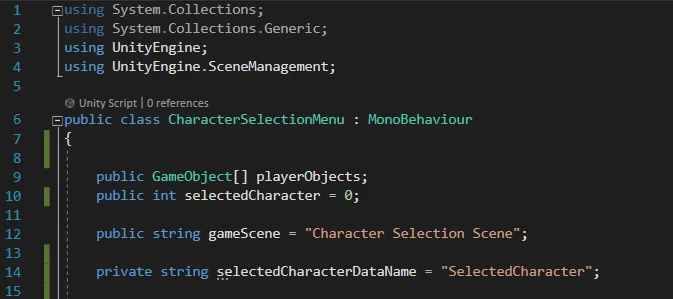
We start analyzing the fields defined in the script, in line 9 of figure 11 is defined an array of GameObjects called “playerObjects”, as it is defined as public will appear in the inspector. Then we have an integer variable that works as an index for the chosen character, with that variable we access the character in the array.
El string “gameScene” indica el nombre de la escena que hay que cargar cuando se pulsa el botón verde, es importante que el nombre coincida exactamente y se respeten mayúsculas, además la escena a cargar tiene que estar añadida en la ventana Build Settings.
The “gameScene” string indicates the name of the scene to be loaded when the green button is pressed, it is important that the name matches exactly and is case sensitive, also the scene to be loaded must be added in the Build Settings window, explained above.
Methods
Now let’s look at the methods that are defined in the Selection Menu Control Script.
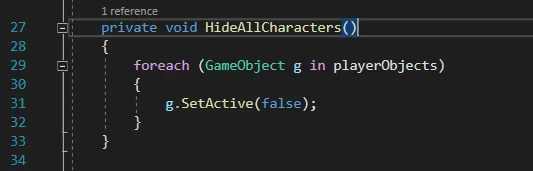
We have a method called “HideAllCharacters” that will be responsible for hiding all the characters in the scene, inside this function we loop through each element of the array executing the “SetActive” function with false as parameter on them. We analyse this function in the article about how to activate or deactivate GameObjects in Unity, you can also see the video here.
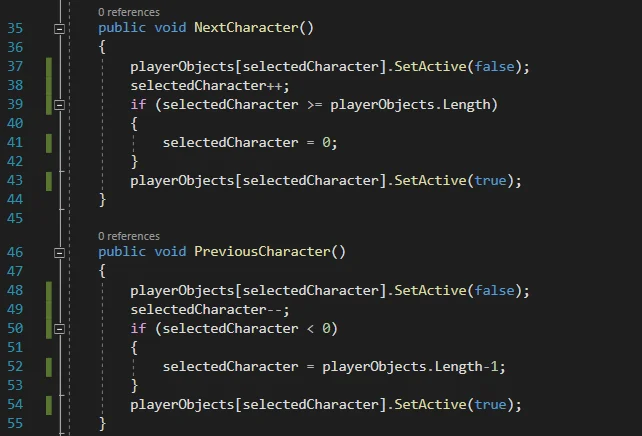
Then we have two public functions, one called “NextCharacter” and the other “PreviousCharacter”, these functions allow you to select the character, the first thing we do int hese functions is disable the currently selected GameObject, then we increase or decrease the index of the selected character, resetting it if it exceeds the total amount of elements or making it equal to the amount of elements minus one if the index is negative. Finally we activate the character corresponding to the given index.
These functions have to be public because they will be called from the buttons of the user interface, here you have an article on how to configure buttons in Unity and a video in which I show how to exit the game in Unity by pressing a button of the Canvas, in the video a button is configured to run a function defined in a script.
Then we have a public function called “StartGame” that will be called by the “Play” button of the menu, this function saves in memory the value of the index using PlayerPrefs, this is a way to pass data between scenes in Unity, having the index of the chosen character in memory, in the next scene that value is read and that allows to place the correct character. Then the LoadScene function of SceneManager is executed to load the next scene, to do this you need to implement the namespace UnityEngine.SceneManagement (line 4 of figure 11).

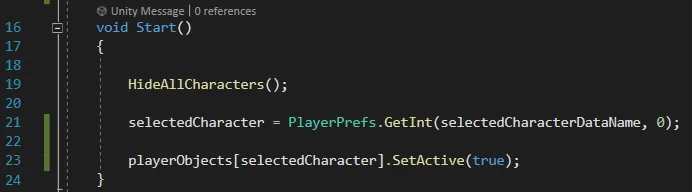
The Start function is executed when you start the game, in it the first thing we do is to hide all the characters using the “HideAllCharacters” function, line 19 in figure 15. Then we recover the value of the index stored in memory, that allows us to show the last selected character, in case there is no value in memory it will be initialized with the value 0.
Finally the GameObject of the selected character is made visible executing on it the SetActive function with parameter “true”, line 23 of figure 15.
Game scene scripts to instantiate the chosen character
Now let’s analyze the Control Script that is in the game scene, this Script identifies the character that was chosen in the scene from the selection menu and places it in a certain position.
Fields
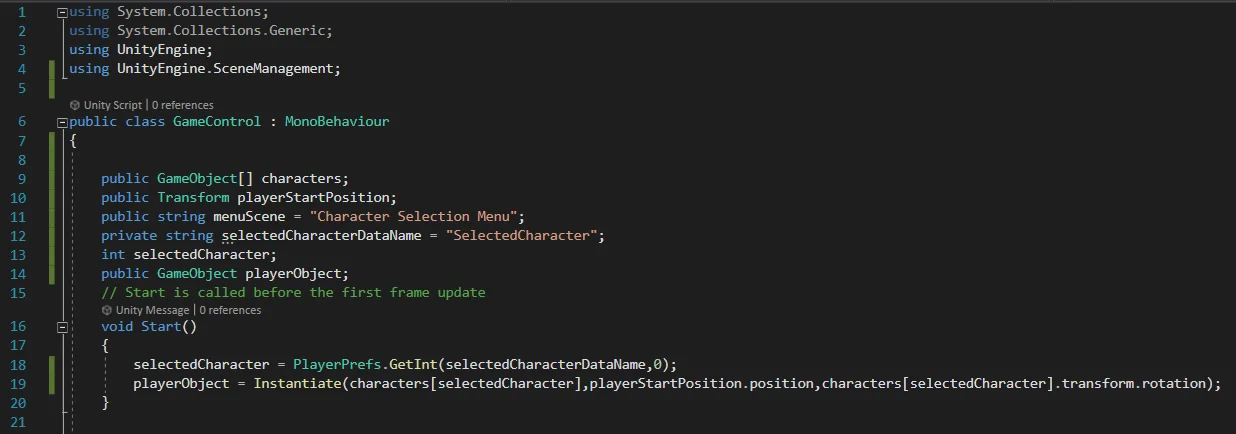
We start analyzing the defined fields, in the figure 16 we see a fragment of the GameControl Script, in the line 9 we have a public array of GameObjects, this field appears in the inspector and there we place the prefabs of the characters, it’s important to respect the same amount and the order of the characters as they were defined in the selection menu.
On line 10 we have a public Transform component, here we will place the object that will indicate the position where the character appears. Then we have two strings, one with the name of the selection menu scene and another with the name of the data in memory where the character’s index is stored. In line 13 we define an integer variable to store the index value and finally, in line 14 we define a reference for a GameObject where we will store the character’s reference that we will place in the scene, in case we need it later.
Methods
In figure 16 we see the Start function that is where the stored value in memory is read using the PlayerPrefs class and in the next instruction the character is instantiated, that is, we create it and place it in the scene.
Then we have a public function called “ReturnToMainMenu” that when executed loads the scene from the character selection menu, we can see it in figure 17. This function will be called by the blue button in the game scene, you can see it in figure 7. Also this function is executed when you press the “Escape” key, as we can see in line 27 of figure 17.
