Introduction
Video playback is a powerful tool in game development, used for cutscenes, tutorials, background visuals, and immersive storytelling. In Unity, playing videos can enhance narrative depth, provide in-game instructions, or create dynamic environments—but it requires the right setup. Whether you’re using Unity’s built-in VideoPlayer component or integrating external assets, this guide will walk you through the essentials of seamless video integration in your game.
For a visual breakdown of this subject, you may find my video discussion helpful.
First Step – Add Video Player component
The Video Player component in Unity allows you to play video files directly in your scene, whether for cutscenes, backgrounds, or interactive elements. To set it up:
- Create an Empty GameObject
- Right-click in the Hierarchy panel.
- Select Create Empty and name it (e.g., VideoPlayerObject).
- Add the Video Player Component (See Figure 1)
- With the GameObject selected, click Add Component in the Inspector.
- Search for and add the Video Player component.

Second Step – Configure Your Video
Supported Video Formats in Unity
The Video Player component supports several common video file formats, including:
- MP4 (
.mp4) – Recommended for broad compatibility - MOV (
.mov) – Common for macOS exports - WebM (
.webm) – Efficient for web-based projects - AVI (
.avi) – Less optimized but widely used
(Refer to Unity’s documentation for platform-specific details.)
How to add a video clip in Unity’s video player component
- Assign a video clip in the Video Clip field.
- Adjust settings like Play On Awake, Loop, and Render Mode as needed.

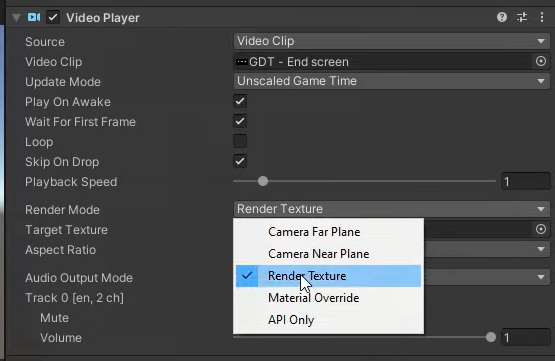
Third Step – Using “Render Texture” Mode in Unity’s Video Player
To render a video onto a dynamic surface (e.g., in-game screens or custom materials), set the Video Player’s Render Mode to Render Texture:
- Create a Render Texture
- Go to
Assets > Create > Render Texture. - Adjust resolution (e.g., 1920×1080) in the Inspector.
- Go to
- Assign to Video Player (See Figure 3)
- Select your Video Player component.
- Set Render Mode to Render Texture.
- Drag the Render Texture into the Target Texture slot.
Why Use This Mode?
- Dynamic Surfaces: Project videos onto 3D objects.
- Reusability: One video can drive multiple textures/materials.
- Performance: Avoids direct UI/raw image overhead.
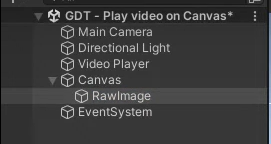
Fourth Step – Apply render texture to object to play video clip in Unity
- Create a UI Raw Image (See Figure 4)
- Right-click the Canvas in the Hierarchy.
- Go to UI > Raw Image.
- Resize and position it as needed.
- Assign the Render Texture
- Select the Raw Image and drag the Render Texture into its Texture field.
Now, the video will play directly on the UI!