Introduction
In this article we will see how to export an audio file in Reaper, how to export in MP3 and WAV format, which are two of the most popular formats, but you will see that it is very simple to choose the format you need. For this it is important to be clear about the export format you need and also its sample rate or bit depth.
Before we move on, here’s a song we were commissioned to produce for an event, let us know what you thought in the youtube comments!
How to make a RENDER of the project in Reaper
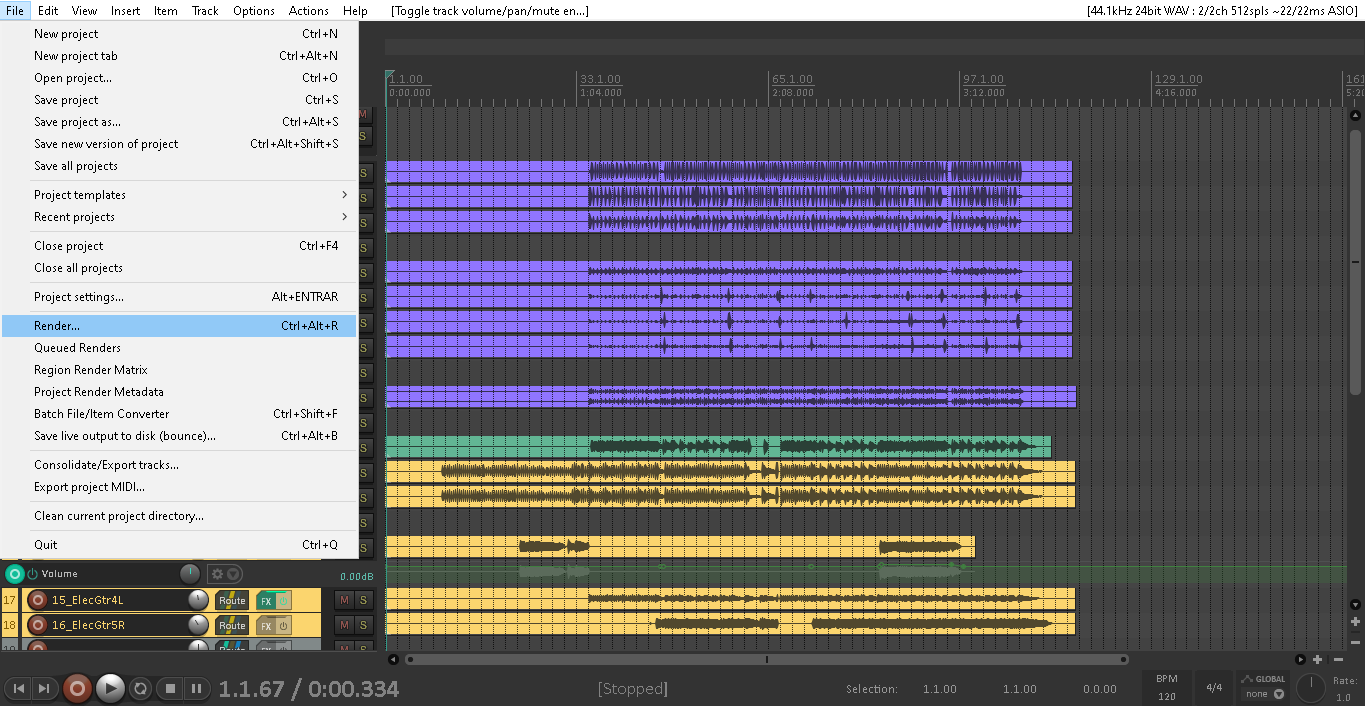
With our Reaper project ready to export the first step is to go to File > Render or use the shortcut CTRL+ALT+R, as shown in Figure 1.
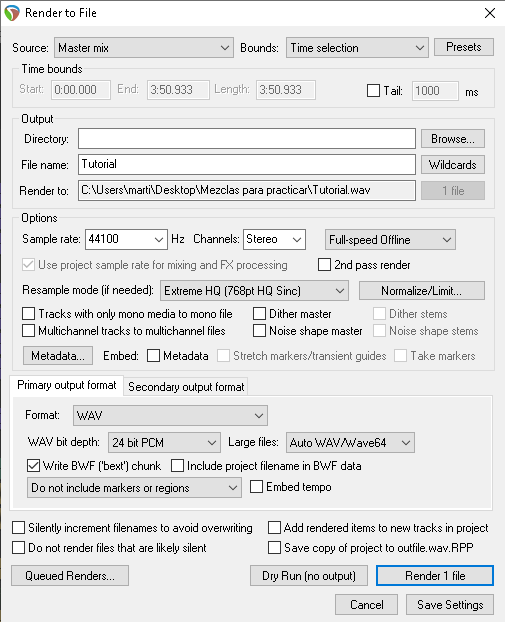
The “Render to file” window will be displayed where we will be able to configure all the export parameters. In this window there is everything we need so let’s see in detail each section of the Reaper export window.
Render entire project, separate tracks or selected time in Reaper
In the first part of the Reaper Render window we can start configuring from where we want to export our audio, inside “Source” the default option is “Master mix” and it refers to the output from the Master track in the DAW, that is, all the tracks that are not muted at that moment and are sending their signal as a last instance to the Master.

We can export the audio tracks separately with the option “Selected tracks (stems)“, see the options listed in figure 4.

In “Bounds” we can configure which part of the timeline we want to export, whether it is just the first two bars, two minutes, the whole project, regions, etc.

Output section of the Reaper export window
EnIn the “Output” section we write the name of the file(s) and choose the directory where they will be exported. The “Directory” section contains the folder where our audios will be sent, we can change it by clicking on “Browse”. In “File name” we write the name for the files. Finally the “Render to” field shows the final result of the configured parameters.

Audio export options in Reaper
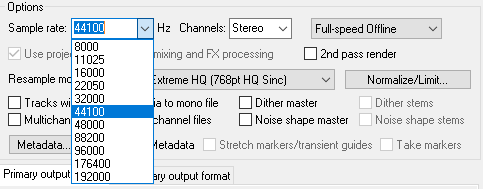
Within “Options” we can configure the “Sample rate“, how many channels we want and other more advanced settings such as “Resample mode” or “Normalize/Limit“. In image 7 you can see that the “Sample rate” is set to 44100, which is the standard quality used in CDs. Depending on the project to be exported, these options must be configured correctly since they could have inconveniences that could damage our export or lead us to undesired results.
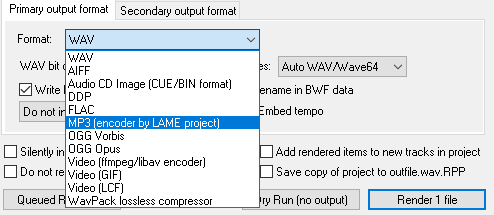
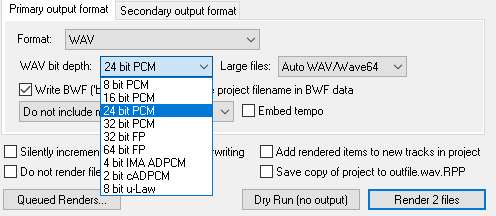
En el apartado “Primary output format” (POF) y “Secondary output format” (SOF) podemos elegir dos formatos para exportar nuestro proyecto en Reaper, en este caso nuestro formato primario será WAV con una profundidad de bits (WAV bit depth) de 24 bits PCM.
In the “Primary output format” (POF) and “Secondary output format” (SOF) section we can choose two formats to export our project in Reaper, in this case our primary format will be WAV with a bit depth of 24 bits PCM.
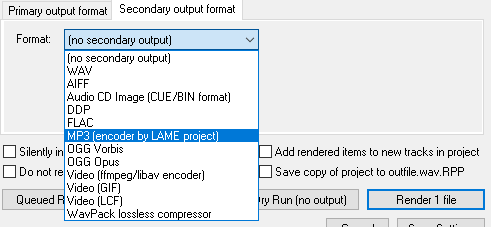
Hacemos click en “Secondary output format” (SOF), esta opción nos permite generar un segundo archivo con un formato distinto en el mismo proceso de Render de un proyecto de Reaper. Para el formato secundario elegiremos MP3 (encoder by LAME project), como se observa en la figura 10.
We click on “Secondary output format” (SOF), this option allows us to generate a second file with a different format in the same Render process of a Reaper project. For the secondary format we will choose MP3 (encoder by LAME project), as shown in figure 10.
Start project export process in Reaper
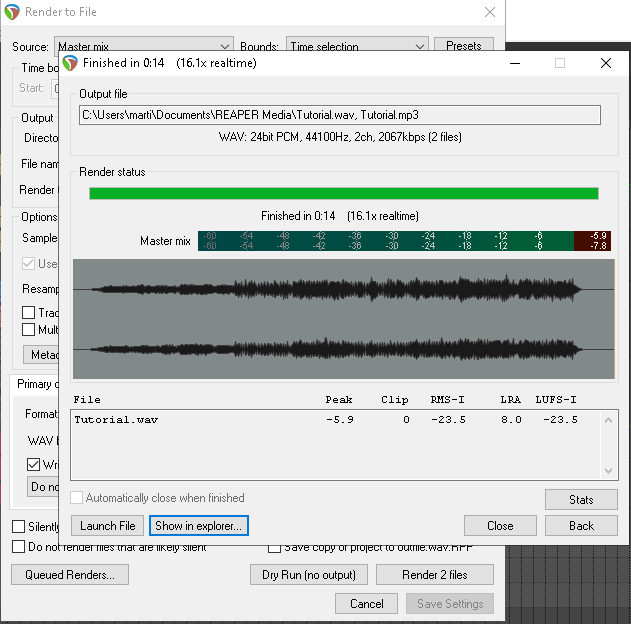
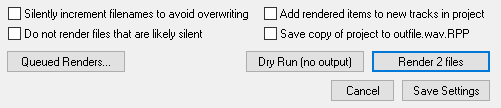
Once all the Render parameters of the project are configured, we click on the “Render 2 files” button, in this case since we have chosen to export two different files in the same process. Clicking on this button will start the rendering process.
The window shown in Figure 12 appears, showing the rendering process of the project in Reaper. Once the process is finished, we will be able to find our two files in the folder we chose. The final window will show the drawing of the audio waveform where we will be able to see the clips, besides Reaper provides us with this same information in the lower text box: Peak, Clip, RMS, LUFS, etc. If we click on “Show in browser” it will take us directly to the directory where the files are located.