Introduction

In Unity, you can dynamically load any scene at runtime using C# code. A common use case is changing scenes with a button click—for example:

  • Starting the Game: From the main menu scene, pressing a button could load the first level or a cinematic scene that plays automatically.
  • Level Selection: If your game has multiple levels (each in separate scenes), you could create a level selection menu in the main menu. This menu could include a panel with buttons, where each button loads a different scene when clicked.

To implement this, you’ll need:

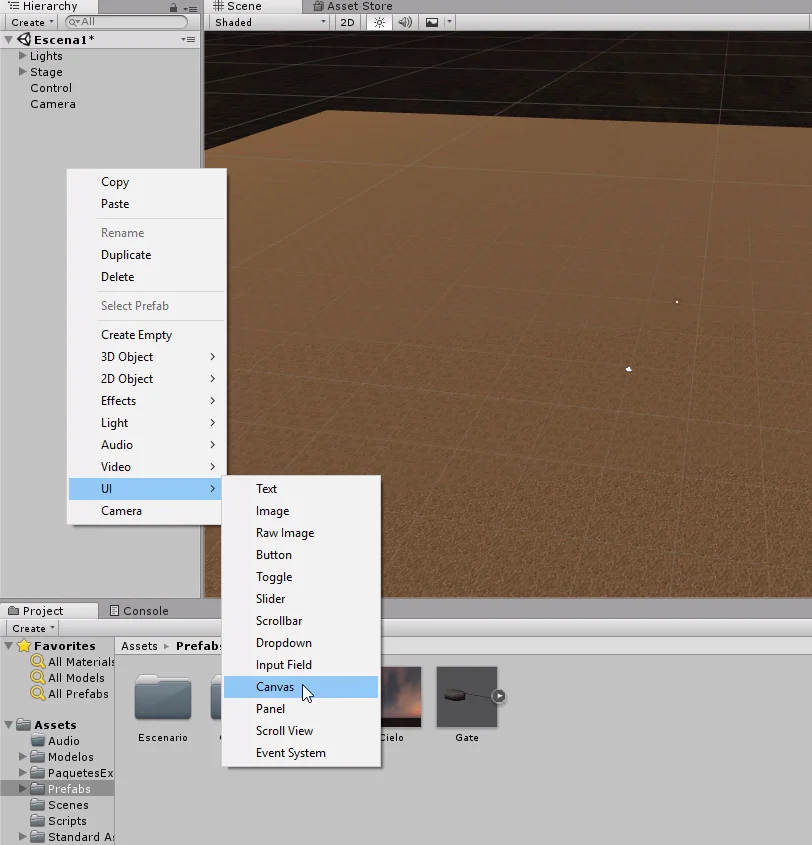
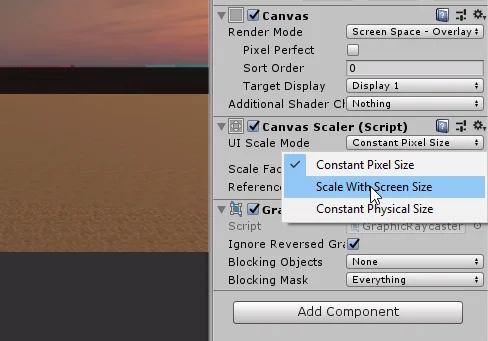
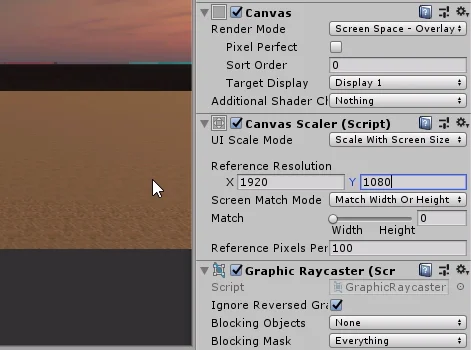
  1. Scene Management Setup (add scenes to Build Settings).
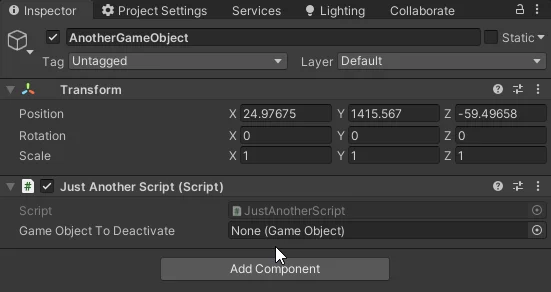
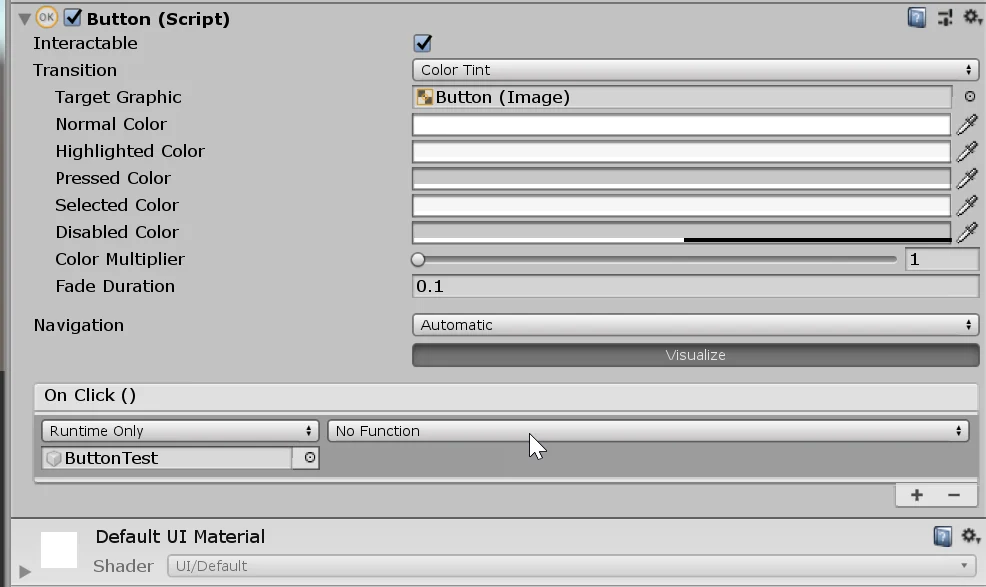
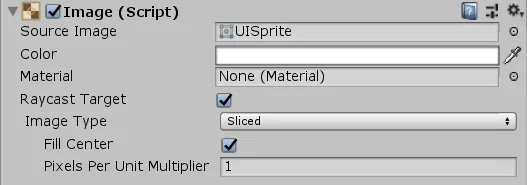
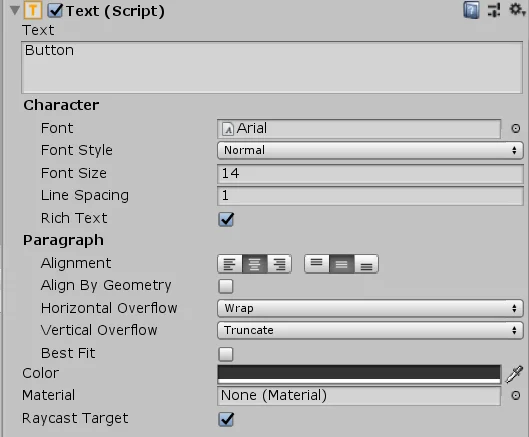
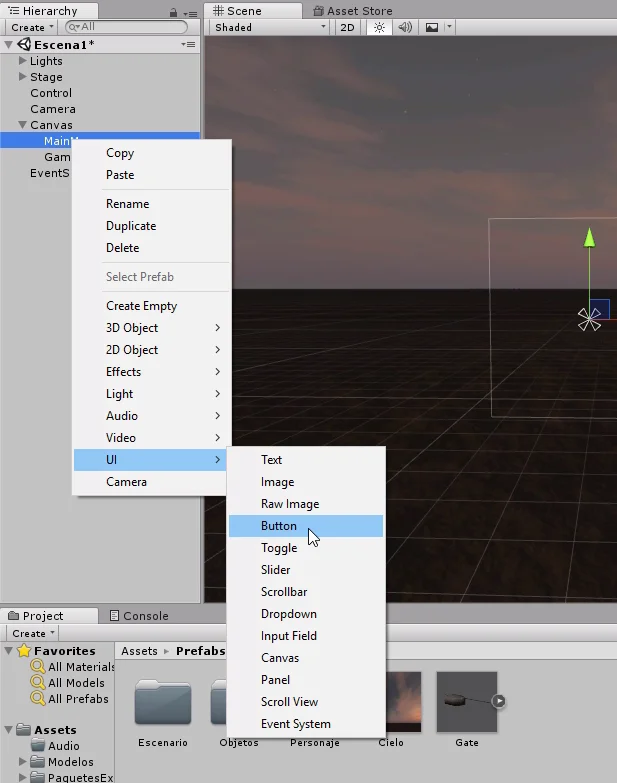
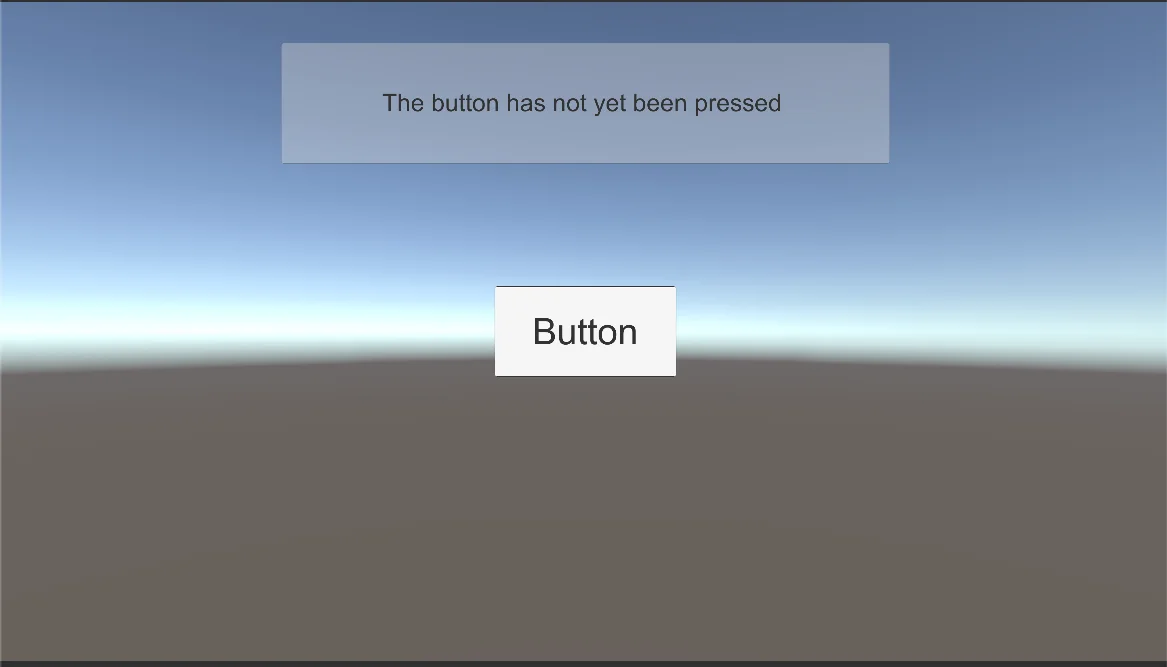
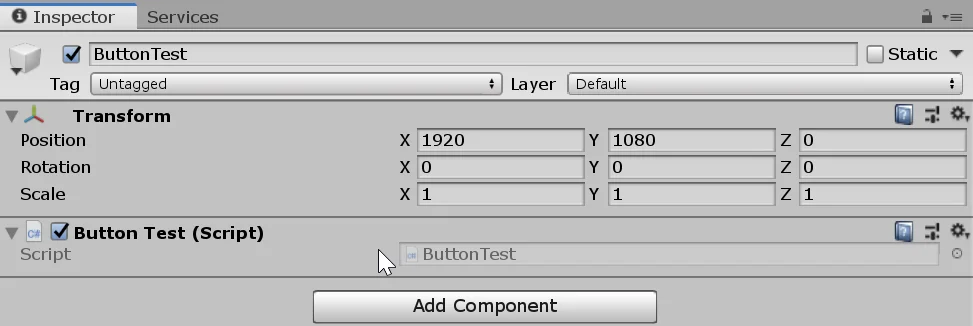
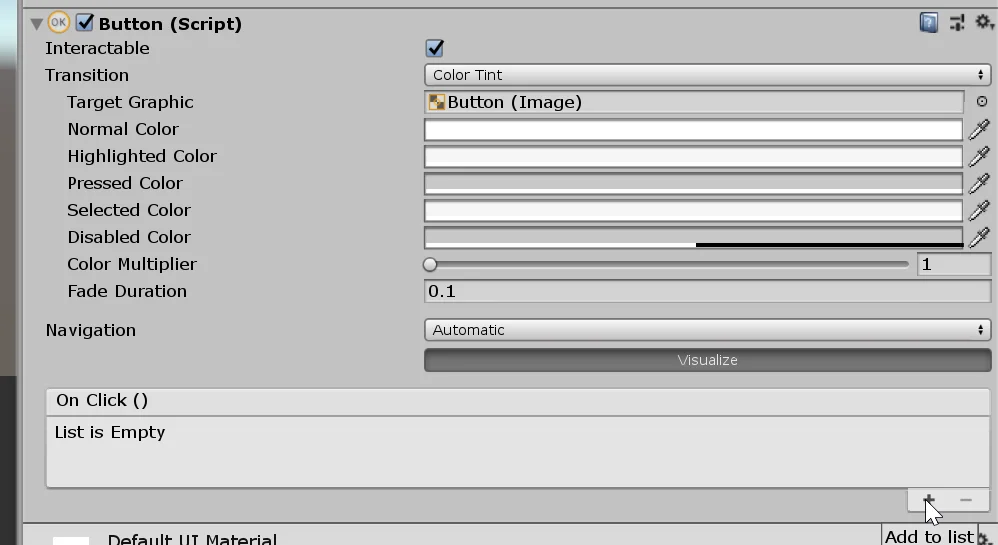
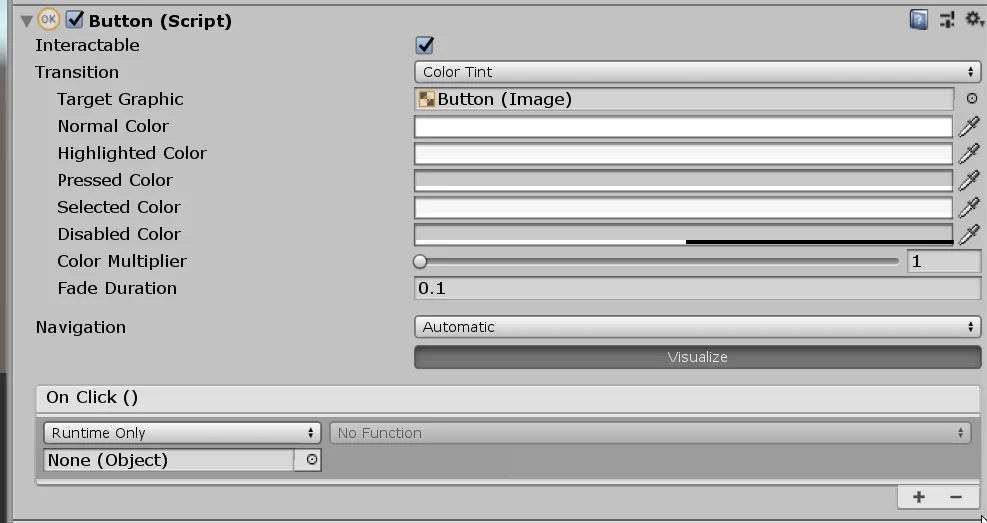
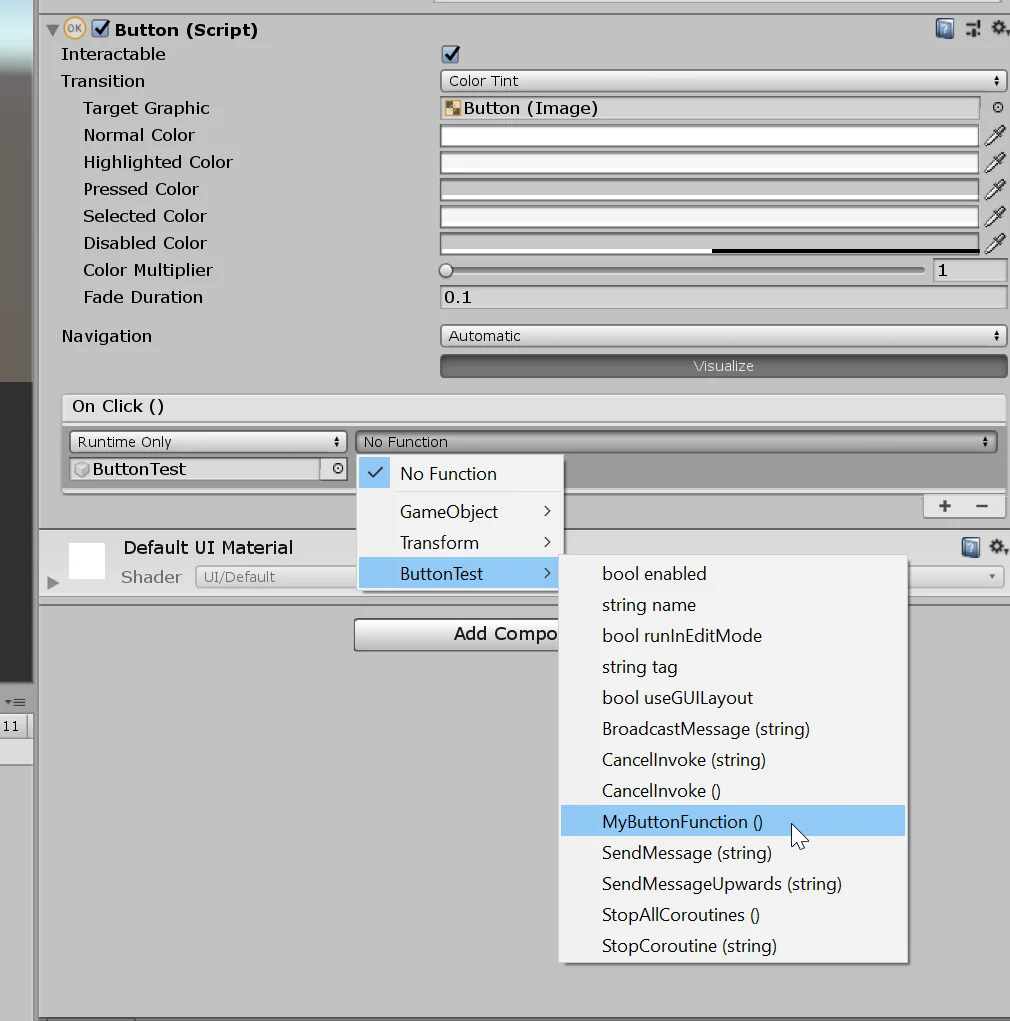
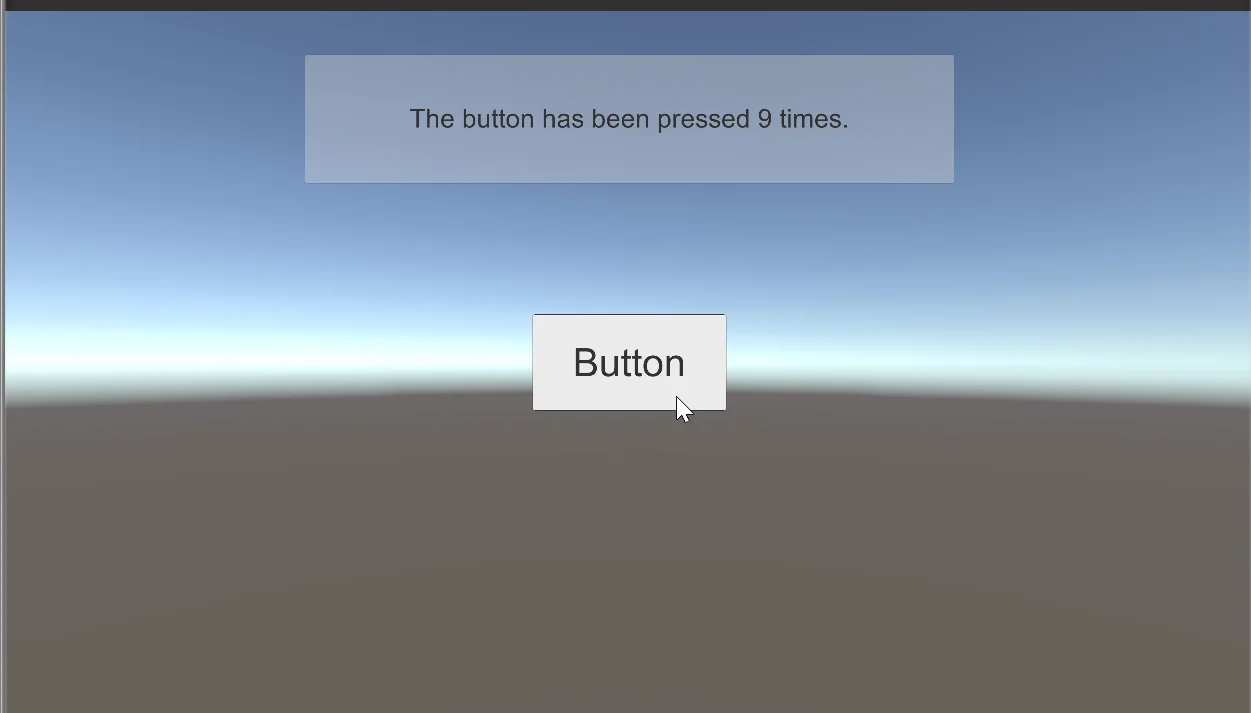
  2. A UI Button (with an
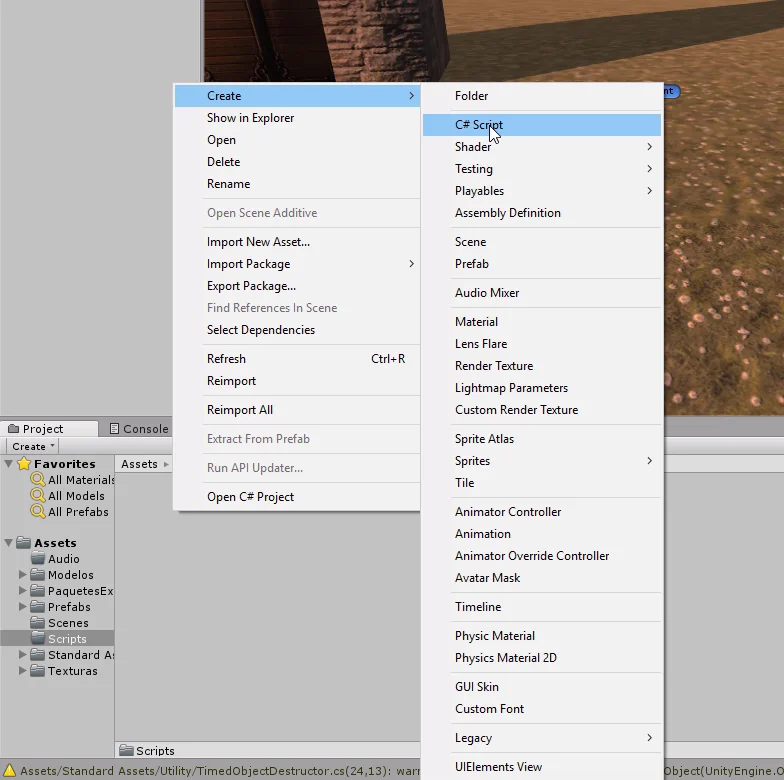
 OnClick() event).
  3. A C# Script (using SceneManager.LoadScene()).

This approach is essential for smooth transitions between menus, levels, and cutscenes in your Unity game.

In this tutorial, you’ll learn how to switch between scenes in Unity using UI buttons—with just one reusable script. Instead of writing separate code for each button, this solution lets you load any scene by simply referencing its name. Perfect for:

  • Main menus → Game levels
  • Level selection screens
  • Cutscene transitions

We’ll use Unity’s SceneManager and a single C# script to keep everything clean and efficient. Let’s dive in!

How to change scene in Unity

Identify the scene to be loaded

There are different ways to change scene in Unity but in all of them it will be necessary to be able to reference in some way the scene that you want to load.

One way to reference a scene could be from the integer value that indicates the position of the scene in the Build Settings window, the first scene starts counting from 0 and is the scene that will be opened as soon as the application is opened.

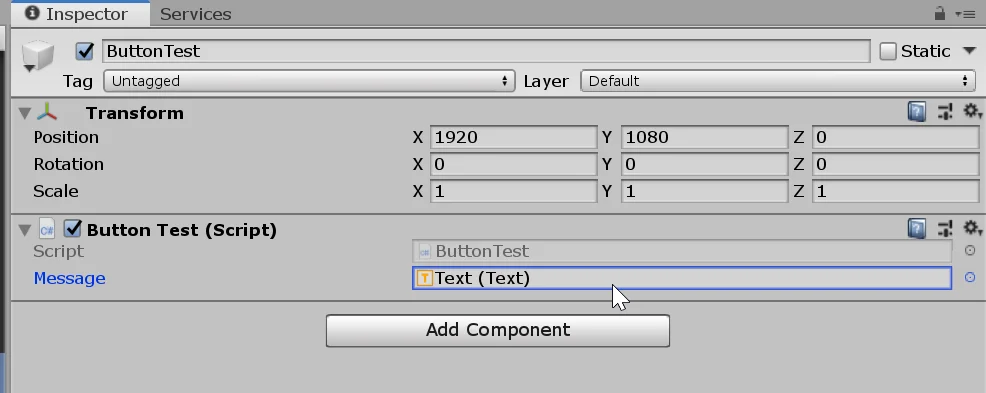
Another way to reference the scene you want to load can be through the name of the file with which the scene is saved. This is the method used in the solution that can be downloaded above.

Instruction to load a scene in Unity

The code instructions that allow you to load a scene in Unity by its ID number and by its name are as follows:

UnityEngine.SceneManagement.SceneManager.LoadScene(idNumber);

and

UnityEngine.SceneManagement.SceneManager.LoadScene(sceneName);

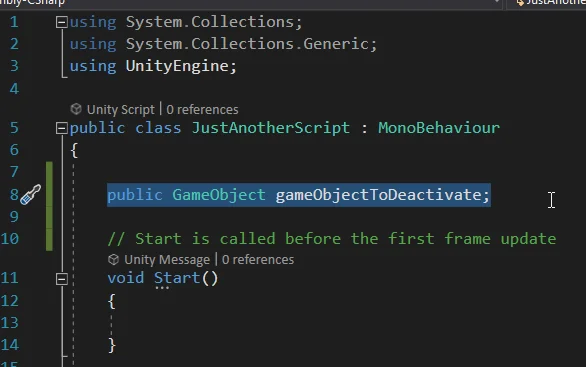
These instructions can be simplified if the Namespace UnityEngine.SceneManagement is implemented in the script header where they are used, by adding the following line of code in the script header:

using UnityEngine.SceneManagement;

Once this is done the instructions can be summarized as:

SceneManager.LoadScene(idNumber);

and

SceneManager.LoadScene(sceneName);

Download the Unity package with the Script and example scenes

For a visual breakdown of this subject, you may find my video discussion helpful


Introduction – What is the Skybox in Unity?

The skybox in Unity serves as a distant backdrop that completely encompasses your scene, creating the illusion of a far-off environment that always remains out of reach regardless of camera movement. Functioning as the horizon of your game world, skyboxes can be customized with different textures to dramatically transform your scene’s atmosphere. In this guide, we’ll walk through the process of changing Unity’s default skybox, allowing you to create a personalized environmental backdrop that enhances your game’s visual identity and mood.

For a visual breakdown of this subject, you may find my video discussion helpful:


First Step – Get an HDR Texture to use as Skybox

Customizing your Unity skybox requires specific texture types, with HDR (High Dynamic Range) textures being particularly effective. Unlike standard textures, HDR formats contain expanded luminance data, allowing them to store a wider range of brightness values. This makes them ideal for scene illumination, as you can adjust their intensity while maintaining realistic light behavior and proper exposure across both bright and dark areas. When implemented as skyboxes, HDR textures can significantly enhance your scene’s lighting quality and overall visual fidelity.

“For high-quality HDR textures, Polyhaven offers an extensive gallery of free environmental images perfect for Unity skyboxes. Their collection features diverse scenes ranging from natural landscapes to urban environments, all available in multiple resolution options from 1K to 8K. This flexibility allows you to balance visual quality against performance requirements for your specific project, as demonstrated in Figure 2. These professionally captured HDR images provide both realistic backgrounds and accurate lighting information in a single asset.

Poly Haven

Fig. 1: First you need to get an HDR texture, on the page there are different categories and they can be downloaded in different resolutions.
Fig. 2: In my case I downloaded a texture in 2K resolution.


How to change the Skybox in Unity – Step by Step

Before showing the complete process I will put a list of steps to summarize the process, if you already have experience with Unity you may find it useful.

1. Import the HDR texture into Unity and in the inspector set its “Texture Shape” parameter to “Cube”.

2. Create a new material and set the Shader type as Skybox > Cubemap.

3. Assign the HDR texture to the “Cubemap HDR” field of our material. With this we have the Skybox ready to use it.

4. Go to the Window > Rendering > Lighting window, Environment section and in the Skybox field select the material you have configured in the previous step.

5. (Optional) If the texture does not have good quality, modify the compression format or download a higher resolution HDR texture.

Detailed procedure on how to change the Skybox in Unity

Once we import the HDR texture into Unity we will create a new material, in the Assets folder, right click, create and then select material.

Fig. 3: We create a material to make the Skybox.

We give it a name and then select it to see its properties in the inspector.

Fig. 4: We select the material to see its parameters in the inspector.

In the header of the inspector, we locate the field “Shader” which by default is set to “Standard” and change it to the type Shader “Skybox > Cubemap”, as shown in figures 5 and 6.

Fig. 5: We click on the Shader tab to change the Shader type.
Fig. 6: Select the Cubemap Shader within the Skybox section.

Now the inspector for this material will be shown with other parameters than before, as we see in figure 7.

Fig. 7: This is what the new material inspector looks like.

In principle we are interested in assigning our HDR texture to the “Cubemap HDR” field but first we have to make some adjustments to the image. We select the HDR texture that we have imported.

Fig. 8: We select the HDR texture that we previously imported to see its parameters in the inspector.

We changed the “Texture Shape” field to Cube and applied the changes

Fig. 9: We changed the texture type to Cube in order to use it in the Skybox Cubemap.
Fig. 10: Apply the changes when the configuration is finished.

This will allow us to use the texture for the Skybox material, we can either drag the texture directly into the field or press the “Select” button and select it from the popup window.

Fig. 11: Now we can drag the texture into the Cubemap space in the material inspector.
Fig. 12: You can also click on the select button and select it from the pop-up window

If everything goes well, you should see a result like the one in figure 13.

Fig. 13: With this you have the Skybox ready to use.

Now that we have the Skybox material set up, let’s apply it to the scene. For that we have to open the “Lighting” tab, in figure 14 you can see where that window is if you don’t have it open.

Fig. 14: We open the Lighting window to change the Skybox.

Inside the Lighting window we go to the “Environment” section and in the first field called “Skybox Material” we assign the Skybox material that we have previously configured.

Fig. 15: Inside the Lighting tab we go to the Environment section and select the Skybox.
Fig. 16: We select the HDR Cubemap texture that we previously configured.

In figure 17 you can see the first result of doing this, the texture does not look good at all due to the type of compression.

Fig. 17: First result, the Skybox is applied but the image has a certain quality loss.

We can select it and in the inspector change the compression to “RGB 16”, “RGB 24” or “RGBA 32”, this will bring an increase in the quality but also in the weight of the image. You can try downloading different qualities of HDR texture and try different formats to find a balance between quality and performance.

Fig. 18: We select the HDR texture and modify the format.

In figure 19 we see the final result that I have reached. Now that we have changed the new Skybox in the scene, we will be able to do lighting bakes to get better results.

Fig. 19: The quality has improved but so has the weight of the image.

You have reach the end of the article, if it was useful consider subscribing to the channel!

Introduction – Important information about GameObjects

GameObjects form the fundamental building blocks of every Unity scene, with each one containing at least a Transform component by default. This essential component tracks the object’s position, rotation, and scale within the 3D world. To create functional elements in your game, you extend these basic GameObjects by adding specialized components that define their behavior and properties. For instance, a camera in Unity is essentially a GameObject enhanced with both Camera and AudioListener components, transforming a simple object into the player’s viewport and audio receiver.

Fig. 1: A test GameObject in the hierarchy.

When a GameObject is active in the hierarchy and the game is running, Unity periodically updates each of its components and executes some other functions, all this automatically. If we deactivate the GameObject, this process will not take place and we will achieve the effect that the GameObject disappears from the scene.

During runtime, Unity automatically processes all active GameObjects in your hierarchy, executing their component update functions each frame according to their scripting implementation. When you disable a GameObject by setting it to inactive, Unity suspends this update process for both the object and all its children, effectively removing it from the scene rendering pipeline. This not only makes the GameObject visually disappear but also prevents its components from consuming processing resources—an important optimization technique for managing scene performance and object lifecycles.

For a visual breakdown of this subject, you may find my video discussion helpful:


How to manually activate and deactivate objects in Unity

As previously noted, every GameObject in Unity must contain at least one Transform component—this is mandatory and cannot be removed. When you select a GameObject in the Hierarchy window, the Inspector panel will display its Transform properties along with the header section (visible in Figures 2 and 3).

Fig. 2: Activation checkbox of the GameObject, at this time it is active.
Fig. 3: Activation checkbox of the GameObject, at this moment it is inactive.

The checkbox highlighted in both images is the GameObject’s active state toggle. When enabled (checked), the GameObject remains active in the scene. When disabled (unchecked), the GameObject becomes inactive—effectively behaving as if it were removed from the scene. In the Hierarchy window, inactive GameObjects appear visually muted, as shown in Figure 4.

Fig. 4: Inactive GameObjects are shown in gray in the hierarchy.


Activate and Deactivate GameObject using Script

Of course we could get more out of this if we could activate and deactivate one or more GameObjects through a Script, this would allow us for example to make enemies appear when the player reaches a certain part of the map, make a final screen appear when the player loses the game and more.

Let’s start by creating a new Script and GameObject in the hierarchy to which to assign the Script.

Fig. 5: We created a new script to make the activation and deactivation of the GameObject by code.
Fig. 6: We create an extra GameObject to assign the script we just created.

In figure 7 you can see that the new GameObject is assigned the script we created. This can be done by dragging the script directly or by using the Add Component button and searching for the script by name.

Fig. 7: We assign the script to the GameObject created in the previous step.

To be able to activate or deactivate the GameObject from a Script we need to have the reference of the GameObject we want to activate or deactivate, so inside our Script we are going to define a public GameObject, in this case I have called it “gameObjectToDeactivate”, trying that the name reflects as much as possible the function it is going to perform.

Fig. 8: We define a public reference for a GameObject and give it a representative name.

When defining the public reference, this object will appear in the GameObject inspector that the script has assigned, as we see in figure 9, this will allow us to manually assign the object we want to activate and deactivate, in our case the first object we had was called “GameObject”, in figure 10 you can see how the field has been filled with this object.

Fig. 9: In the inspector there is a field where we can place a GameObject type object.
Fig. 10: We take the first object and drag it into the inspector’s field


Instruction to activate or deactivate a GameObject in Unity

The function that allows us to change the Activation status of a GameObject is “SetActive”, it is a method that receives as a parameter a boolean value (true or false) and this function is called on a GameObject, in this case we use the reference that we have defined, as seen in lines 22 and 27, we are deactivating and activating the GameObject respectively.

In this particular example we are reading the A and D keys to execute the functions, this means that if the player presses the A key, the instruction “SetActive(false)” is executed which disables the GameObject and if the player presses the D key, the instruction “SetActive(true)” is executed which enables the GameObject.

Fig. 11: In the Update function we read the keyboard entries and carry out the activation and deactivation of the GameObject.

Executing those instructions is exactly equivalent to checking or unchecking that box in the inspector we saw in figures 2 and 3.


You have reach the end of the article, if it was useful consider subscribing to the channel!

Introduction – ¿What is the origin of an object?

The origin of an object in Blender is the point in space that represents the whole object, for example if we want to say the exact position where the object is, we will use the position of the origin. Furthermore, transformations like position changes, rotations and scale will be calculated relative to the origin coordinate. The origin of a 3D model is a concept that is used throughout different design software, for example if we export our Blender model to Unity, the origin of the model that is defined in Blender will be the origin of the object in Unity.

For these reasons it is important to know how to set the origin of an object in Blender, placing it where we think it is more convenient.

For a visual breakdown of this subject, you may find my video discussion helpful:


How to know where the origin of an object is located

The origin of an object in Blender is represented by a yellow dot, to see it we need to be in OBJECT MODE and select an object.
Below you can see a couple objects with their respective origins.

Fig. 1: Position of the origin in a default cube in Blender
Fig. 2: Position of the origin in a default toroid in Blender
Fig. 3: Position of the origin in a default cylinder in Blender

If you cannot see the origin even in OBJECT MODE maybe you have the “VIEWPORT OVERLAYS” disabled.


Working Modes – Object Mode and Edit Mode

Fig. 4: Working mode selector in Blender.

In Blender we can work in different modes, two of them in particular are the object mode and the edit mode, with the TAB key we can switch between both (if we have at least one object selected). In the object mode as its name indicates we will work with objects, that is, we will not take into account the geometry of the object itself, but its basic transformations, such as position, rotation and scale, and here the origin is important to represent the object in space. When we move, rotate or scale the object, we will be doing it in relation to its origin point.

In the object mode we can know the exact position of the origin point in the transformation panel (shortcut “N” if it is not visible), as we see in figure 5, in the tab Item, we can see the location of the origin, its rotation and its scale and of course we can manually enter values in these fields, positioning precisely an object or giving it a certain orientation or size.

Fig. 5: The exact position of the origin can be seen in the transformation tab in Blender.
Fig. 6: Edit Mode is selected.

On the other hand, when we work in Edit mode (figure 6), we get inside the object and we can see and modify its geometry, that is, the vertices, edges and faces that conform the mesh. In this mode we can create new faces and do all kind of geometrical transformations but the origin remains in the same location, unless we explicitly modify it.

Figure 7 shows all the vertices of the cylinder was selected and have been moved, the origin point however remains in place, if we compare it with the cylinder in figure 3.

Fig. 7: If we move one or more parts of the object in edit mode, its origin will remain at the same point.

How to modify the origin of an object in Blender using the 3D cursor

After understanding what the origin of the 3D object is and what it is used for, we will see how to modify the origin’s position to any point in space. To do this we will help us with the 3D Cursor.

First we will see how to position the 3D Cursor exactly where we want, for that we will see three examples, the first is to position the 3D Cursor in the center of a face, on a vertex or in the center of an edge.

Placing the 3D Cursor in the center of a face in Blender

Giving a certain object, we go to the edit mode and select a face from the mesh(with the faces mode, shortcut “3” or by selecting the vertices that define it). Once we have the face selected we use the shortcut “SHIFT+S” to open the SNAP menu, as we see in figure 8, this menu gives us many options, but the one that interests us at this moment is to move the 3D Cursor to the current selection, as we have the face selected, the result is that the 3D cursor is moved to the geometric center of the face, as we see in figure 9.

Fig. 8: We select one face of the model and using the shortcut SHIFT+S we access the Snap menu, choose “Selection Cursor”.
Fig. 9: El cursor 3D se ha movido al centro de la cara seleccionada.


Placing the 3D Cursor on a Vertex in Blender

If we repeat the process but this time having only one vertex selected, the 3D Cursor will be positioned on that vertex, see figure 11.

Fig. 10: We select a vertex of the model and using the shortcut SHIFT+S we access the Snap menu, choose “Cursor to Selection”.
Fig. 11: The 3D cursor has moved to the selected vertex.

Placing the 3D Cursor in the center of an edge in Blender

And if we do the process again but this time having an edge selected (two vertices), we see how the 3D Cursor moves to the center of that edge, see figure 13.

Fig. 12: We select an edge of the model and using the shortcut SHIFT+S we access the Snap menu, choose “Cursor to Selection”.
Fig. 13: The 3D cursor has moved to the center of the selected edge.

With practice, using one of these three techniques or a combination of them we will be able to position the 3D Cursor at any point of interest in the object or in the world.

How to move the origin to the 3D cursor in Blender

Fig. 14: How to move the origin to 3D cursor in Blender. In the object mode, right click on the model, then “Set Origin” and choose the option “Origin to 3D Cursor”.

Now that we have the 3D cursor placed in the position where we want to move the origin’s object we will proceed exiting the Edit Mode and entering the Object Mode, then right click on the object, go to the “Set Origin” option and choose the “Origin to 3D Cursor” option (figure 14), this will make the object’s origin move to the current position of the 3D Cursor.

As we can see in figure 15, the yellow dotthat represents the origin has been moved to the center of the edge where the 3D Cursor was located, from now on, the transformations made in object mode will be calculated with respect to that new origin, as we can see in figure 16, a rotation restricted to the X axis is made and the result is that the origin point remains fixed and the rest of the object rotates around it.

Fig. 15: The object’s origin has now been moved to the 3D cursor position.
Fig. 16: All transformations made in object mode will be calculated with respect to the point of origin.


Conclusion

The origin of an object defines the position of the object in the world.

The transformations that are made on an object, in general will be calculated with respect to the origin.

It is possible to set the origin of an object anywhere in space, but some locations will be more appropriate for a given object.

Introduction

In this article we will see how to solve the error “GUIText is obsolete” in Unity, an error that started to occur several versions ago because the GUIText programming class was replaced by another one and there are still many Unity packages using the previous version.

In the following video we see how I solve this error that appears when importing the Standard Assets package. This is an error that is simple to solve but it is important that you understand why it occurs and what to do, since the error can occur in countless cases, you will have to identify how to do it in your particular case.


Steps to solve “GUIText is obsolete” in Unity

1. Open all the scripts that contain this error. Help yourself with the error information in Unity’s console (clicking on the error will give you some extra information), the console will tell you the name of the script and the error line. If we double-click on the error, the script will open and the error line will be highlighted.

error GUIText is obsolete in unity console, double click to open script with error
Fig. 1: This is what the error “GUIText is obsolete” looks like in the Unity console. Notice how the console reports the script name, the error line and suggest how to solve it.

2. It is necessary to replace the use of the “GUIText” fields by the “UnityEngine.UI.Text” class. That is, where we see that “GUIText” is used (case sensitive), delete it and write “UnityEngine.UI.Text” instead.

Fig. 2: The GUIText component is deprecated but in line 11 it is being used, resulting in a console error.
Fig. 3: “GUIText” is replaced by “UnityEngine.UI.Text”.

3. Save the script and verify in the console that the error disappears.

Optional: The prefix “UnityEngine.UI” can be included in the script header, that way we can refer to the component directly as “Text”. See lines 3 and 12 in figure 4.

Fig. 4: Implementation of the “UnityEngine.UI” namespace and replacement of “GUIText” with “Text”.

Introduction

The IF statement allows us to make a decision based on whether a condition is true or false.

The simple decision is to perform an action if the condition is true and otherwise do nothing. The double decision allows us to perform a second action if the condition is false.

In the following video you can see how to define an if statement in C# language with examples in Unity.

Script from the video

Below you can download the script to test the different ways to declare an If statement.

Ways to express the logical condition

The simplest way would be to use a boolean variable in the condition, but this is not the only way.

Logical Expression

Another way to do this is to create a logical expression using operators that determine whether the condition is true or false.

In the video I proposed the following example: “We can be hungry or not, if we are hungry there are two ways to eat, one is to be in the house and also have food or if not the other way is to be in a store and have money”.

With these assumptions we can create a logical expression that determines whether we eat or not. We can see it below.

weAreHungry && ( (insideHouse && weHaveFood) || (insideFoodStore && weHaveMoney) )

This expression will be true when we are in a position to eat and therefore we can use it as a condition of an if statement.

Method that returns a logical value

A method is a function that we can execute using its name, for more information see Modularization and Methods in Programming. If we have a method that returns a boolean value, its execution is equivalent to having e this value, so we can use this as a condition for an IF statement.

In the video I define a method called “ShouldWeEat()” that returns the value of the boolean expression.

Logical Expressions using other types of variables

Using the comparison operators (AND, OR, >, <, >=, <=, etc) we can create logical expressions using other types of variables such as integers, floats, characters, we can also compare strings. In the video I use as a condition the following expression:

money >= foodCost

If the money we have is greater than or equal to the cost of the food we will be able to buy it, otherwise we will not be able to.

Logical expression combining methods and operators

We can combine the two previous cases, if we have a method that returns an integer value for example, we can compare the execution of this method with another value and create a logical expression.

Introduction

In this article we will see how to play music and sound effects in Unity, making them play automatically when starting the game mode, but we will also see how to create a control script to play music or sounds in Unity through code.

To play audio clips in Unity we use a component called AudioSource, this component allows us to configure different parameters such as volume, make it play in loop, among others.

The AudioSource component by itself is not enough to listen to the audio in Unity, it is also necessary to have an AudioListener component in the scene, this component is usually assigned to the camera by default when creating a new scene, the AudioListener acts as the “ears” that hear the sound played by the AudioSources. We must make sure that there is only one AudioListener component in the scene, especially if we are using 3D sound effects, that is to say that we take into account the position from where the sound is originating, for example if a sound is produced to the right of the player’s perspective, that the sound is heard with greater volume in the speakers on the right.


How to play an AUDIO CLIP in Unity at startup

1. Create a GameObject and in the inspector assign the AudioSource component (Add Component button).

2. Configure the AudioSource component with the “Play On Awake” option activated and the rest of the parameters configured as you like (see below for the different options).

3. When you enter the game mode, the sound will start playing automatically with the parameters set.

How to play an AudioClip in Unity through code

1. Create a GameObject and in the inspector assign the AudioSource component (Add Component button). Deactivate the “Play on Awake” option and configure the other parameters as you wish.

2. Create a Script to control the start of the sound, the volume, the end, among other actions. Assign this Script to the same GameObject that has the AudioSource component.

3. In the script define a reference for the AudioSource object and find it in the Start method using GetComponent<>().

4. Define a public function to play the sound from any other script, within this function execute the instruction: “audioSource.Play()”.

5. Detect the proper event in which the sound should be played and execute the play function defined in the audio script.

AudioSource component setup

The AudioSource component has many adjustable parameters to achieve different results with our sounds. In the following image we see what the AudioSource component looks like in the inspector in Unity.

Fig. 1: Generic AudioSource component in Unity

To start with, you can manually assign the sound you want to play by dragging it to the AudioClip field. This can also be done from a script with the instruction “audioSource.clip=aClip;”, being “audioSource” the reference of the AudioSource component of the inspector and “aClip” a field that contains the reference of some sound.

Then we can mute the sound and adjust the volume. Enable the “Play On Awake” option so that the sound is played as soon as the GameObject enters the enabled state. The Loop option makes the sound play again when it is finished.

The Spatial Blend is a parameter that allows us to adjust if it is a background sound or a sound that depends on the distance between the AudioSource and the AudioListener. If we put the indicator in 3D, we will obtain a stereo sound whose volume and distribution in the headphones will depend on the position of the source. Within the 3D Sound Settings you can adjust parameters related to this.

Introduction

We’re going to see how to store bools in Unity using the PlayerPrefs class, then we’ll see how to load those bool values. This can be useful to save game states, for example if the player has already done some action.

How to save a bool with PlayerPrefs

PlayerPrefs doesn’t have a function to save logical values directly, so we’re going to save an integer that could be worth 0 or 1 depending on the state of the boolean variable, for this we use the static method “SetInt”, a function that needs us to give it two parameters.

The first parameter is a string with the name that will have this variable that we are going to store, this will allow that later we can recover it. The second parameter is the integer value that we want to store.

The instruction that will do the saving of the data in Unity would look like this:

PlayerPrefs.SetInt(“boolDataName”, boolData ? 1 : 0);

In this case we indicate the name of the data between quotes because it is a string, the second parameter we indicate it using the ternary operator “?:” that works as a simplified if statement, first we have the logical data we want to save, “boolData”, then the operator “?” and then the values it returns if boolData is true or false separated by “:”.

The expression “boolData ? 1 : 0” will result in 1 if boolData is true and 0 if boolData is false.

How to load a bool with PlayerPrefs

To load a bool into Unity using PlayerPrefs we have to remember that in the previous step we saved it as 0 if the variable is false or 1 if it’s true, so we retrieve the integer value using the “GetInt” function, a function that can be used in two different ways.

In the first form we give a parameter that is going to be the name of the data we want to retrieve, the name we gave it when we executed the “SetInt” function we saw before. We do it in the following way.

boolData =PlayerPrefs.GetInt(“boolDataName”)==1;

The execution of the static method “GetInt” of PlayerPrefs gives as a result an integer but by using the operator “==”, that compares if both expressions are equal, we get a logical result that we can assign to the “boolData” variable. If the stored integer is 1, boolData will be true, otherwise it will be false.

The second way is also to give it the name of the data that we use in the execution of “SetInt” but we also give a default value that will be used in case there is no data saved under that name, this is done in the following way.

boolData =PlayerPrefs.GetInt(“boolDataName”,0)==1;

Introduction

We’re going to see how to store floats in Unity using the PlayerPrefs class, then we’ll see how to load those float values.

This can be useful, for example, to save configuration parameters that has decimal values.

How to save a float with PlayerPrefs

To save a float in Unity using PlayerPrefs we’ll use the static method “SetFloat”, a function that needs two parameters.

The first parameter is a string with the name that will have this variable that we are going to store, this will allow that later we can recover it. The second parameter is the float value that we want to store.

The instruction that will do the saving of the data in Unity would look like this:

PlayerPrefs.SetFloat(“floatDataName”,floatNumber);

In this case we indicate the name of the data between quotes because it’s a string, the second parameter we indicate it using a float variable.

How to load a float with PlayerPrefs

To load a float into Unity using PlayerPrefs we’ll use the static “GetFloat” method, a function that can be used in two different ways.

In the first form we give a parameter that is going to be the name of the data we want to retrieve, the name we gave it when we executed the “SetFloat” function we saw before. We do it in the following way.

floatNumber=PlayerPrefs.GetString(“floatDataName”);

The execution of the static method “GetFloat” of PlayerPrefs results in a float value, that’s why it is assigned to the variable “floatNumber” in the above instruction.

The second way is also to give it the name of the data that we use in the execution of “SetFloat” but we also give a default value that will be used in case there is no data saved under that name, this is done in the following way.

floatNumber=PlayerPrefs. GetString(“floatDataName”,0f);

Introduction

In this article we see how to SAVE STRINGS in Unity using the PlayerPrefs class, to store information in the persisten memory, then we see how to load those strings from memory to recover the information. An application of this method could be for example save the player’s name in memory.

How to save a String with PlayerPrefs

To save a String in Unity using PlayerPrefs we’ll use the static method “SetString”, a function that needs two parameters.

The first parameter is a string with the name that will have this variable that we are going to store, this will allow that later we can recover it. The second parameter is the String data that we want to store.

The instruction that will do the saving of the data in Unity would look like this:

PlayerPrefs.SetString(“stringDataName”,stringData);

In this case we indicate the name of the data between quotes because it’s a string, the second parameter we indicate it using a string type object.

How to load a String with PlayerPrefs

To load a String into Unity using PlayerPrefs we’ll use the static “GetString” method, a function that can be used in two different ways.

In the first form we give a parameter that is going to be the name of the data we want to retrieve, the name we gave it when we executed the “SetString” function we saw before. We do it in the following way.

stringData=PlayerPrefs.GetString(“stringDataName”);

The execution of the static method “GetString” of PlayerPrefs results in a string data, that’s why it is assigned to the obhect “stringData” in the above instruction.

The second way is also to give it the name of the data that we use in the execution of “SetString” but we also give a default value that will be used in case there is no data saved under that name, this is done in the following way.

stringData=PlayerPrefs. GetString(“stringDataName”,””);

Introduction

We’re going to see how to save integer numbers in Unity using the PlayerPrefs class, then we’ll see how to load those numbers in Unity. This method will be useful for example to save the score in Unity, if that score is represented by an integer number of course.

How to save an integer with PlayerPrefs

To save an integer in Unity using PlayerPrefs we’ll use the static method “SetInt”, a function that needs two parameters.

The first parameter is a string with the name that will have this variable that we are going to store, this will allow that later we can recover it. The second parameter is the integer value that we want to store.

The instruction that will do the saving of the data in Unity would look like this:

PlayerPrefs.SetInt(“integerDataName”,integerNumber);

In this case we indicate the name of the data between quotes because it’s a string, the second parameter we indicate it using an int type variable.

How to load an integer with PlayerPrefs

To load an integer into Unity using PlayerPrefs we’ll use the static “GetInt” method, a function that can be used in two different ways.

In the first form we give a parameter that is going to be the name of the data we want to retrieve, the name we gave it when we executed the “SetInt” function we saw before. We do it in the following way.

integerNumber=PlayerPrefs.GetInt(“integerDataName”);

The execution of the static method “GetInt” of PlayerPrefs results in an integer, that’s why it is assigned to the variable “integerNumber” in the above instruction.

The second way is also to give it the name of the data that we use in the execution of “SetInt” but we also give a default value that will be used in case there is no data saved under that name, this is done in the following way.

integerNumber =PlayerPrefs.GetInt(“integerDataName”,0);

Description of the problem

A Canvas has been created with one or more buttons to perform an action, when running the game the buttons don’t work when you press them.

This is something that has happened to me on several occasions and can be due to several reasons.

Let’s assume you have a GameObject with the script with the button function defined as public, you have assigned it to the Button component of the Canvas and selected the appropriate function.


Here you have a video tutorial from my channel in which we review different reasons why buttons don’t work in Unity:


Possible Solution #1: No EventSystem component in the hierarchy

When we create a Canvas, a GameObject called “EventSystem” is automatically created, as you can see in figure 1, this GameObject has some components associated to handle the input events (figure 2).

Fig. 1: GameObject EventSystem en la jerarquía.

Fig. 2: Componentes de EventSystem en el inspector.

If we accidentally delete the GameObject EventSystem, the mouse inputs are not detected and the Canvas buttons do not work.

To solve this we can create a second Canvas to make the EventSystem appear, then remove the second Canvas. Or we can simple create an EventSystem.

Possible Solution #2: Button configured as non-interactive

The Button component has a Boolean to disable it, as shown in figure 3 the “Interactable” box.

Fig. 3: The Interactable box is used to disable the button.


Possible Solution #3: Button is not a RayCast target

The button has an Image component for the background image and a Text component for the button text.

Both components have a box with the name “Raycast Target”, what it does is to enable the component to be detected by a ray tracing, the process by which it is detected that some element of the Canvas has been pressed.

In figures 3 and 4 we see the “Raycast Target” boxes. In a button if all the Raycast Target boxes are unchecked, it will not be possible to detect when clicking on those elements.

Fig. 4: Canvas image component.

Fig. 5: Canvas text component

To fix this problem, make sure that at least one Raycast Target box is enabled.

Introduction

In this article we see how to use buttons in Unity to make a certain action happen when you press those buttons. The actions that the button will execute must be defined inside a Script, it has to be a function with public visibility, so that we can assign that function to the On Click event of the button. By pressing a button we can make a simple action like exit the game or a set of actions as complex as we need.

All the IMPORTANT information is summarized in the following TUTORIAL FROM MY YOUTUBE CHANNEL


In case your buttons don’t work:

Graphic interface setup

Before we look at how to use Canvas buttons in Unity let’s create the minimum elements needed to be able to solve the problem.

Canvas

The Canvas is the object in which we can place elements belonging to the graphic interface. To create a Canvas we right click on the hierarchy, go to UI and then click on Canvas, as shown in figure 1.

Fig. 1: Creating a Canvas GameObject in Unity

Before going any further, I recommend to configure the Canvas climbing component according to your needs, this component is assigned to the Canvas and you can see it in the inspector.

In my case I will set the “UI Scale Mode” parameter to “Scale With Screen Size” and indicate a reference resolution of 1920×1080, as shown in figures 2 and 3.

Fig. 2: Canvas Scaler component of a Canvas type object

Fig. 3: Reference resolution for the Canvas climber

Button Object

Now inside the Canvas we create a Button. In the hierarchy, right click on the Canvas object, go to UI and choose the “Button” option, this will add a Button type object to the Canvas.

Fig. 4: Creation of a button object in Unity

Then I will create a panel that will have, as a child, a Text type object, both can be created from the same menu as shown in figure 4.

Fig. 5: The Canvas contains a button and a message. An empty GameObject is created to assign the script with the action.

Fig. 6: Elements of the graphic interface

Create an action for the button

As an example, the action will simply consist of making a sign appear saying that the button has been pressed.

For the button to be able to perform any action when pressed, we need to define it in a Script, so let’s create one by right clicking on the project folder, then go to Create and choose the option C# Script, as shown in figure 5.

Fig. 7: Creating a new script in Unity

We give it a name and then create an empty GameObject and assign the Script to it. In figure 5 you can see that I have created an empty GameObject called “ButtonTest”.

Fig. 8: We created a Script called ButtonTest to program the action of the button when pressed.

Fig. 9: Asignamos el Script al GameObject ButtonTest.

To describe all the actions that a button must do when pressed we create a method or public function within the Script, in figure 10 we see the function called “MyButtonFunction”.

It is VERY IMPORTANT that this function is declared as public, otherwise we cannot assign it to the button.

The function is responsible for incrementing a counter called “buttonPressedCounter” and then writing a message on the screen indicating how many times the button was pressed. The if I had to add it because when the counter is 1, the word “time” goes in singular.

You can try this same example for, remember to add the namespace that is in line 4, “UnityEngine.UI”, otherwise you will not be able to access the Text class.

Fig. 10: Code within the ButtonTest Script.

We go to the inspector and place the Canvas Text component in the script field.

Fig. 11: I assign the text requested by the script to the inspector.

Now we select the button and go to the Button component in the inspector, here we must click on the + button in the OnClick() panel, this will add a new action when an OnClick() event occurs, that is when the button is pressed.

Fig. 12: In the OnClick panel we click on the + button to add a new action.

Fig. 13: A field appears in which we can assign a GameObject.

As we see in figure 13, we have a field where we can assign a GameObject, here we drag from the hierarchy, the GameObject that has assigned the script with the action. As we see in figure 14, we have dragged the GameObject “ButtonTest”.

Fig. 14: We assign the GameObject containing the Script with the action we want the button to perform when pressed.

Then using the drop-down menu, which initially says “No Function”, we’ll first select the Script and then the public function we’ve created for the button, as shown in Figure 15.

Fig. 15: Using the drop-down menu, we choose the function that we want to be executed when the button is pressed.

Each time the button is pressed the poster changes showing the number of times it has been pressed.

Fig. 16: Every time the button is pressed the counter increases and the display changes.

Conclusion

We’ve seen how to use the Canvas buttons in unity. The action must be programmed within a script using a programming method and must be declared as public.

Then we must add a new field in the OnClick() panel of the Button component and assign the GameObject that the script has with the action.

Finally, using the drop-down menu in OnClick(), we must select the function we have defined in the script.

Introduction

In this article we are going to talk about what MonoBehaviour is in Unity, first a practical approach to know in general terms what it is and what functions it fulfils concretely, then we analyze MonoBehaviour from the programming perspective.

What do we need to know about MonoBehaviour to work at Unity?

When we created a new script in Unity, next to the name we gave it appears the word “MonoBehaviour”, this in simple terms is telling us that the script we made will behave like a MonoBehaviour.

This means that Unity will be in charge of executing certain functions automatically. To understand the concept of function in programming I invite you to read this article.

For example the “Start” function will be executed when the GameObject to which we assign our Script appears in the scene (when we start the game or when we instantiate it).

Another function that is automatically executed is “Update”, which is executed before showing each frame of the game, so it is a function that allows us to update the state of the game and produce the dynamic.

These two functions are defined by default when we create a new script in Unity, but there are also other functions that we can define and will be executed automatically at a certain point in the life time of a MonoBehaviour. You can read more about the Update function here.

A useful function that is not defined by default is the “FixedUpdate” function, which is similar to Update, but is executed equispaced in time with a default frequency of 20 milliseconds. This allows us to achieve changes in the game that should occur regularly over time, for example the movement of objects.

Other useful functions are “Awake”, “LateUpdate”, “OnDestroy”, “OnEnable”, “OnDisable”,

What is MonoBehaviour from a programming perspective?

Mono Behaviour is a “Programming Class”, this means that it is a set of variables, objects and functions that perform a certain function.

To know more about what is a class and object in programming you can consult this article.

When we create a new Script in Unity, what we do in the background is to create a new programming class that will have the same name that we gave the Script and that will also extend from MonoBehaviour, that is to say that it will inherit its behaviour from the MonoBehaviour class. That’s why the “Start”, “Update” or ”FixedUpdate” methods are automatically executed when the game starts running.

Introduction

In this article I am going to show the detailed process to access a variable defined in another script in Unity.

The main problem we are facing is the following, yesterday a person came in to ask how to read the defense value of an enemy from the player’s script, a while ago, just before you, someone came to ask how to make a control script access the total amount of coins collected to know if the objective has been achieved. And now you are here with your own project different from the others, with your own scripts to which you have given very particular names.

To solve this problem I will explain the solution USING GENERIC NAMES (such as “ScriptA” and “ScriptB“), you need to understand the procedure for this particular example and then you need to apply what you have understood to your own particular case, i.e. you need to determine who ScriptA and ScriptB are in your particular case.


All the IMPORTANT information is summarized in the following TUTORIAL FROM MY YOUTUBE CHANNEL


Step-by-step procedure to access a variable from another script in Unity

Step 1. Define which scripts are involved

This is a very important step for us to solve the naming problem, your scripts have a very particular name, different from the scripts of the other people who have entered in this article.

Please keep these two points in mind:

  • In this generic example we are going to use two scripts, their names will be “ScriptA” and “ScriptB“.
  • The variable we want to access is located in ScriptB and we are going to access this variable from ScriptA.


Step 2. Ensure that the variable is accessible from an external context

We must make sure that the variable we want to access (in ScriptB) is declared with public visibility, so that this variable can be accessed from an external context, for example from ScriptA.

For example, if the variable we want to access were of type int and its name were “exampleVariable“, in ScriptB we should define it as follows:

public int exampleVariable;

IF THE VARIABLE DOES NOT HAVE PUBLIC VISIBILITY IT CANNOT BE ACCESSED FROM OTHER SCRIPTS

Step 3. Define a data type that allows access to the script where the variable is located

Let’s remember that from ScriptA we want to access ScriptB, therefore inside ScriptA we have to define a ScriptB type variable, this variable will allow us to access from ScriptA to the variables and public functions defined in ScriptB.

We can define this variable as follows:

public ScriptB typeBVariable;


Step 4 (CRUCIAL). Initialize the above variable to point to the component we want to access

I can’t tell you how IMPORTANT this part is, not only to solve this particular problem of accessing a variable from another script, but for ANYTHING WE WANT TO DO IN UNITY. It is about being able to reference a precise object from a Script.

The point is that the variable that we defined in the previous step, if we do not initialize it, has a null value and if we try to use it in this state we will get a Null Reference Exception error in the console.

We have to make sure that the variable has in its interior the appropriate component to which we want to make reference, in this particular case the ScriptB type component.

This can be done in many ways, one of the simplest is to go to the Unity scene and in the ScriptA inspector drag the GameObject that has the ScriptB assigned to the ScriptB type field, in this way we place in the variable that component and we can use it inside the ScriptA.

Step 5. Use the ScriptB type variable to access the variable defined within that script

Once we completed the previous step we now have a ScriptB type variable that contains the reference of the ScriptB type component that is assigned in a GameObject in the Unity scene.

To access a variable defined in the other script we use that ScriptB type variable and with the dot operator we access the variable we are interested in. According to the example given in this step by step we would do it in the following way:

typeBVariable.exampleVariable

The previous expression is the variable that is defined in the other script, this variable can be used inside ScriptA or change its value if we wish.

Exit mobile version
Secured By miniOrange