

Iterating through child GameObjects is a fundamental skill when working with Unity’s hierarchy system. Whether you’re building procedural systems, managing UI elements, or organizing scene objects, understanding how to traverse and manipulate child objects programmatically is essential for efficient game development.
In this tutorial, we’ll explore various techniques for iterating through GameObject children using C#, including how to access child transforms, modify their properties, and apply components at runtime. The examples demonstrated here are part of the GDT Solutions for Unity project, which can be cloned from my GitHub account for hands-on practice.

The complete project demonstrated in this tutorial is available in the GDT Solutions for Unity repository on GitHub. By cloning this repository, you’ll have access to the working scene, scripts, and any future solutions that are added to the collection.
To clone the project:
This approach ensures you always have access to the latest examples and solutions as they are published.
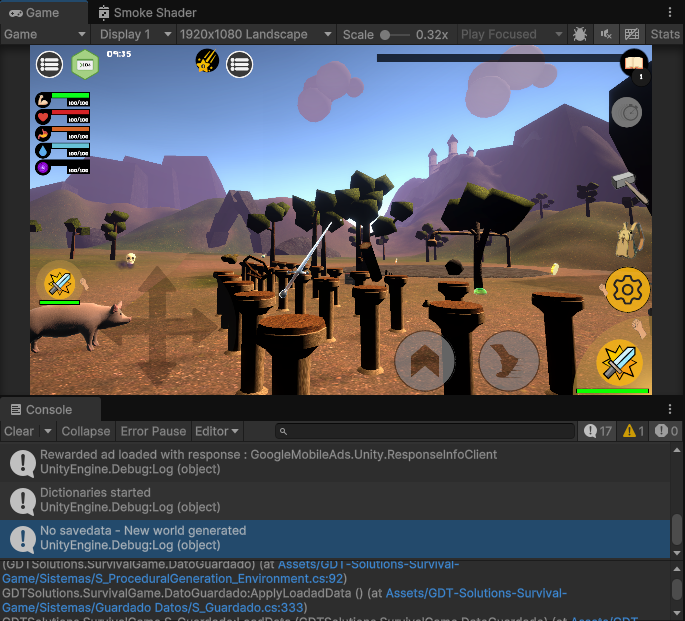
The demonstration scene has been prepared with a simple hierarchy structure. An empty GameObject serves as the parent container, holding multiple child objects—standard cube primitives positioned at the same location. Additionally, a separate GameObject contains the script that will be used to iterate through these children.
A UI button has been connected to trigger the iteration function, with console output confirming when the button is pressed. This setup allows for testing and visualization of the iteration process in real-time.
Before children can be accessed, a reference to the parent GameObject must be established. This is accomplished by defining a public GameObject variable in the script:
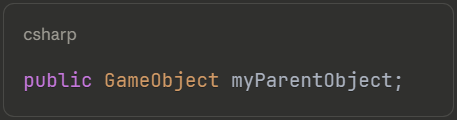
Alternatively, a Transform variable can be used, since child objects are accessed through the Transform component. However, using a GameObject reference is equally effective, as every GameObject in Unity has an associated Transform component that can be accessed directly.
Once the variable has been defined, the parent GameObject is assigned through the Inspector by dragging the target object into the exposed field.
To keep the code organized, the iteration logic is placed in a separate function called IterateThroughChildren(). This function is then called when the button is pressed, maintaining clean separation of concerns.
For more information on organizing code across multiple scripts and calling functions between them, check out our guide on how to call functions from another script in Unity.
The first step in traversing child objects is determining how many children exist. This is achieved using the Transform component’s childCount property:

This value can be displayed in the Inspector for verification purposes by making it a public variable temporarily. When tested, the variable correctly reflects the number of children (10 in this example).
With the child count established, a standard for loop is used to iterate through each child:
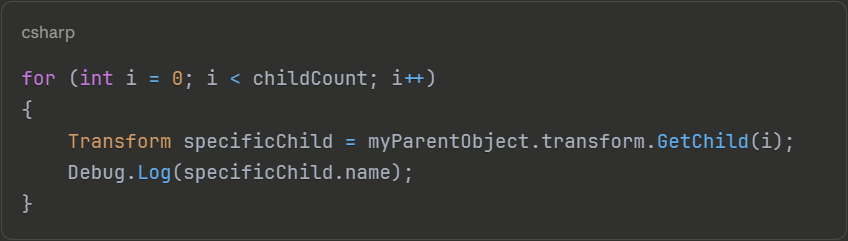
The GetChild() method retrieves the Transform of the child at the specified index. By storing this reference in a local variable, various operations can be performed on each child object.
When executed, the names of all child objects are printed to the console, confirming that the iteration is working correctly.
Once the basic iteration structure is in place, numerous modifications can be applied to each child object.
Child objects can be renamed programmatically using the name property, which is both gettable and settable:

Note that i + 1 is used because loop indices start at zero, but human-readable numbering typically starts at one. When executed, all children are renamed sequentially.
Children can be repositioned using their Transform component. For example, objects can be aligned in a straight line with consistent spacing:

By exposing these values as public variables, the positioning can be adjusted through the Inspector without modifying code. This approach provides flexibility when fine-tuning object placement.
Visual properties can also be modified during iteration. To assign random colors to each child, the MeshRenderer component is accessed:

This line accesses the MeshRenderer, retrieves its material, and sets a random HSV color. If multiple materials are assigned to a renderer, alternative properties would need to be used, but for single-material objects, this approach works perfectly.
Each time the iteration function is called, new random colors are generated and applied to the children.
More complex logic can be implemented using conditional statements within the loop. For instance, children can be displaced vertically based on whether their index is even or odd:
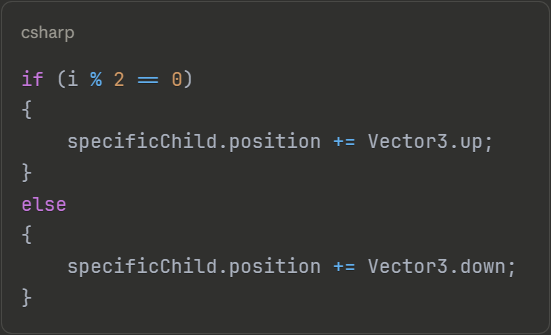
The modulo operator (%) determines whether a number is even or odd by calculating the remainder when divided by two. Even-indexed children are moved upward, while odd-indexed children are moved downward.
Beyond modifying existing properties, components can be added to child objects during iteration. This is particularly useful for creating dynamic behaviors.
A Rigidbody component can be added to each child, enabling physics simulations:

The AddComponent<>() method returns a reference to the newly added component, which can be stored in a variable for further configuration.
With the Rigidbody reference available, its properties can be modified immediately:
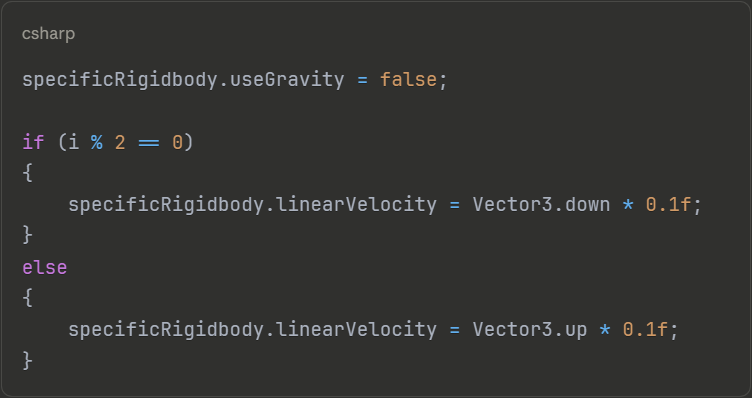
In this example, gravity is disabled and linear velocity is applied directly. Even-indexed objects are given downward velocity, while odd-indexed objects move upward, creating an interesting visual effect.
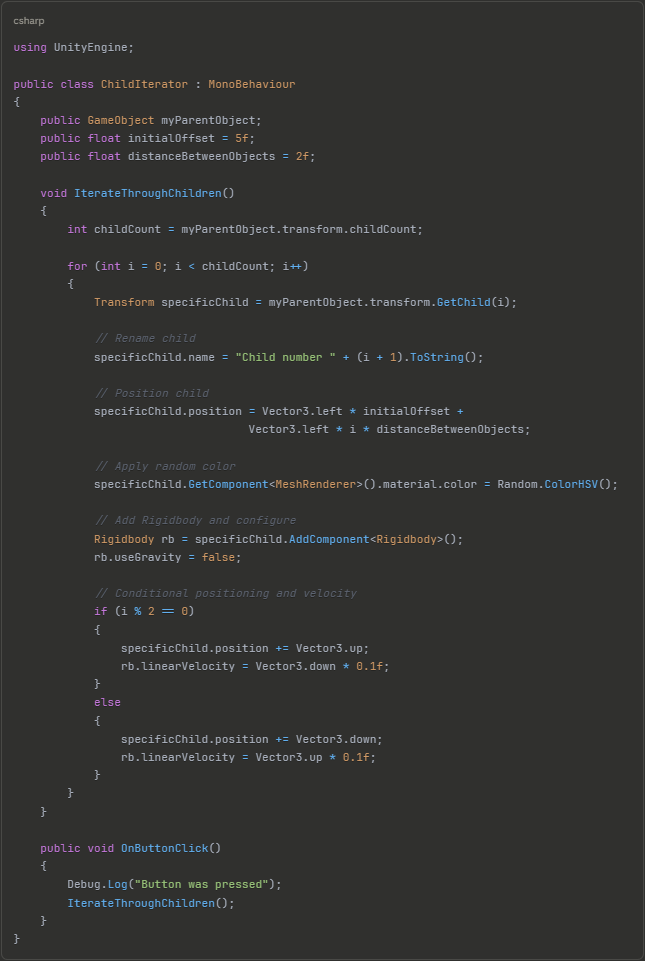
Here’s a comprehensive example combining multiple techniques:
When working with GameObject hierarchies in Unity, several important concepts should be kept in mind:
transform.childCount propertyAddComponent<>() can be captured for immediate configurationIterating through child GameObjects is a powerful technique that enables dynamic scene manipulation, procedural content generation, and efficient batch operations on multiple objects. By combining basic iteration with Transform manipulation, component access, and runtime component addition, complex behaviors can be created with relatively simple code.
The techniques covered here form the foundation for more advanced systems, including object pooling, procedural level generation, and dynamic UI management. Experimenting with these concepts in the provided project will help solidify understanding and reveal additional creative possibilities.
If you found this tutorial helpful, consider exploring the other solutions in the GDT Solutions for Unity project, and feel free to experiment with the code to create your own variations and effects.
Cooldowns are essential mechanics in game development that prevent players from spamming certain actions. Whether it’s a power movement, a healing ability, or any special action, implementing a cooldown system ensures that players must wait a certain amount of time before using an action again.
In this tutorial, you’ll learn how to create a cooldown timer in Unity using C#, implementing a complete system that controls action frequency.

Before the cooldown system can be implemented, a scene with a couple of buttons, text elements, and an audio source should be prepared. For this example, a sound will be played when a button is pressed, and this action will be limited using the cooldown system.
A new C# script called “CooldownExample” should be created. Once Unity has finished compiling, an empty game object named “Script_Cooldown” can be created to hold this script.
Two main variables need to be defined in the script to handle the audio functionality:

The first variable will hold the reference to the audio source component that will play the sound. The second variable will contain the audio clip to be played.
Since these variables are defined as public, they will appear in the Inspector. The audio source game object can be dragged from the hierarchy into the myAudioSource field. For the testSound variable, a sound from the project’s library can be selected (in this case, “WindowShutter” is used).
The action that will be limited by the cooldown needs to be defined. A generic function called PerformAction() can be created for this purpose:
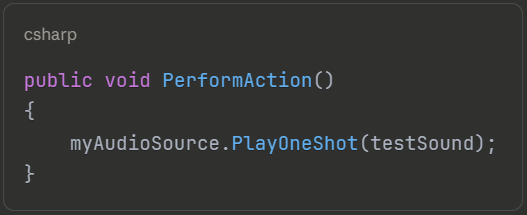
This function uses the audio source variable and calls the PlayOneShot() method, passing the test sound as a parameter. When this function is called, the sound will be played.
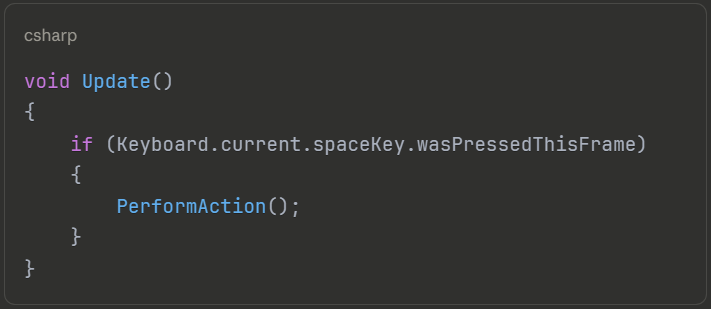
The action can be tested in two ways. First, in the Update function, the spacebar input can be read:
Second, the action can be linked to a UI button. The button should be selected, and in the OnClick event, a new event should be added. The game object containing the script should be dragged into the event field, and the PerformAction() function should be selected from the dropdown menu.
This demonstrates one way to call functions between different game objects in Unity. For more advanced scenarios where you need to call a function from another script, such as triggering actions across multiple systems, additional techniques may be required.
When the scene is played, the sound can be triggered either by pressing the button or by pressing the spacebar. However, at this point, the action can be spammed without any limitations.
To create a cooldown timer in Unity, two float variables are needed:
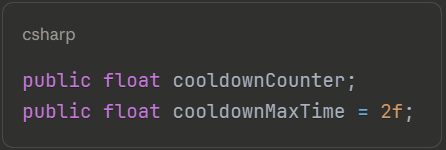
The cooldownCounter variable will be used to count the time, while cooldownMaxTime defines how long the player must wait before the action can be performed again. An initial value of 2 seconds can be assigned, though this can be modified from the Inspector later.
The action should only be performed if the cooldown counter is less than or equal to zero. The PerformAction() function can be modified as follows:
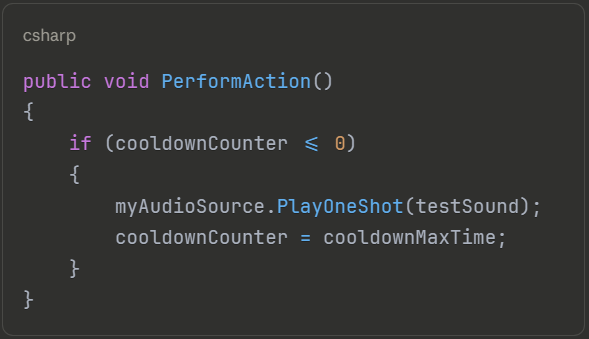
When the action is performed, the cooldownCounter is set to cooldownMaxTime. This prevents the action from being performed again until the counter decrements back to zero.
The cooldown counter needs to be decremented over time. This can be done in the Update function:
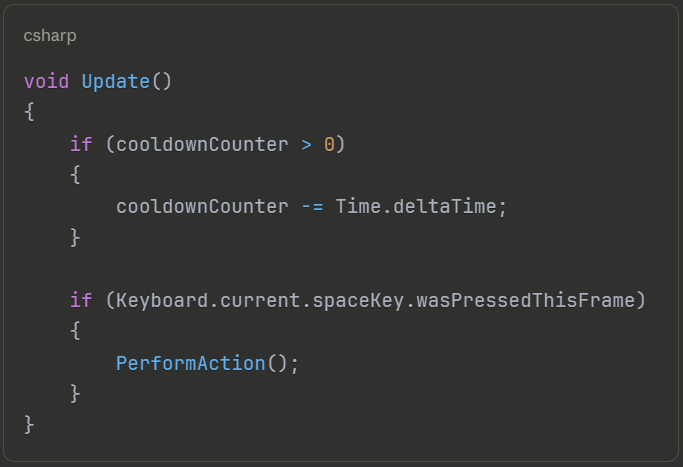
By subtracting Time.deltaTime from the counter, the variable will be decremented by one unit per second. This decrementing only occurs when the counter is greater than zero.
When the scene is played, the cooldown counter starts at zero. When the button is pressed, the counter is initialized to the max time value and decrements over time. The action cannot be performed again until the counter reaches zero. The cooldown time can be adjusted in the Inspector (for example, to 5 seconds) to test different durations.
To provide visual feedback to the player, a text element can be used to display the cooldown status. A new variable should be defined:
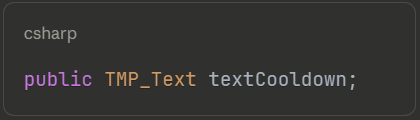
This variable needs to be assigned in the Inspector by dragging the text element into the field.
Two different messages should be displayed: “Ready” when the action can be performed, and a loading percentage while the cooldown is active.
The Update function can be modified to handle the text display:
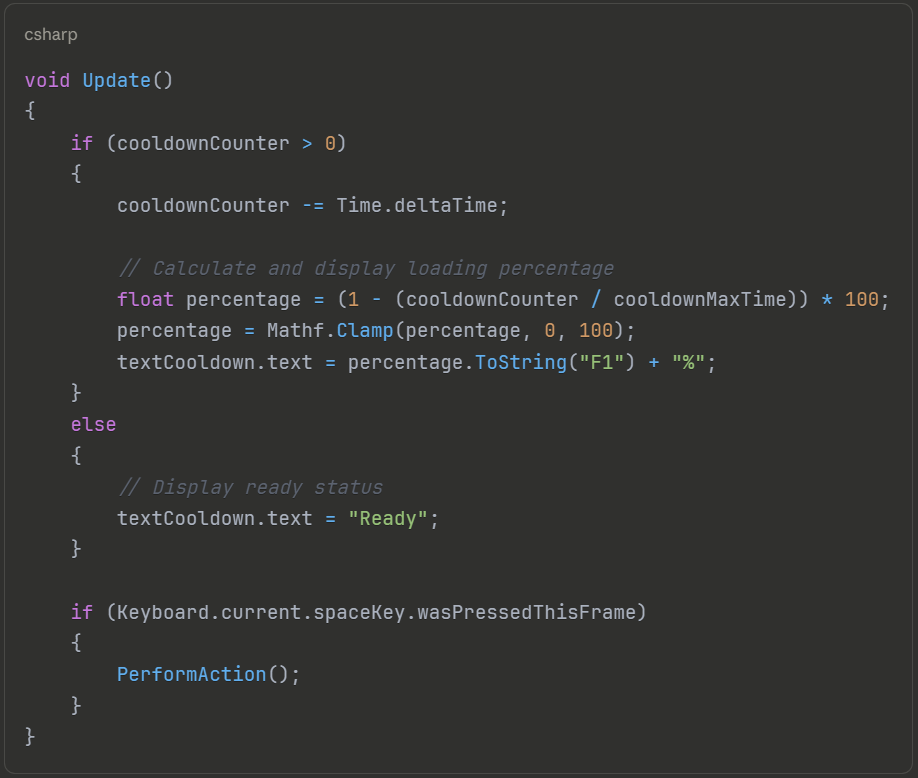
The loading percentage is calculated using a mathematical formula. When the cooldown counter is divided by the cooldown max time, a value of 1 is obtained when they’re equal, and 0 when the counter reaches zero. However, since the counter is decrementing, the opposite is needed. By calculating 1 - (cooldownCounter / cooldownMaxTime), a variable that starts at zero and goes to one is obtained. This is then multiplied by 100 to get a percentage value.
The percentage is clamped between 0 and 100 using Mathf.Clamp() to ensure it stays within valid bounds. Finally, the value is converted to a string with one decimal place using ToString("F1"), and the percentage sign is appended.
Before the scene can be tested, the text element must be assigned to the textCooldown variable in the Inspector. If this step is skipped, a null reference exception will be thrown because the script will attempt to write to an empty text variable.
Once the text has been properly assigned and the scene is played, the text will display “Ready” initially. When the button is pressed, a percentage will be shown that increases from 0% to 100% as the cooldown progresses. Once the cooldown completes, the text returns to “Ready,” indicating that the action can be performed again.
You’ve now successfully learned how to create a cooldown timer in Unity that prevents action spam and provides visual feedback. This system prevents action spam by requiring players to wait a specified amount of time between uses. The implementation includes both functional cooldown logic and visual feedback through a percentage display.
This cooldown system can be adapted for various game mechanics such as special abilities, healing powers, weapon attacks, or any other action that needs to be limited by time. The cooldown duration can be easily adjusted through the Inspector, and the visual feedback can be customized to match the game’s UI style.
The complete project can be found on GitHub, where it can be cloned and used as a reference for implementing similar systems in your own Unity projects.
While this tutorial focuses on creating a cooldown timer within a single script, you may want to learn how to call a function from another script to create more complex game systems where different scripts communicate with each other.
In Unity game development, scripts are essential for adding behavior to game objects. Often, you’ll need to communicate between different scripts—such as calling a function from one script in another. This tutorial walks you through the process step by step, explaining key concepts like references, instances, and visibility. By the end, you’ll understand how to call functions between scripts.

Start by creating two new C# scripts in your Unity project:
Open both scripts in your code editor (e.g., Visual Studio).
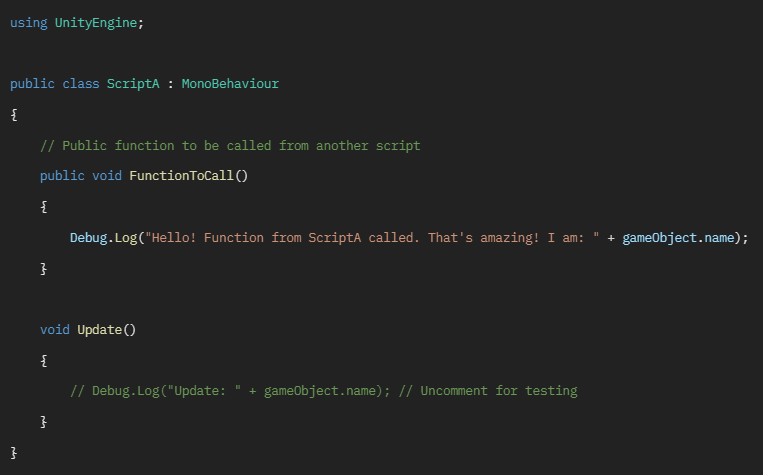
In ScriptA.cs, define a simple function that we’ll call from ScriptB. We’ll also add some logging in the Update method to demonstrate script execution. In the image below we define a function called “FunctionToCall”, which is the function that is going to be called from the other script.
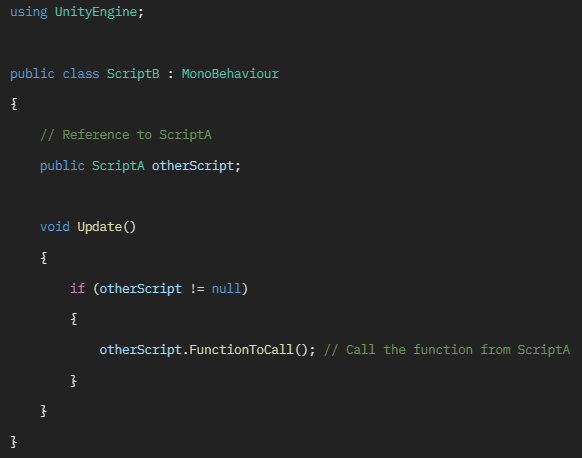
In ScriptB.cs, we’ll declare a reference to ScriptA and call its function.
Scripts in Unity don’t run on their own—they need to be attached to GameObjects in the scene to create instances. Each instance is independent.
Example: If you have two GameObjects with ScriptA attached (e.g., “Main Camera” and “Enemy”), calling FunctionToCall() requires specifying which instance to target. Unity won’t guess—you must provide a reference.
If you try calling the function without initializing otherScript, you’ll get a Null Reference Exception. This means the variable is empty (null) and points to nothing.
To fix the null reference:
This assigns the specific instance of ScriptA to the variable.
Duplicate ScriptA_Object and rename it (e.g., “John”).
This demonstrates targeting specific instances. In a game, this is crucial—for example, applying damage only to the hit enemy, not all enemies sharing the same script.
Calling functions between scripts in Unity is straightforward once you grasp instances and references. Start with the code-level setup (defining public functions and variables), then handle the Unity-side initialization. This technique is foundational for building interactive games, like enemy AI or UI interactions.
Experiment in your project, and remember: Practice with multiple instances to solidify the concept. If you found this helpful, explore more Unity tutorials on inter-script communication!
We’ve all been there—you start a new Unity project and hastily name it something like “New Unity Project” or “GameTest1”, only to realize later that the name no longer reflects your vision. Whether it’s for better organization, professionalism, or just personal preference, renaming your project is a common necessity.
However, renaming a Unity project isn’t as simple as changing the folder name. It requires careful steps to avoid broken references, missing assets, or engine errors. In this article, we’ll walk through the correct way to rename your Unity project without losing your work or causing technical issues.
(Tip: Always back up your project before renaming! For example using GitHub)

Renaming your Unity project folder will close all scripts currently open in Visual Studio as their paths become invalid. Be sure to:
To do this, the simplest way is to navigate to your project in File Explorer (or Finder on Mac), then copy and paste the entire project folder to the desired location.
To remove a project from Unity Hub without deleting its files:
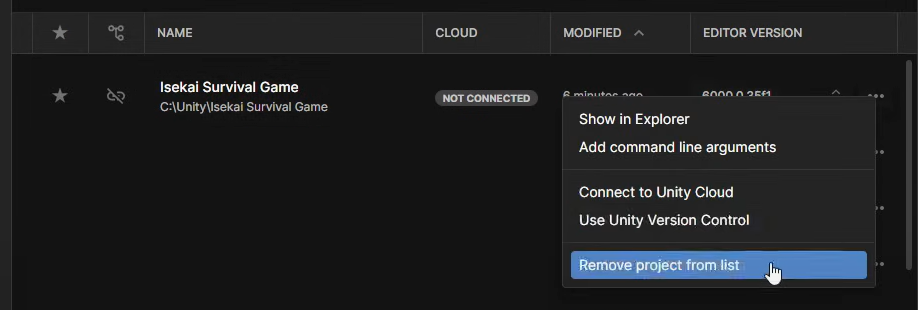
Important: This action only removes the project from Unity Hub’s interface—your project files remain untouched on disk. To fully delete the project, you’ll need to manually remove its folder from your computer.
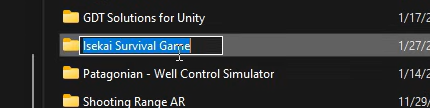
To rename your Unity project, simply right-click the project folder in File Explorer (Windows) or Finder (Mac), select Rename, and enter the new name.
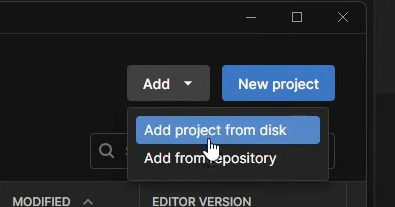
To add your renamed project back to Unity Hub, click the Add button (see Figure 3), select Add project from disk, and navigate to the renamed project folder in File Explorer/Finder.
Once added to Unity Hub, your renamed project will appear with its new name—simply open it to continue working with all your assets and scripts intact.
In many games, you might need an enemy, follower, or NPC to chase the player or a target object. Unity provides several ways to achieve this, and in this article, we’ll focus on one simple yet effective method: the Vector3.MoveTowards() function.
This approach allows you to smoothly move one GameObject toward another at a controlled speed, making it ideal for basic AI movement, following mechanics, or even simple pathfinding. We’ll break down how it works, how to implement it in a script, and how to customize its behavior.

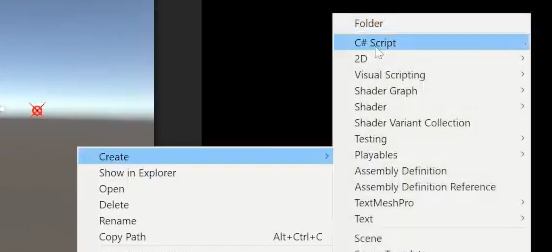
To begin, create a new C# script in Unity by right-clicking in the Project Window and selecting Create > C# Script (See Figure 1). Name it (e.g., ChaseTarget), then double-click to edit it in your code editor.

Next, drag the script from the Project Window onto an empty GameObject in your scene’s Hierarchy. This assigns the script as a component, allowing you to define movement logic (like MoveTowards) that will execute during gameplay.
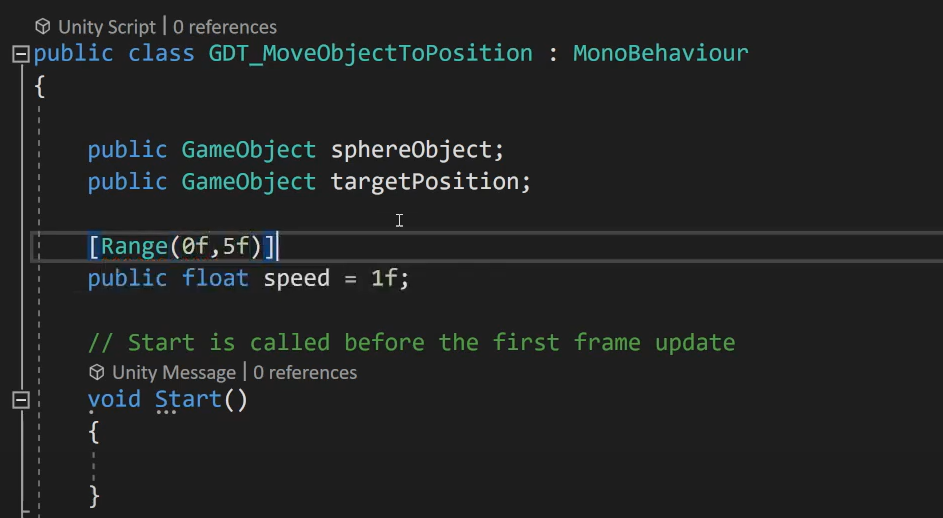
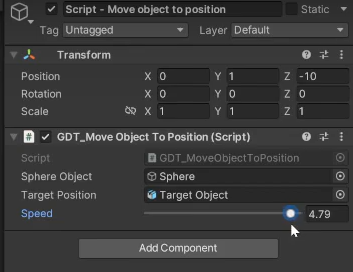
In your script, define two public GameObject variables to reference the moving object and its target (See Figure 3) and a float variable for the speed of the chasing object:
public GameObject sphereObject;  // The object that will move (e.g., a sphere)
public GameObject targetPosition; // The target to chase
public float speed = 1f; //The speed of the chasing object
After saving the script, return to Unity’s Editor (See Figure 4 for visual reference):
sphereObject and targetPosition.Now your script can access these objects at runtime! (Tip: Mark variables as [SerializeField] if you prefer private fields to appear in the Inspector.)
To move the sphereObject toward the targetPosition, use Vector3.MoveTowards() inside an update method (e.g., Update(), FixedUpdate(), or LateUpdate()). Add the speed variable to control movement and multiply it by Time.deltaTime for frame-rate independence:
void Update()
{
    if (targetPosition != null)
    {
        sphereObject.transform.position = Vector3.MoveTowards(
            sphereObject.transform.position,
            targetPosition.transform.position,
            speed * Time.deltaTime
        );
    }
}
Update(): Standard for most movement (runs every frame).FixedUpdate(): Preferred for physics-based movement (syncs with physics steps).LateUpdate(): Useful if movement should follow other calculations (e.g., camera tracking).targetPosition exists to avoid NullReferenceException.Video playback is a powerful tool in game development, used for cutscenes, tutorials, background visuals, and immersive storytelling. In Unity, playing videos can enhance narrative depth, provide in-game instructions, or create dynamic environments—but it requires the right setup. Whether you’re using Unity’s built-in VideoPlayer component or integrating external assets, this guide will walk you through the essentials of seamless video integration in your game.

The Video Player component in Unity allows you to play video files directly in your scene, whether for cutscenes, backgrounds, or interactive elements. To set it up:

The Video Player component supports several common video file formats, including:
.mp4) – Recommended for broad compatibility.mov) – Common for macOS exports.webm) – Efficient for web-based projects.avi) – Less optimized but widely used(Refer to Unity’s documentation for platform-specific details.)

To render a video onto a dynamic surface (e.g., in-game screens or custom materials), set the Video Player’s Render Mode to Render Texture:
Assets > Create > Render Texture.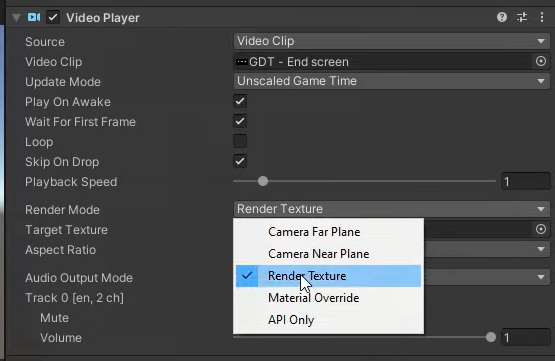
Why Use This Mode?
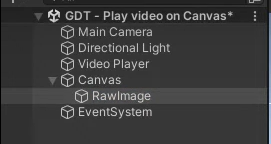
Now, the video will play directly on the UI!
In this tutorial, we’ll explore the straightforward methods to change TextMeshPro text colors in Unity via scripting. Whether you’re looking to highlight important information, indicate status changes, or simply add visual flair to your game’s UI, these techniques will help you implement color changes efficiently in your Unity project.

When using TextMeshPro, you’ll likely work with one of the two component types shown in the images below: either a TextMeshPro – Text (UI) component that displays on your user interface (which must be placed inside a Canvas), or a TextMeshPro component that renders in world space like a 3D model. Fortunately, the color-changing method we’ll cover works effectively for both component types.
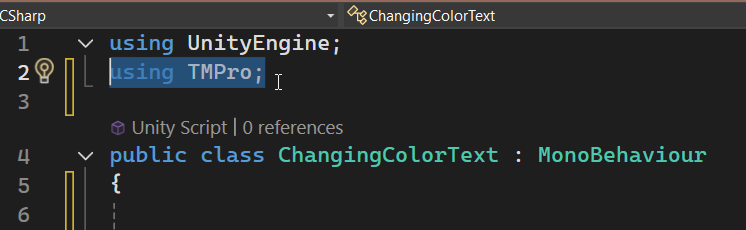
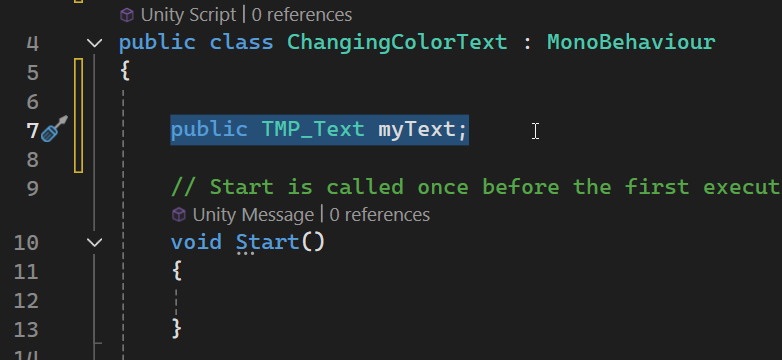
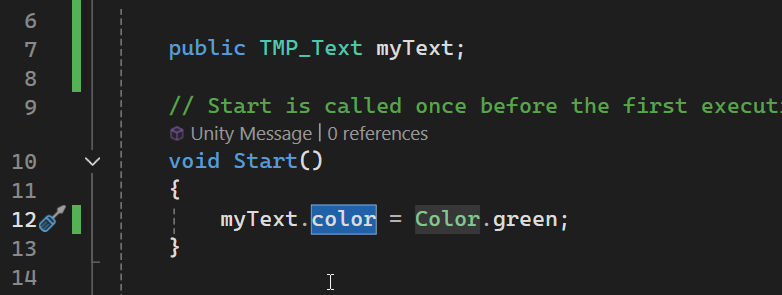
For changing color text in Unity at runtime, create a script that executes when your game runs. Add ‘using TMPro;’ at the top to import the TextMeshPro namespace, then declare a TMP_Text variable before your Start function—for example, ‘public TMP_Text myText;’ (though you can choose any variable name). This steps are shown below.
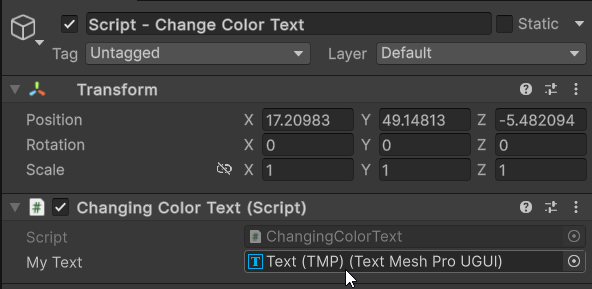
After attaching your script to a GameObject, you’ll notice your variable appears in the Inspector but shows ‘None’ in the field. To proceed with changing color text in Unity, you need to initialize this variable. Simply drag the TextMeshPro component you want to modify into the field in the Inspector, as demonstrated in the images below.

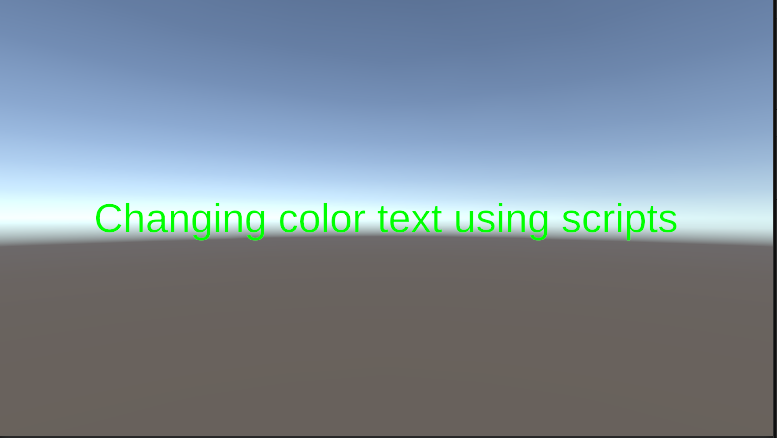
With your variable initialized, you can now change text color in Unity through your script by accessing the color parameter with the dot operator. Add ‘myText.color = Color.yourChosenColor;’ in the Start method, and when you press Play, you’ll see the text immediately display in your new color, as illustrated in the images below.
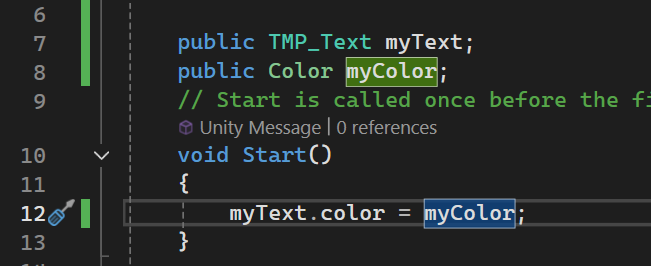
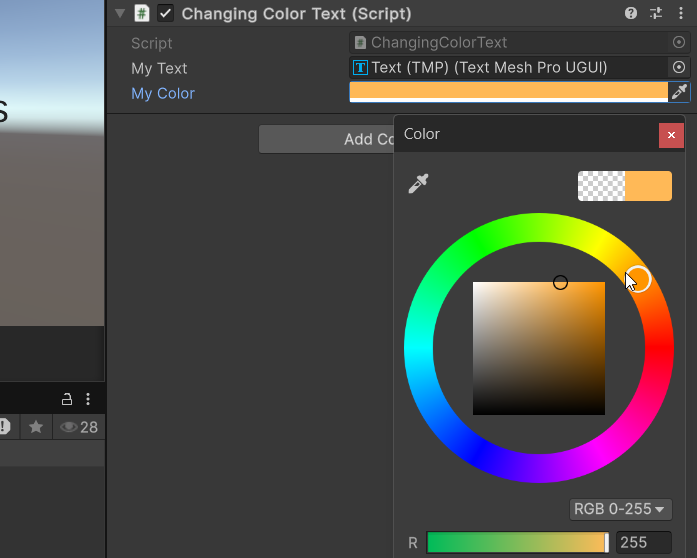
For more flexibility, define a public Color variable in your script, which will allow you to select your preferred text color directly through the Unity Inspector, as demonstrated in the images below.


Texturing a 3D model is a crucial step that brings your design to life. It involves adding colors and intricate details that enhance the visual appeal of your work. In this guide, we will explore how to texture a 3D model in Blender using images as a primary resource for colors and textures.

Before diving into the texturing process, it’s essential to make sure your 3D model is properly prepared. This includes ensuring that your model’s UV mapping is correctly set up.
UV mapping is a process that translates the 3D surface of your model into a 2D surface, allowing you to apply textures accurately.
You can access the UV Editing workspace in Blender to adjust and optimize the UV layout.
To quickly create a UV Map for your 3D model you can follow this steps:
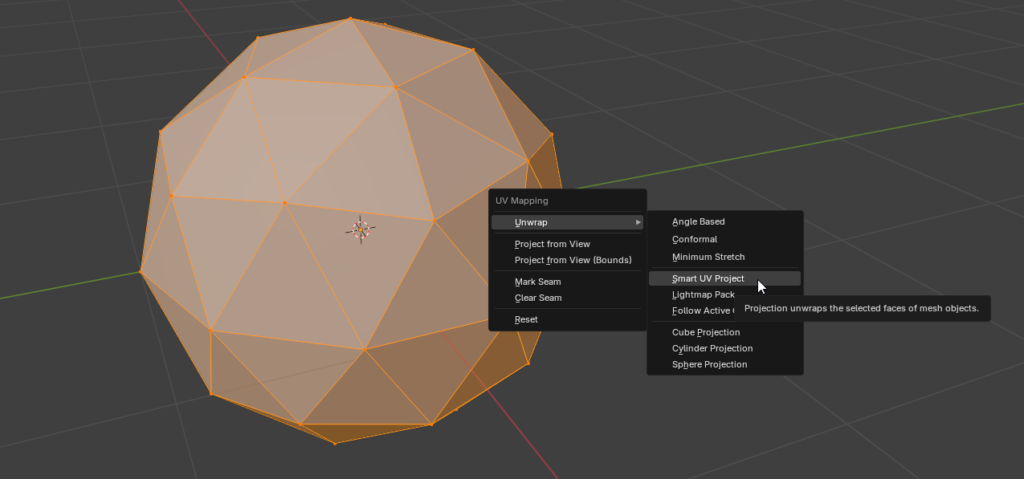
With your UV map in place, you can start applying textures. Blender allows you to use image textures that can be imported into your project. To do this, navigate to the Shader Editor and create a new material. Add an Image Texture node and load the image you wish to apply. Connecting this node to the Base Color of your material will display the image on your model. Adjust the mapping settings in the Image Texture node to fit your model correctly.
As you work on how to texture a 3D model in Blender, remember to tweak various settings such as scaling, rotation, and placement to get the desired look. Utilizing additional nodes for bumps and specularity can also enhance the realism of your textures.
You have reach the end of the article, if it was useful consider subscribing to the channel!
Bending 3D models in Blender can transform your designs into dynamic, organic shapes. One of the most effective tools for achieving this is the Proportional Editing feature. This tool allows you to manipulate vertices, edges, and faces while maintaining a smooth transition across nearby elements. It’s essential for achieving that natural look in your models.
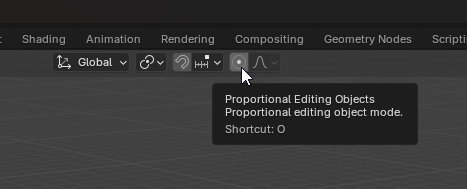
To start bending your model, you first need to activate Proportional Editing. You can do this easily by selecting your object, entering Edit Mode (press Tab), and then clicking the circle icon in the toolbar or simply pressing the ‘O’ key. A highlighted circle will appear around your selected vertex, indicating the area of influence you can manipulate. This circle can be adjusted using your mouse wheel, increasing or decreasing the size of the affected area.

With Proportional Editing activated, it’s time to bend your model. Select the vertex you want to move and drag it to your desired location. As you move the vertex, you’ll notice that surrounding vertices will also adjust based on the influence of the Proportional Editing tool, you can use the mousewheel while moving the element to modify the influence of the proportional editing tool. This tool is not limited to one vertex, you can select multiple vertices, edges or faces and the bending will be calculated using all those elements.
This technique is ideal for creating curves or bending areas of your model without compromising the overall shape.
If you need to achieve more complex curves, consider experimenting with the different falloff settings available (such as Smooth, Sphere, or Root). Each will provide a unique effect on how the surrounding geometry interacts as you make your adjustments. This versatility is key in getting the precise look you want.
In conclusion, mastering the Proportional Editing tool in Blender offers you incredible flexibility in bending 3D models. With practice, you can create intricate and engaging designs that elevate your projects. Start experimenting with this powerful tool today, and watch your creative possibilities expand.
You have reach the end of the article, if it was useful consider subscribing to the channel!
In this artcile we see how to show the current system time in Unity in a text from the user interface.
This could be useful for example to have a VR smartwatch and display the system time in a world space Canvas attached to that smartwatch.
This solution is in the “GDT Solutions for Unity” GitHub repository


This article is about how we can read the system time in Unity and showing it on a text in the Canvas
First of all let’s create a new script and also create an empty GameObject to assign the script, as shown in the following images


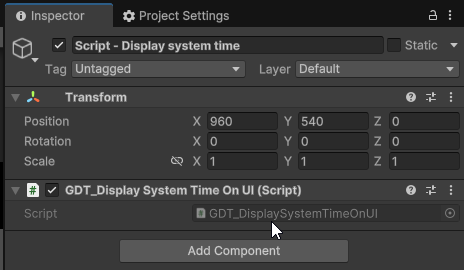
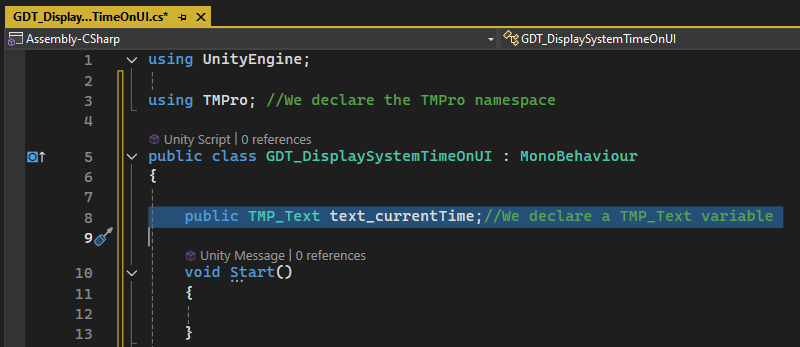
Inside the script declare the TMPro namespace and define a TMP_Text variable, call it for example “text_currentTime“, as shown in the lines 3 and 8 of the following image.
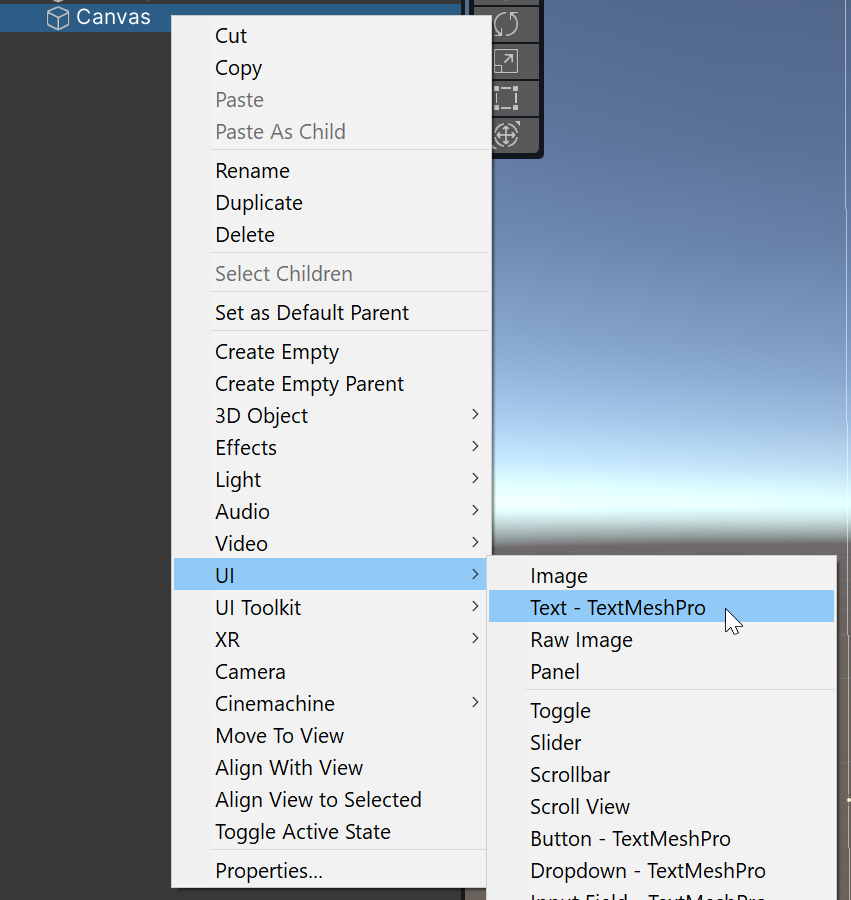
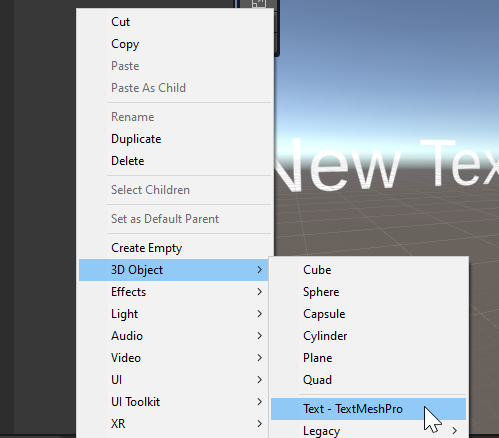
In the hierarchy, inside your Canvas, create a new Text Mesh Pro object. If you don’t have a Canvas Unity will create one for you.

In case you need it, here is a video on how to work with Text Mesh PRO, you may want to check it, if it’s the first time using it.
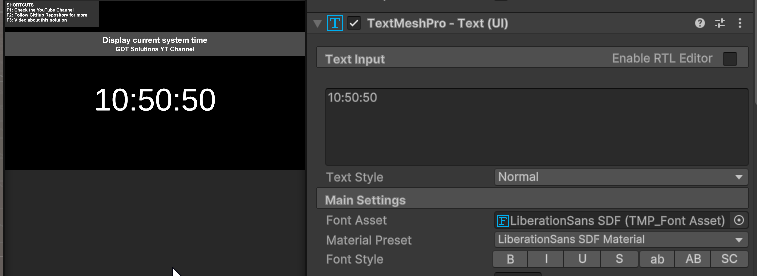
Select the GameObject object that has the script, take the Text Mesh Pro object and drop it in the field in the inspector that corresponds to the TMP_Text variable we defined. By doing this, now we have the reference of the text object in our script and we can modify it by code.

Inside our script, let’s add the “System” namespace and define a “DateTime” type variable, call it for example “currentTime“.
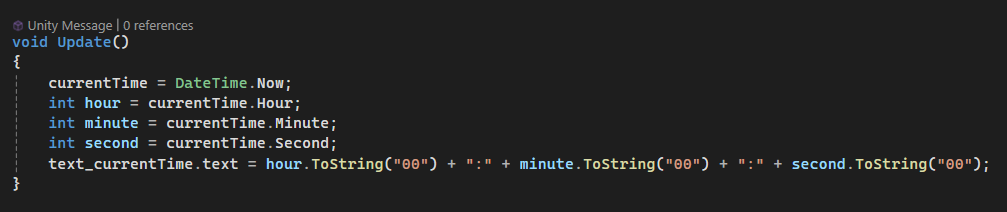
Inside Update we are gonna assign to that variable, the following instruction (pay attention to uppercase characters):
currentTime = DateTime.Now;
We can use this currentTime variable to get information about the current time, for example which hour it is, the current minute and the current second. So let’s define a couple local int variables to temporarily assign those values.
int hour = currentTime.Hour;
int minute = currentTime.Minute;
int second = currentTime.Second;
Now that we have all the information we need, we can show the system time in our Unity game in the user interface using the TMP_Text variable we defined, and we can do so in the following way:
text_currentTime.text = hour.ToString(“00″)+”:”+minute.ToString(“00”)+”:”+second.ToString(“00”);
Hit play and you should be seeing that it is working.
This solutions works exactly the same if you want to display the current time on a VR smartwatch, the difference is that you probably will need to configure the Canvas as World Space, assign your VR camera in the canvas field in the inspector and attach the Canvas object as a child of the Hand anchor of your VR controller.
You have reach the end of the article, if it was useful consider subscribing to the channel!
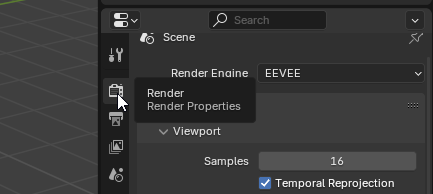
In this article we see how to draw the outline on the edges of 3D models in Blender, using the Freestyle tool within the Render Properties.
You can configure the thickness of the outline and apply modifiers to it, you can also choose the color of the outline or use a modifier, for example a random noise generetor that allows you to randomly choose between different colors.

Let’s start with a basic 3D model with a camera that is pointing towards it, if we press F12 we will get a render of the scene from the prespective of our camera, as we can see in the following two images.

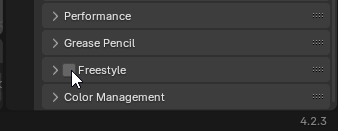
Now, we can easily add an outline to our 3D model going to the render Properties by activating the freestyle checkbox.
If we make a render again we will see that the outline is being generated on the edges of our 3D model.

You can quickly modify the thickness of the outline using the thickness variable inside the Freestyle section:

And in the View Layer tab you will find several options to apply to the outline, for example you can where to draw the outline along with other parameters like color and effects.
For detailed information check the video above.

You have reach the end of the article, if it was useful consider subscribing to the channel!
In this article, we’ll explore how to import a custom font into Unity and generate a Text Mesh Pro (TMP) Font Asset using the Font Asset Creator. By following these steps, you can easily customize the font style of your TMP text, enhancing the visual appeal of your Unity projects.

Fully supported formats for custom fonts and Text Mesh PRO are:
TrueType Fonts (.ttf)
OpenType Fonts (.otf)
Other Formats: While Text Mesh Pro does not directly support other formats like Web Open Font Format (.woff / .woff2), you can convert these into .ttf or .otf if needed before importing them into Unity.
First of all you will need to import the font files in your Unity project, you can do that by taking the font files and dragging to a folder inside Assets.
To use custom fonts with Text Mesh Pro you need to generate a font atlas, which is done through the Font Asset Creator in Unity.
This process involves creating a texture atlas with the characters from the font file, which is then used by Text Mesh Pro for rendering text smoothly at various sizes.
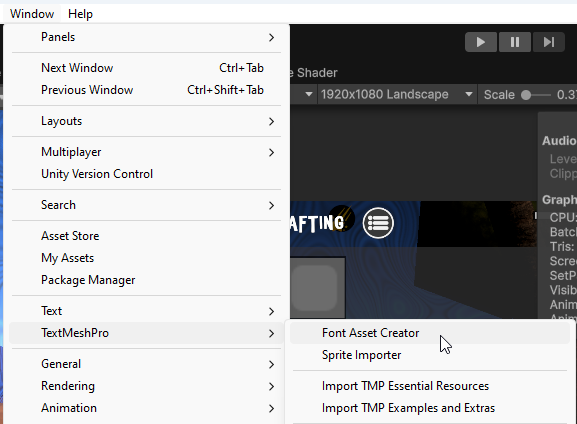
To generate the font atlas in Unity go to the Window tab, then to TextMesh Pro and then Font Asset Creator, as you can see in the following image.
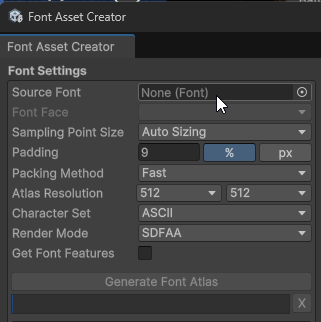
In the Font Asset Creator window you have a field called “Source Font” where you can drag your font file.
Once you drag the font you click on “Generate Font Atlas”.
The process will take a momento, when it’s done you save the file in your project folder.
The resulting Asset is a file that you can drag and drop it in to the font field from any TextMesh PRO component in the inspector. That will apply the custom font to your text
You can get Font files from different websites like DaFont or 1001Fonts.
You have reach the end of the article, if it was useful consider subscribing to the channel!