
Introduction
In this article, we’ll explore how to change the skybox in Blender by applying a texture to your scene’s background. We’ll specifically use an HDR texture as an environment map, which serves a dual purpose: creating a visually appealing backdrop and generating realistic lighting. HDR environment textures are particularly valuable for achieving photorealistic renders, as they project directionally varied colors and intensities onto your 3D models. This environmental lighting naturally highlights object geometry and creates compelling reflections, especially on materials with reflective properties.
For a visual breakdown of this subject, you may find my video discussion helpful:
First Step – Get HDR texture to use as a background texture
To modify the Skybox of the scene in Blender we will need special textures, one of the ones that can be used are the HDR (High Dynamic Range) textures, they are textures that have more information than the ones we commonly use and they are useful to illuminate scenes, because you can increase or decrease their intensity and the texture responds properly.
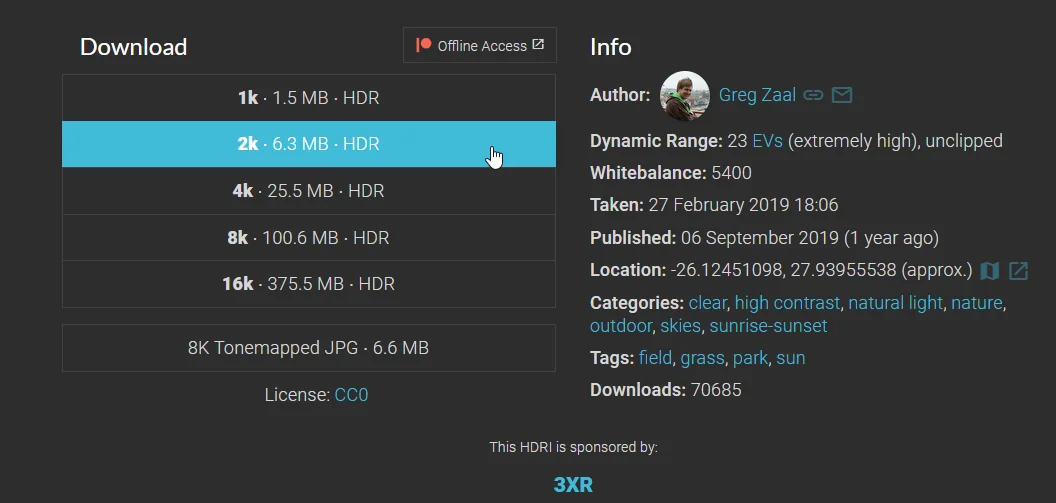
I usually download textures from the Poly Haven website, they have a quite interesting gallery with this kind of images, the downloads are free and you can also choose between qualities ranging from 1K to 8K textures, as you can see in figure 2.
Poly Haven

Next steps to change the Sky texture in Blender
Next we are going to see how to modify the background texture in Blender in two simple steps.
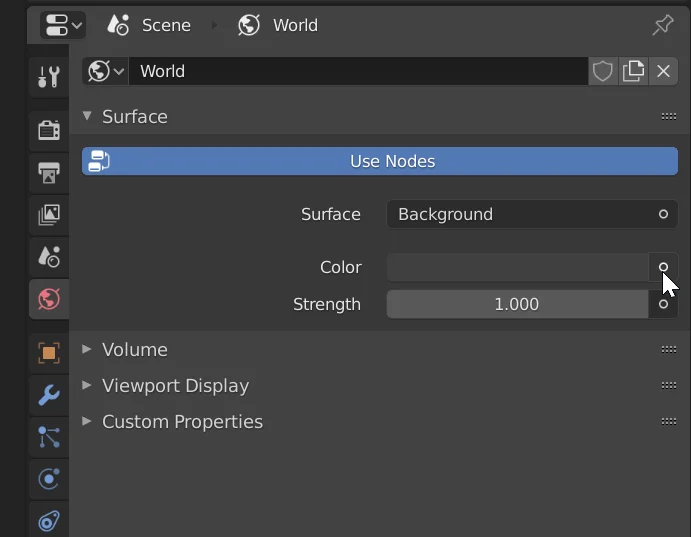
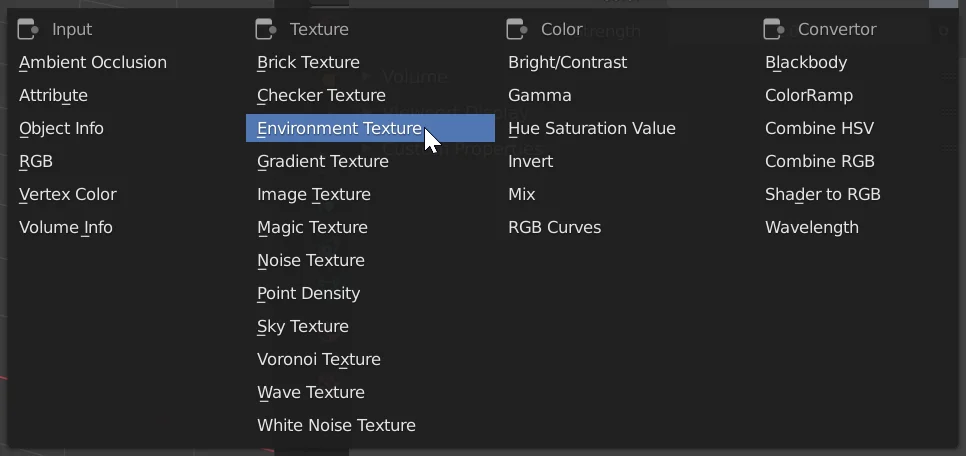
1. Go to the “World Properties” tab and modify the color node, choosing the “Environment Texture” option, as shown in figures 3 and 4.
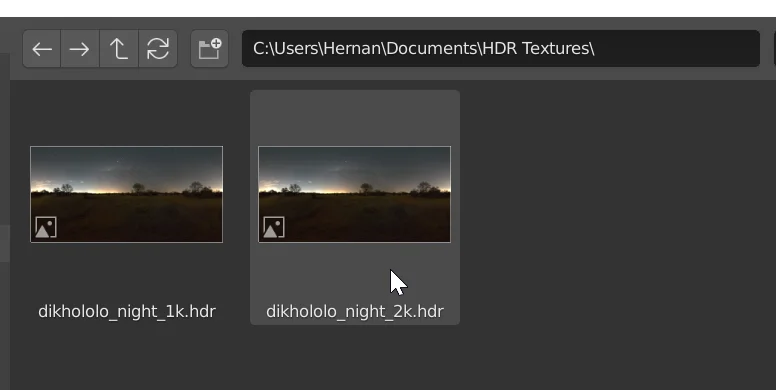
2. Using the “Open” button that appears, select the HDR texture to use as a sky.

How to see the background texture
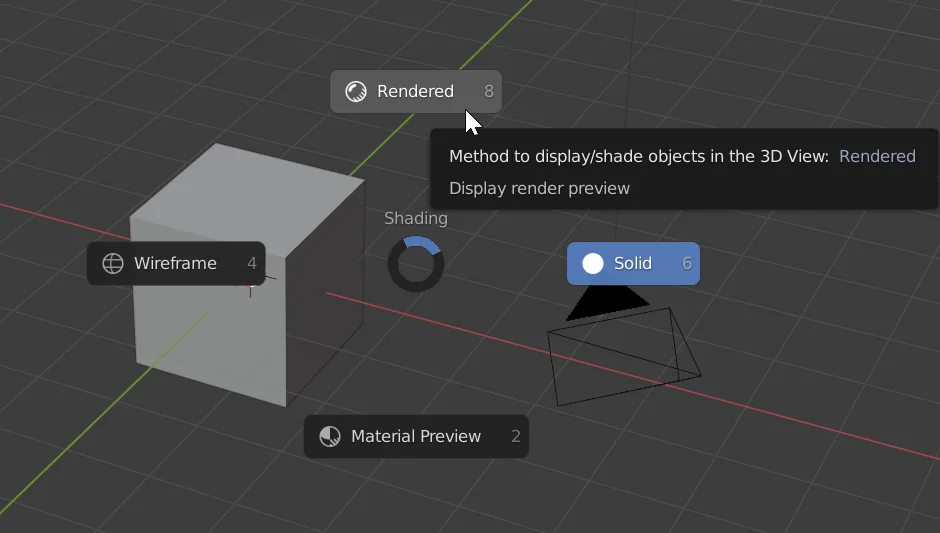
To see how the sky looks like in the scene we go to the render mode, pressing the Z key should display the options shown in figure 7, we choose the “Rendered” option.
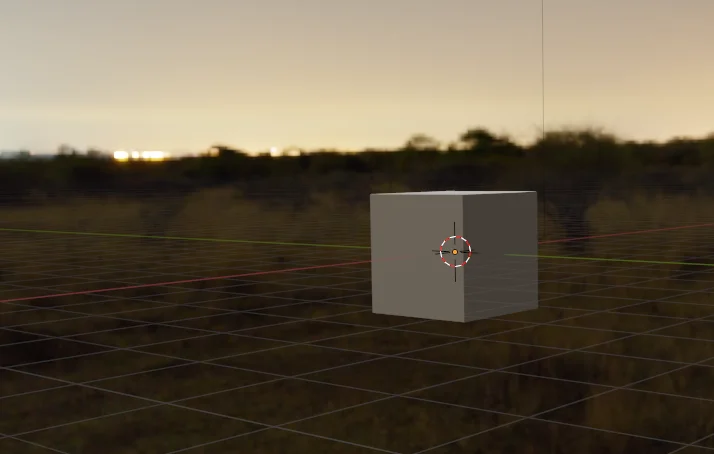
In figure 8 we see the result, the whole scene is surrounded by the HDR texture and the lighting of the scene comes in part from this texture. We can make this more evident if we make the material reflective.
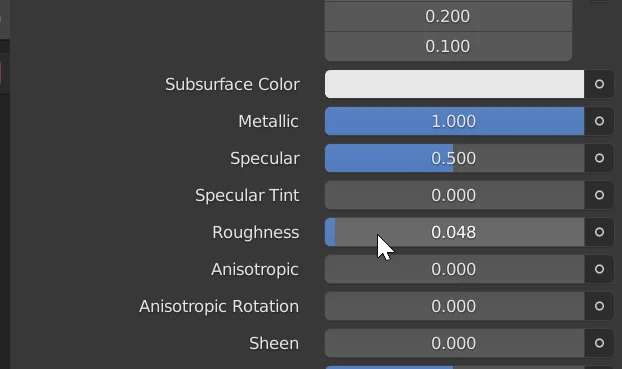
To do this we select the cube, go to the material tab and increase the parameter “Metallic” to the maximum and decrease the parameter “Roughness”.
In figure 10 we see the result, now the cube is metallic and has a smooth surface, therefore it reflects the light of the environment.
