Iterating through child GameObjects is a fundamental skill when working with Unity’s hierarchy system. Whether you’re building procedural systems, managing UI elements, or organizing scene objects, understanding how to traverse and manipulate child objects programmatically is essential for efficient game development.
In this tutorial, we’ll explore various techniques for iterating through GameObject children using C#, including how to access child transforms, modify their properties, and apply components at runtime. The examples demonstrated here are part of the GDT Solutions for Unity project, which can be cloned from my GitHub account for hands-on practice.
Video Tutorial: Iterating Through GameObject Children

Accessing the Project Files
The complete project demonstrated in this tutorial is available in the GDT Solutions for Unity repository on GitHub. By cloning this repository, you’ll have access to the working scene, scripts, and any future solutions that are added to the collection.
To clone the project:
- Navigate to the repository on GitHub
- Click the “Code” button
- Select “Open with GitHub Desktop” (or use your preferred method)
- Choose a local folder for the project
- Open the project in Unity
This approach ensures you always have access to the latest examples and solutions as they are published.
Project Setup and Scene Structure
The demonstration scene has been prepared with a simple hierarchy structure. An empty GameObject serves as the parent container, holding multiple child objects—standard cube primitives positioned at the same location. Additionally, a separate GameObject contains the script that will be used to iterate through these children.
A UI button has been connected to trigger the iteration function, with console output confirming when the button is pressed. This setup allows for testing and visualization of the iteration process in real-time.
Referencing the Parent GameObject
Before children can be accessed, a reference to the parent GameObject must be established. This is accomplished by defining a public GameObject variable in the script:

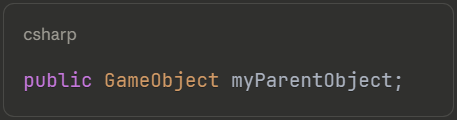
Alternatively, a Transform variable can be used, since child objects are accessed through the Transform component. However, using a GameObject reference is equally effective, as every GameObject in Unity has an associated Transform component that can be accessed directly.
Once the variable has been defined, the parent GameObject is assigned through the Inspector by dragging the target object into the exposed field.
Creating the Iteration Function
To keep the code organized, the iteration logic is placed in a separate function called IterateThroughChildren(). This function is then called when the button is pressed, maintaining clean separation of concerns.
For more information on organizing code across multiple scripts and calling functions between them, check out our guide on how to call functions from another script in Unity.
Accessing Child Count
The first step in traversing child objects is determining how many children exist. This is achieved using the Transform component’s childCount property:


This value can be displayed in the Inspector for verification purposes by making it a public variable temporarily. When tested, the variable correctly reflects the number of children (10 in this example).
Implementing the For Loop
With the child count established, a standard for loop is used to iterate through each child:

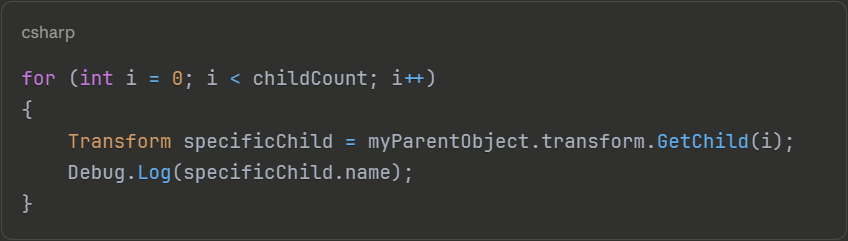
The GetChild() method retrieves the Transform of the child at the specified index. By storing this reference in a local variable, various operations can be performed on each child object.
When executed, the names of all child objects are printed to the console, confirming that the iteration is working correctly.
Manipulating Child GameObjects
Once the basic iteration structure is in place, numerous modifications can be applied to each child object.
Renaming Children Dynamically
Child objects can be renamed programmatically using the name property, which is both gettable and settable:


Note that i + 1 is used because loop indices start at zero, but human-readable numbering typically starts at one. When executed, all children are renamed sequentially.
Positioning Objects in Space
Children can be repositioned using their Transform component. For example, objects can be aligned in a straight line with consistent spacing:


By exposing these values as public variables, the positioning can be adjusted through the Inspector without modifying code. This approach provides flexibility when fine-tuning object placement.
Applying Random Colors
Visual properties can also be modified during iteration. To assign random colors to each child, the MeshRenderer component is accessed:


This line accesses the MeshRenderer, retrieves its material, and sets a random HSV color. If multiple materials are assigned to a renderer, alternative properties would need to be used, but for single-material objects, this approach works perfectly.
Each time the iteration function is called, new random colors are generated and applied to the children.
Conditional Position Modifications
More complex logic can be implemented using conditional statements within the loop. For instance, children can be displaced vertically based on whether their index is even or odd:

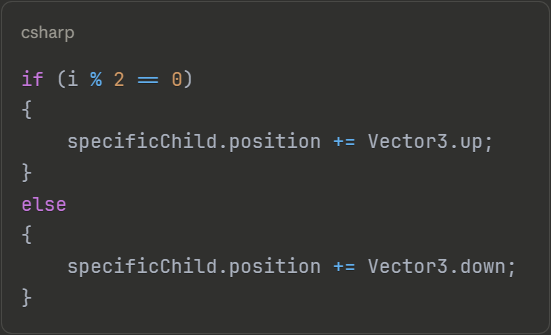
The modulo operator (%) determines whether a number is even or odd by calculating the remainder when divided by two. Even-indexed children are moved upward, while odd-indexed children are moved downward.
Adding Components at Runtime
Beyond modifying existing properties, components can be added to child objects during iteration. This is particularly useful for creating dynamic behaviors.
Adding Rigidbody Components
A Rigidbody component can be added to each child, enabling physics simulations:


The AddComponent<>() method returns a reference to the newly added component, which can be stored in a variable for further configuration.
Configuring Physics Behavior
With the Rigidbody reference available, its properties can be modified immediately:

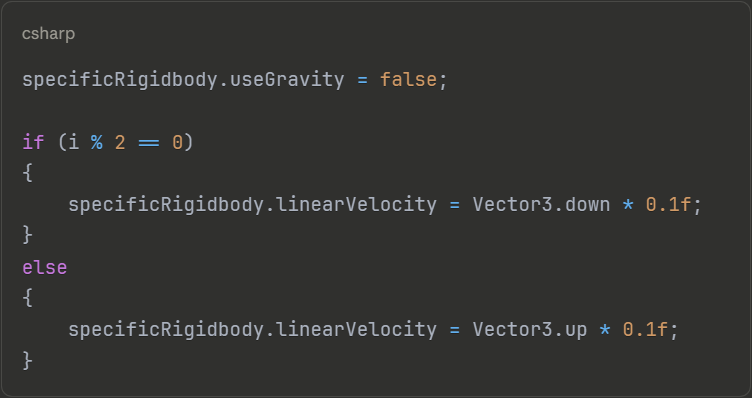
In this example, gravity is disabled and linear velocity is applied directly. Even-indexed objects are given downward velocity, while odd-indexed objects move upward, creating an interesting visual effect.
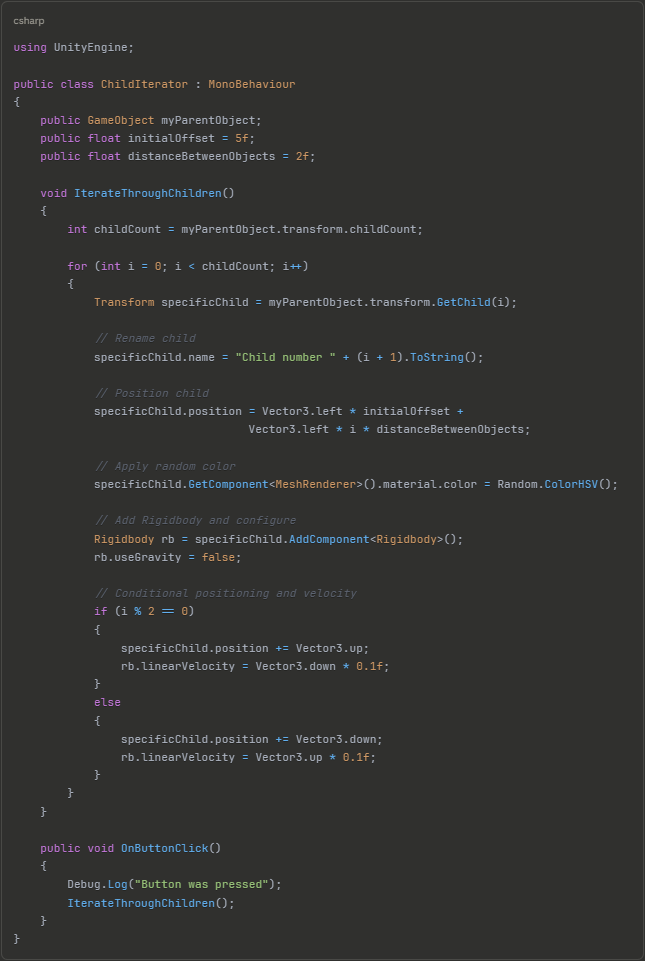
Complete Implementation Example
Here’s a comprehensive example combining multiple techniques:

Key Takeaways
When working with GameObject hierarchies in Unity, several important concepts should be kept in mind:
- Transform component access is the gateway to working with child objects
- GetChild() retrieves children by index, making loop-based iteration straightforward
- Child count can be obtained through the
transform.childCountproperty - Component references returned by
AddComponent<>()can be captured for immediate configuration - Public variables allow Inspector-based tweaking without code modification
- Modulo operations enable index-based conditional logic for alternating behaviors
Conclusion
Iterating through child GameObjects is a powerful technique that enables dynamic scene manipulation, procedural content generation, and efficient batch operations on multiple objects. By combining basic iteration with Transform manipulation, component access, and runtime component addition, complex behaviors can be created with relatively simple code.
The techniques covered here form the foundation for more advanced systems, including object pooling, procedural level generation, and dynamic UI management. Experimenting with these concepts in the provided project will help solidify understanding and reveal additional creative possibilities.
If you found this tutorial helpful, consider exploring the other solutions in the GDT Solutions for Unity project, and feel free to experiment with the code to create your own variations and effects.