Updated information about this project
This article belongs to a series that consist on making a first person game about finding objects inside a maze. It’s one of my very first series from the channel. Now I reworked this project and you can download it to import in your own Unity project. Some day I will make a new series about this project, subscribe to my channel to see all the fresh content about Blender, Unity and programming.
Follow me on itch.io and download the source code of this project
YOU CAN TRY THIS GAME HERE, IT MAY TAKE A LITTLE WHILE TO LOAD
🔻
MOVEMENT: WASD CAMERA LOOK: MOUSE
Introduction of the old article
This is the beginning of the Labyrinth series, in which we’ll create a simple prototype of a first-person game in which the stage will be a labyrinth, while we see all the tools that Unity has to create games.
This series is ideal for those who do not have experience with Unity as it shows a little of everything and without going into detail, the purpose is rather to observe the entire development process to get a general idea.
Go to the project’s Main Page
Video related to this article
Before we begin, I invite you to watch this video from the My First Game series at Unity.
Creation of the project
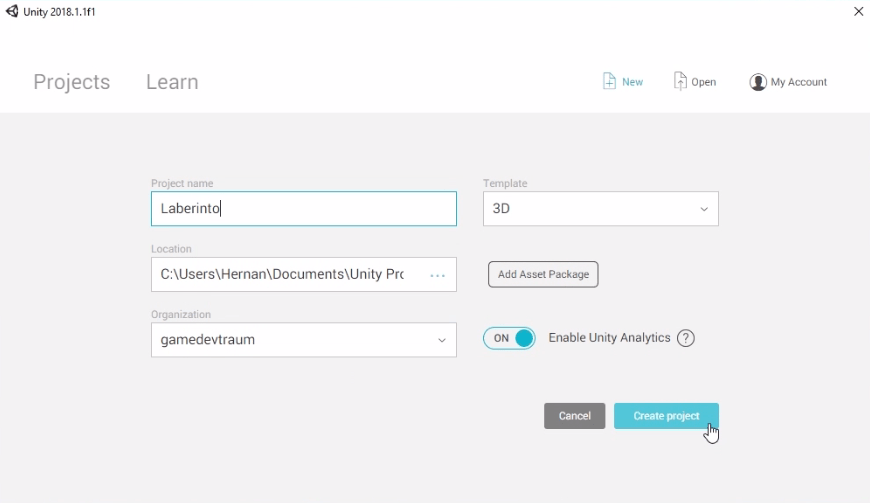
When you run Unity or Unity HUB, a window appears in which you can create new projects, open them and access the tutorials.
We will create a new 3D project, give it a name and choose a location on the disk. Everything else is optional. When everything is ready we create the project
We give it a name and select the 3D template.
The first thing we’re going to do is create a new scene. In this version of Unity, by default we create the scene “SampleScene.unity”, as seen in the header of the program in Figure 2.
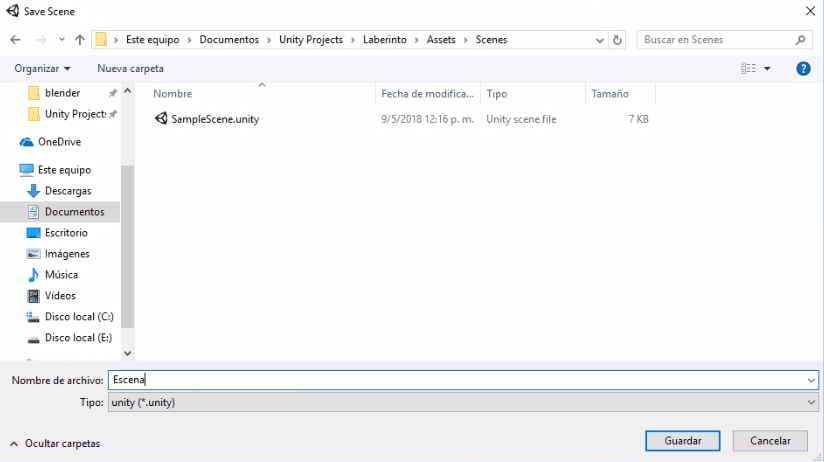
To create a new scene click on File > Save Scene As…
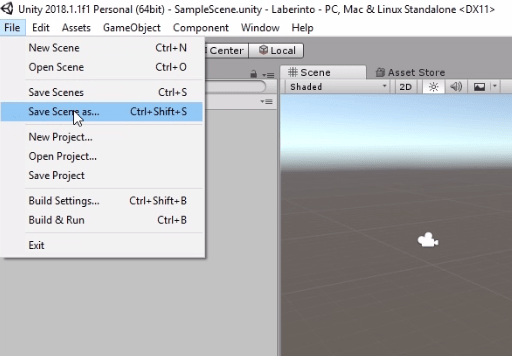
We give it a name and keep it. When you do it, you can see in the header the name of the new scene.
Each scene has its own design independent of the others. For example we can use one scene for the main menu and another for the game.
It’s all going to depend on how we want to structure the game.
Creating folders
It’s important to set up an organization system for our Unity game files from the beginning, because as we go along we’re creating more Scripts, importing more files and things get cluttered easily.
All project files are located in the “Project” window, inside a folder called “Assets”. This folder can be found in the directory we defined for the project.
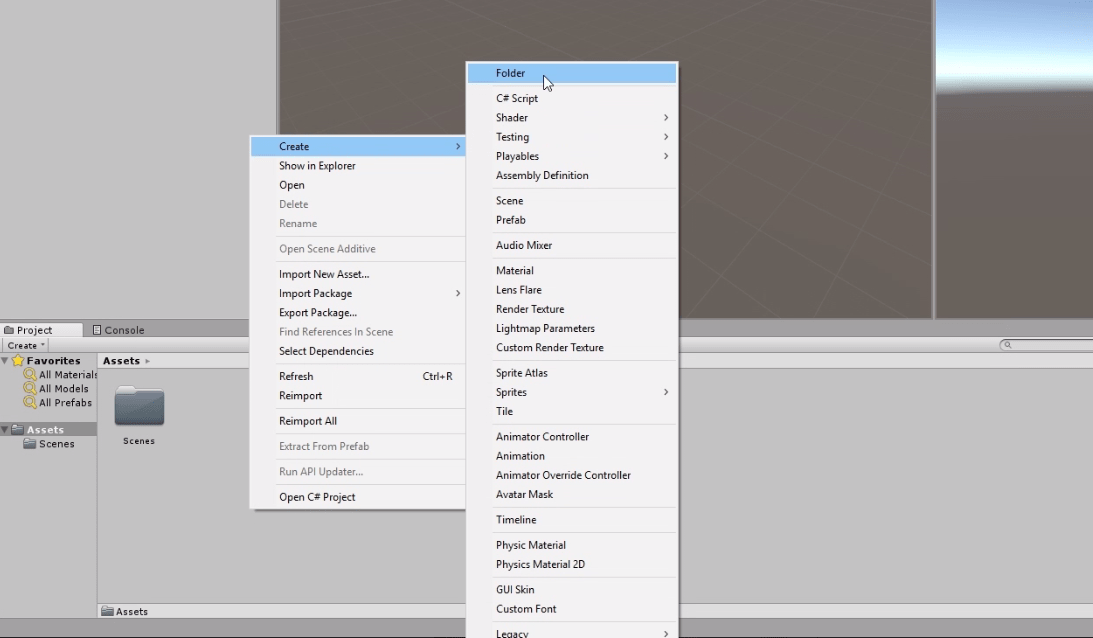
As can be seen in figure 4, right-clicking displays a menu with different options, go to the “Create” option and choose “Folder”.
We create as many folders as necessary to organize ourselves, this part is personal.
Import Packages
To start making a game in Unity is not necessary to create everything from scratch, we can use existing libraries to start working on an idea. Next we’ll import Unity Packages from the Standard Assets library and the Asset Store.
Standard Assets – Unity
In the version of Unity that I had at the time of recording the video, you could import the Standard Assets packages, a library offered by Unity that has different prefabrications, effects and scripts that are useful to start with.
Right-clicking on the folder we have the option “Import Package” where we can choose a package that we have downloaded using the option “Custom Package” or we can choose a package from Standard Assets.
If you do not see all the packages as shown in Figure 5, you have the option to download them from the Asset Store, but you must have a Unity account to do so. We’ll talk about that later.
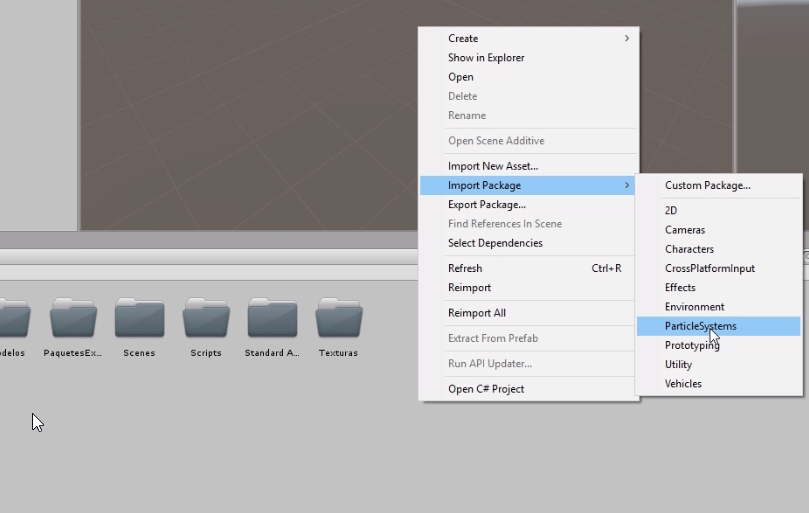
In this case I will import from Standard Assets the packages “Characters”, “ParticleSystems” and “Utility”.
With the package “Characters” we will be able to place in the stage a prefabricated one that has implemented a control in first person.
ParticleSystems brings some interesting effects to use, such as fire and smoke.
Utility brings some useful scripts like a frames per second (fps) counter.
Asset Store – Unity
Unity’s store contains an infinity of Assets, some of them paid and others free.
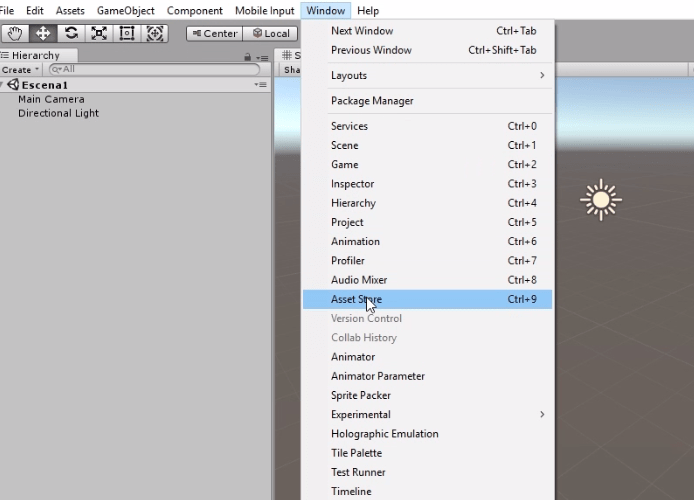
To access the shop we use the Unity Asset Store tab, if it is not open, go to Windows > Asset Store or use the direct access Ctrl+9. As shown in figure 6.
To use the store we must log into our account (we can do it from Unity). Then using the home screen or the search bar we can explore the content.
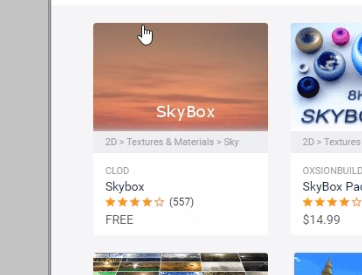
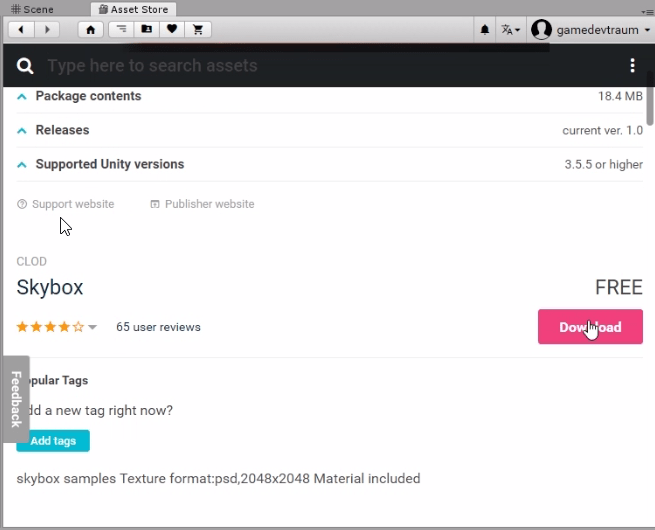
In order to see how Asset Store is used we are going to download two packages. The first is called “SkyBox” and the second “FastMobileBloom”, we use the search bar to find them, in figures 7 and 8 you can see the miniatures of the packages.

To add them to our project we enter the package and put “Download”, at the end of the download we have the option “Import”.
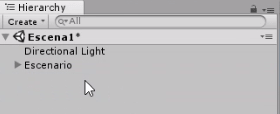
Project hierarchy
Within each scene all the elements of the game will be defined, that is to say a scenario, objects that are part of the world, invisible objects that serve for the logic of the game, graphical interface, etc. All these elements are known as GameObjects and will be listed in the hierarchy of our project.
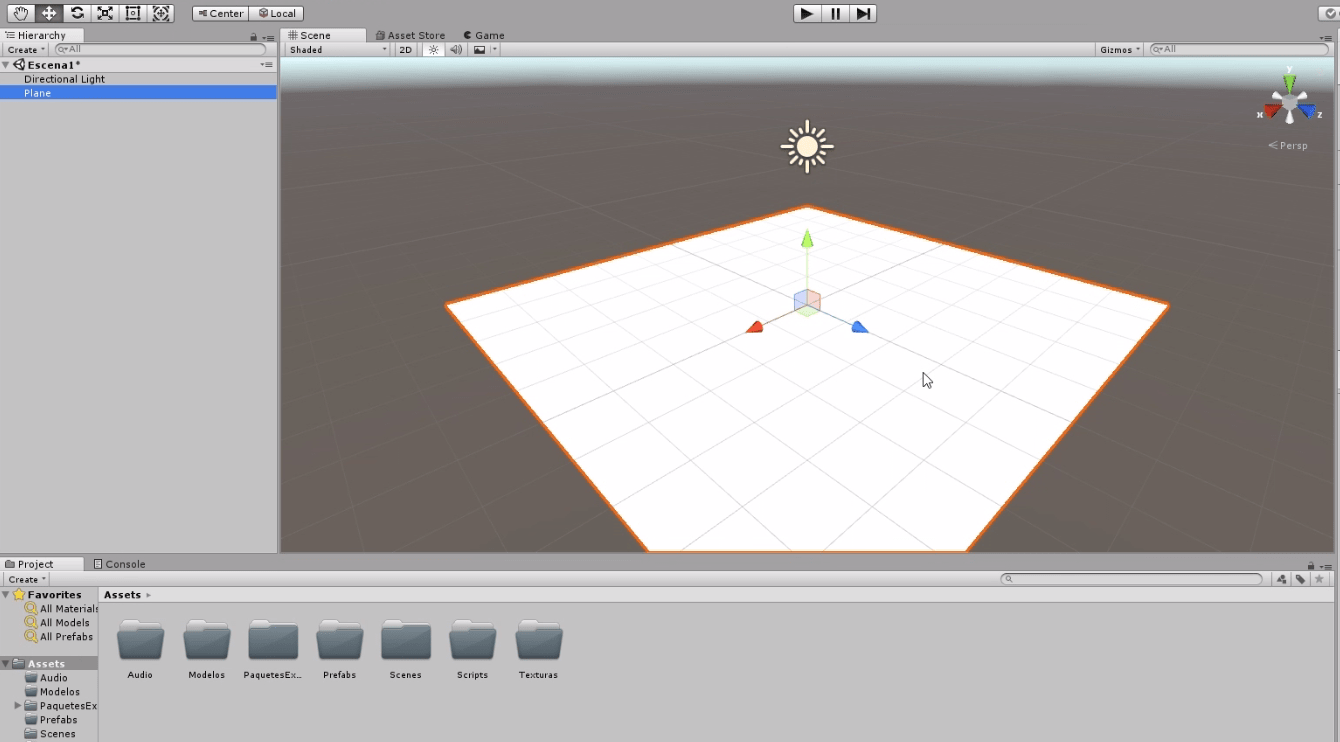
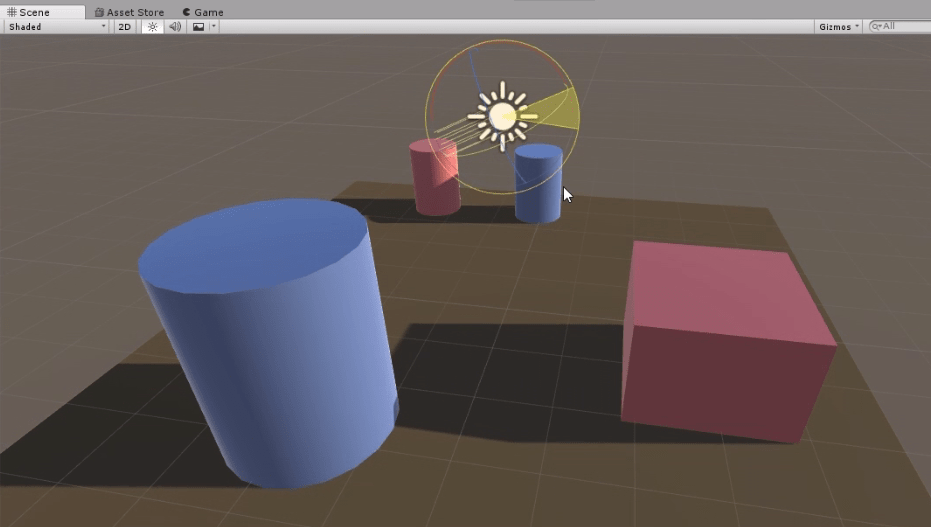
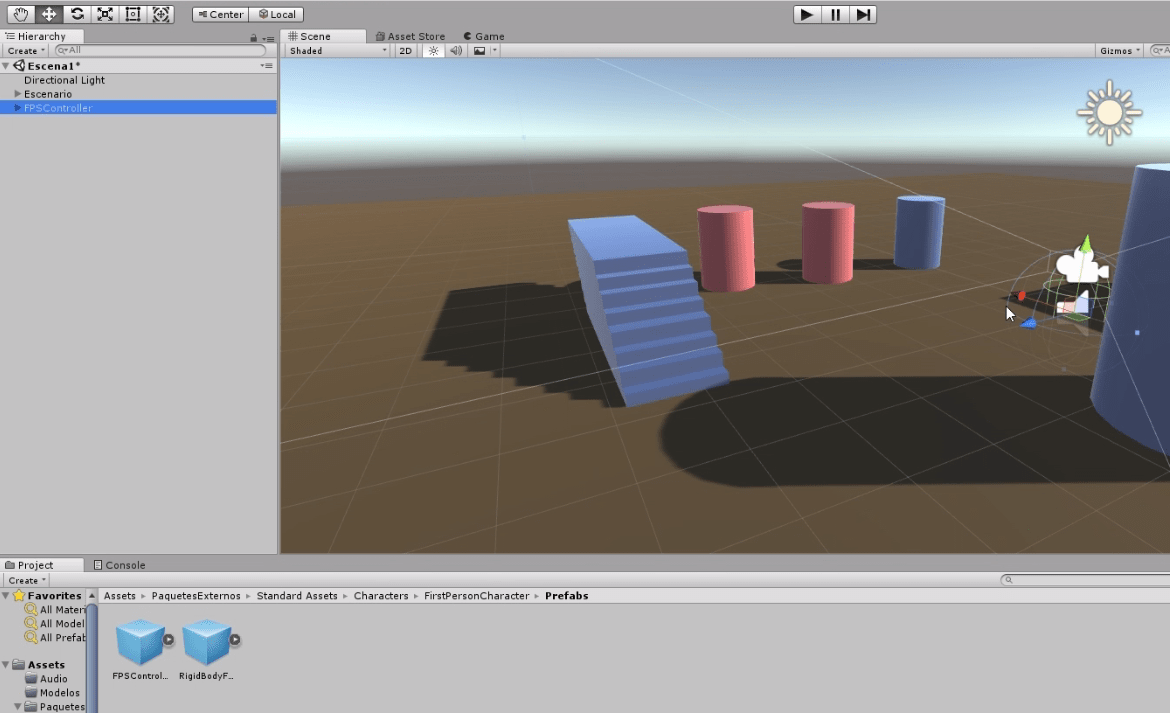
As you can see in figure 10, when creating a new scene, we have two GameObjects that come by default. A camera and a directional light.

Let’s delete the camera and start adding objects to the scenario.
By right clicking on the hierarchy we have the option to add different GameObjects, e.g. empty objects, primitives, lights, etc.
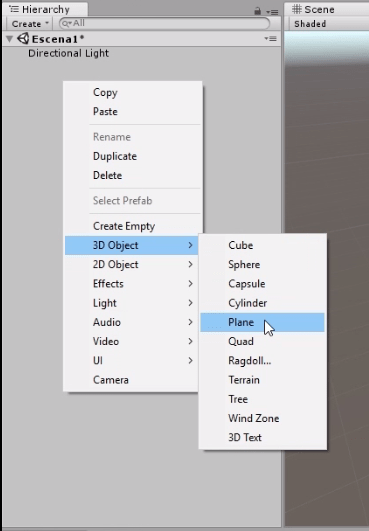
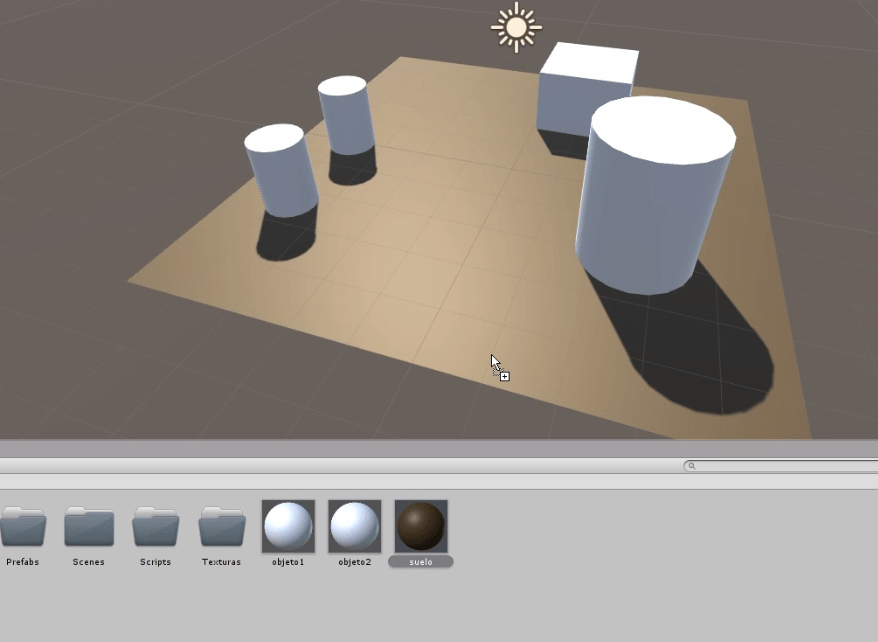
I’m going to set up a simple stage with a floor plan and some buckets and cylinders.
As we add more objects to the scenario the hierarchy grows. It’s also recommended to have a good organization from the beginning, placing appropriate names and using Empty GameObjects to group the objects.
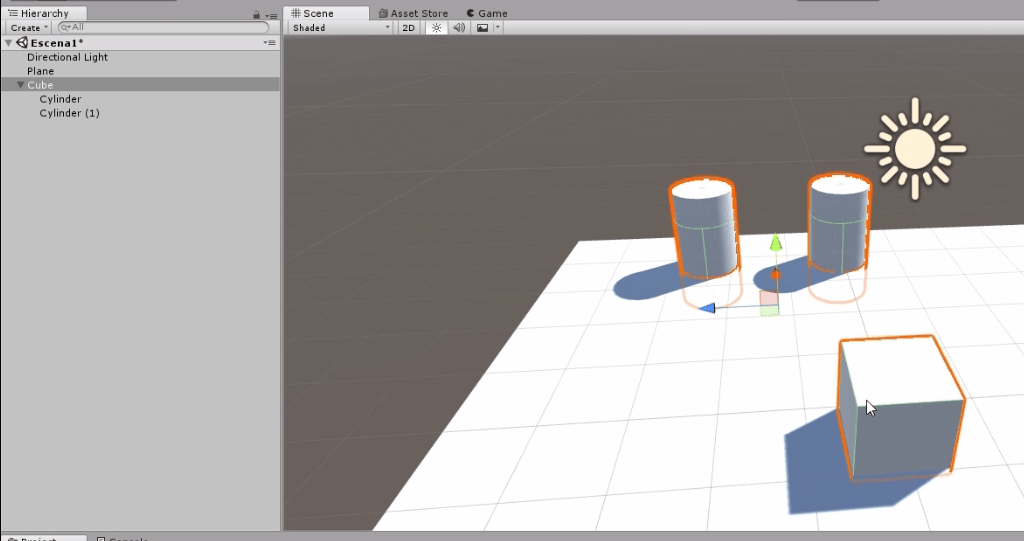
Note figures 14 and 15. In the first one you can see that both cylinders are contained by the cube, as they are slightly to the right and the cube has an arrow to unfold and collapse the contents. In figure 15, on the other hand, it is observed that they are at the same level, so to speak.
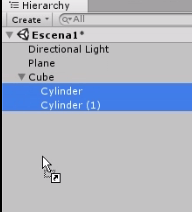
This represents the kinship that exists between GameObjects. In figure 14 it is said that the cube is the father GameObject and both cylinders are children. This implies that the cylinders are going to be affected by certain changes that apply to the parent. For example if we deactivate the cube, both cylinders will also be deactivated.
The same applies to the transformation component, for example. The position of the cylinders is measured with respect to their parent, so if we move the parent, the cylinders move together.
Materials
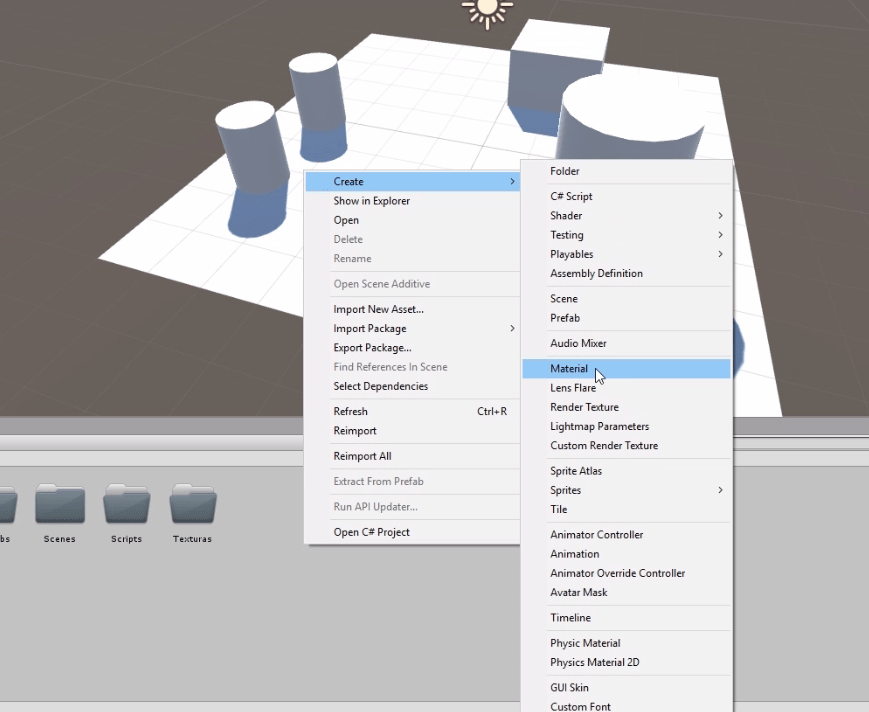
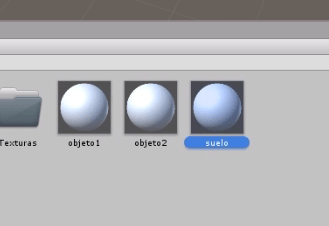
To apply colors and textures on the objects of the world the materials are used. Let’s create some to see how they work. Right click on a project folder then Create > Material, as shown in figure 16.
The material is visualized as a sphere in which are applied the properties of the material we must assign it a name, as always maintain the order from the first moment benefits us in the long term.
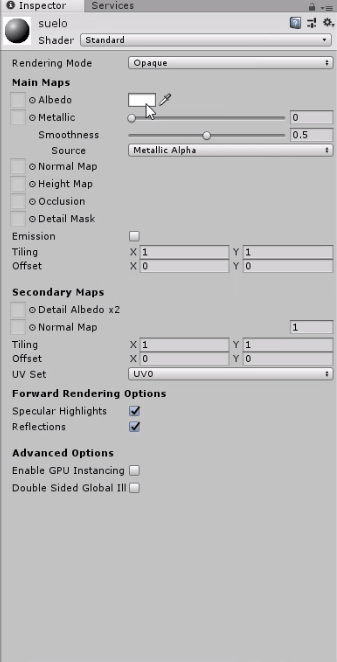
The materials have several parameters that define it, in our case we will simply modify the color by clicking on the box to the right of “Albedo”. When doing so, a color palette appears where we can choose the color or write its hexadecimal code.
To apply a material we simply drag it over the desired object.
Lighting
Let’s select the directional light from the hierarchy or in the scene window.
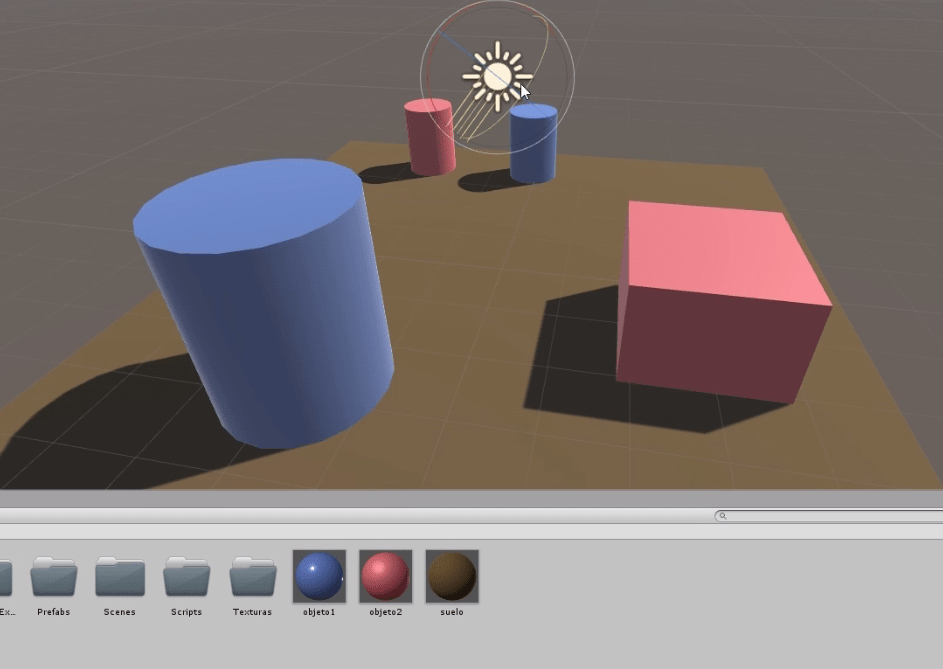
Directional light is a source of light such as the sun, i.e. situated in infinity and sending all its parallel rays. For this reason moving the source or making it larger does not affect the illumination of the scene, but changing the rotation if it does. We see it in the direction of the shadows.
Create a ladder with primitives
Let’s do this little exercise to see the elements of Unity’s toolbar, particularly the tools that will allow us to modify the Transform component of GameObjects. We started by creating a cube in the hierarchy.
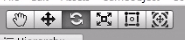
The tools move, rotate and scale are shown in figure 22 in positions 2, 3 and 4 respectively and are quickly accessed using the “W”, “E” and “R” keys (respectively).
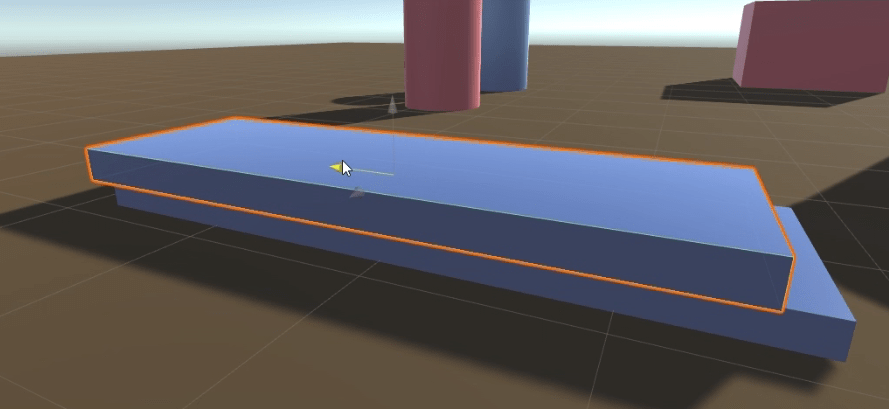
If we press the R key with the cube selected, we can scale it using the “Gizmo” of the three axes, as shown in figure 23.
We scale it in two directions to give it the appearance of a step.

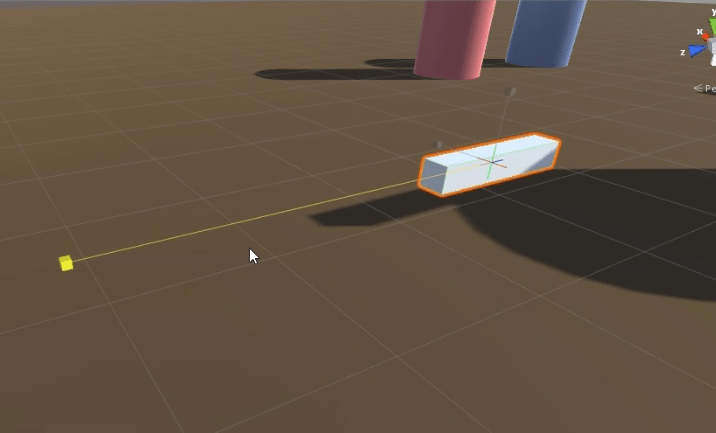
Fig. 24: Scaling a GameObject in one direction.
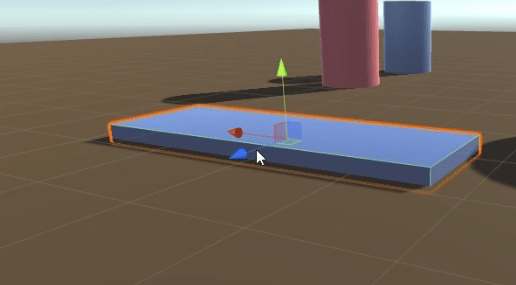
We apply a material to it and with the W key we can place the step on the stage.
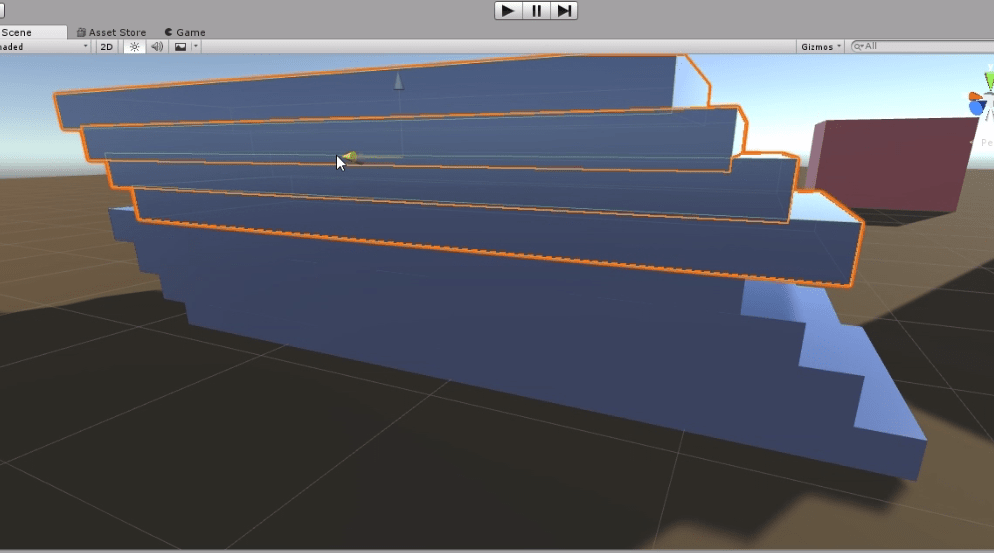
We can easily duplicate the object using the shortcut CTRL+D and with the W key raise it a little and move it backwards.
We can repeat this process with several selected steps.
Let’s create an Empty GameObject and call it “Scenario”.
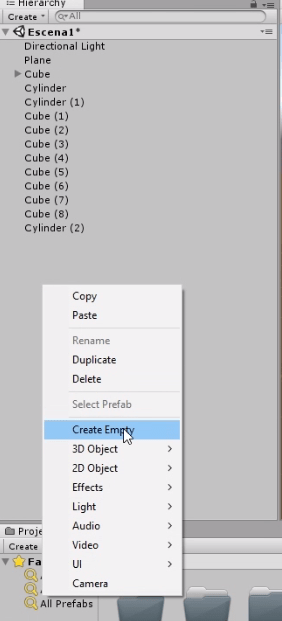
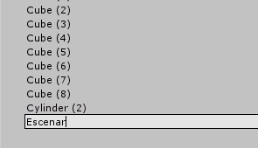
Then we select all the objects and drag them to this new object to group them. In this way we can collapse the whole content and the hierarchy is more orderly, as shown in figure 30.
First-Person Controller
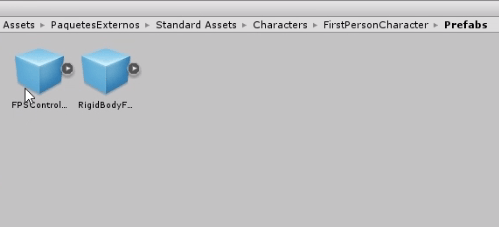
The reason why we previously removed the camera is because we are going to place the prefabricated “FPSController” from Standard Assets on the scene and it already has a built-in camera. This prefab is located in the directory Standard Assets > Characters > FirstPersonCharacter > Prefabs.
We take it to the scene and put it where we like.
Bugs
We are already able to do some tests, in the top center we have three buttons.
The Play button is used to start running the game. The second button pauses the game but does not end it. The third button is used to advance a single frame in the game.
Pressing the Play button displays an error sign saying that all errors must be fixed before you can enter game mode.
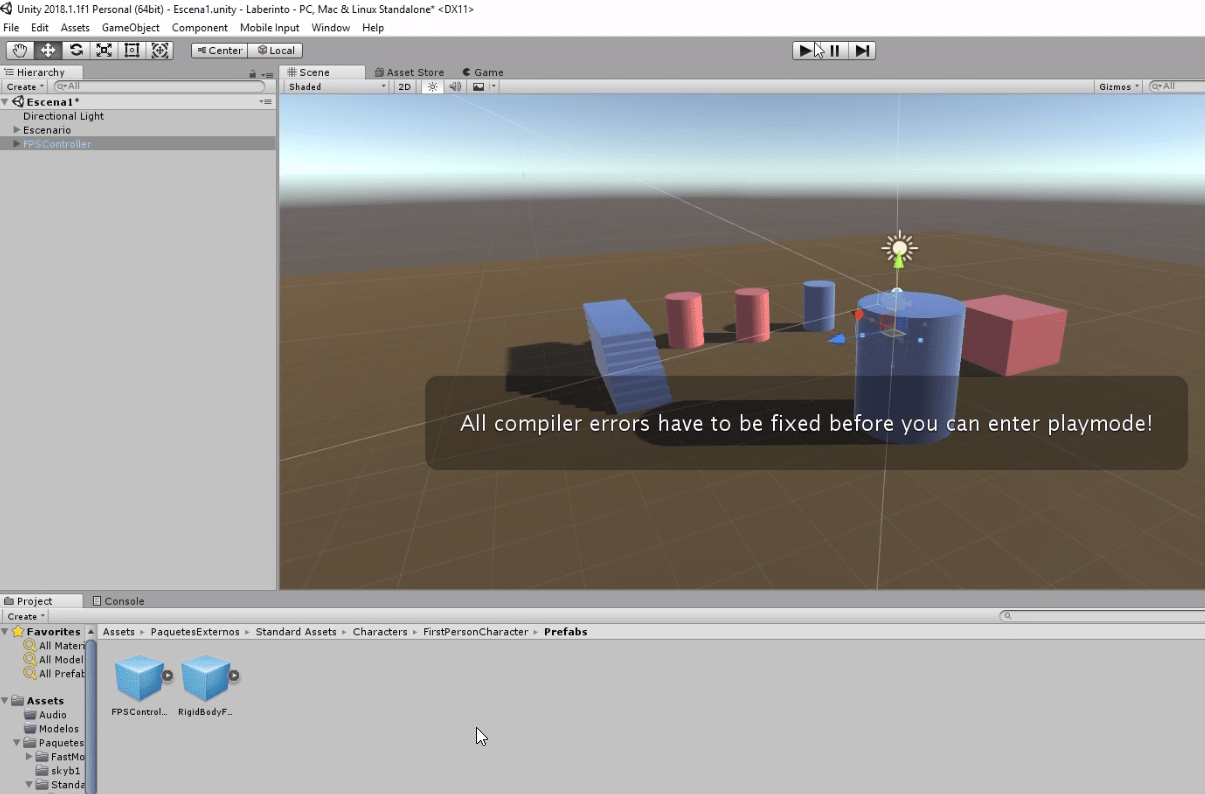
This is a problem that we are going to encounter very often, especially at the beginning and it is usually very frustrating, even more so if we are learning to program.
To get information about what is happening we have the “Console” window. If it is not open, you can find it in the “Window” menu.
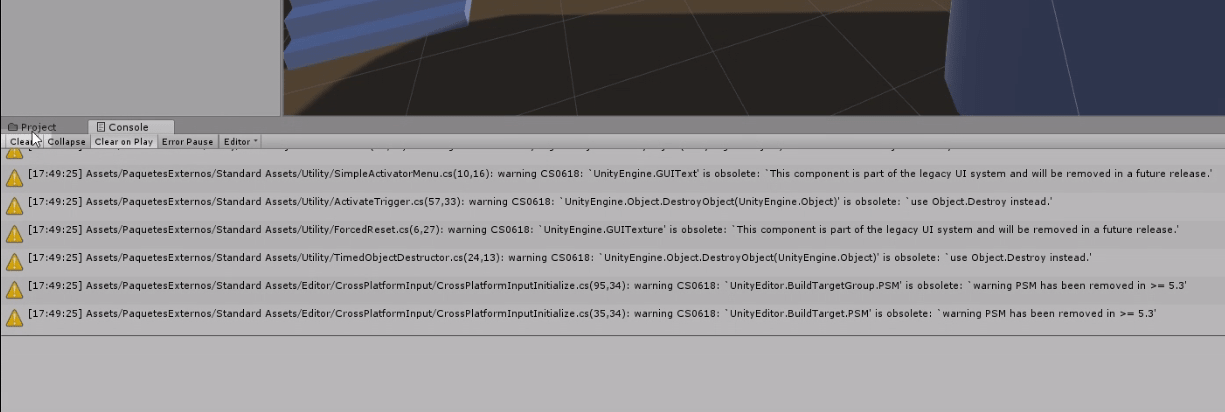
In figure 34 we see a large number of warnings but this does not affect the operation of the game, are suggestions for optimizing the code, warnings for use of obsolete code and so on. If only we had warnings we could enter the game mode without problem.
Figure 35 is a screenshot after clicking the “Clear” button, this clears the warnings and lets you see the errors that cannot be overlooked in order to enter the game mode. These are shown with a Red sign.
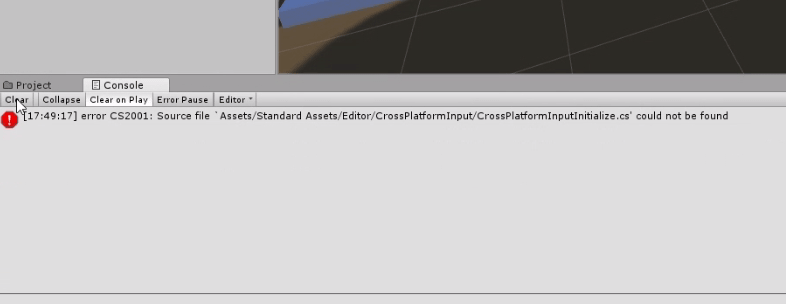
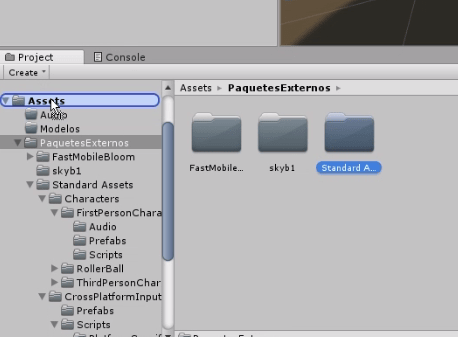
There is not much information about the error but it is enough for us to understand that there is a file that is not found. If we look at the address we see that it is related to the Standard Assets package and we see that its address begins with “Assets > Standard Assets > …”. In the video we made a folder called “External Packages” and inside it we put the Standard Assets package.
Everything seems to indicate that there is some process that is looking for Standard Assets files but inside the Assets folder, not the External Packages folder, so I move the Standard Assets folder to the Assets folder and the error is fixed. Now if we are able to enter the game mode.
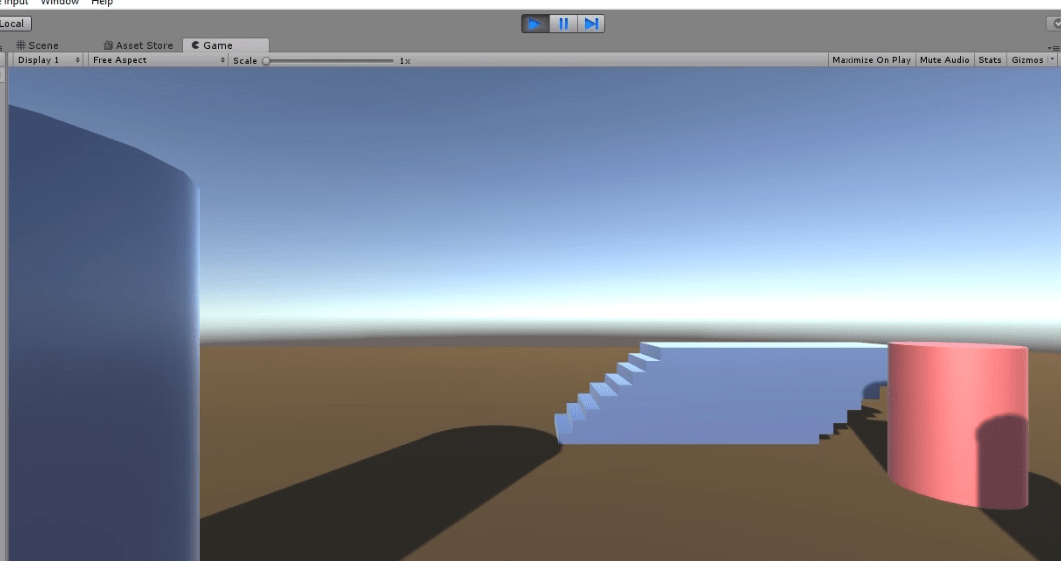
Testing the game at Unity
The prefab FPS Controller works like a standard first-person game. Move forward, backward, sideways with WASD keys or arrows. Jump with space bar, with Shift you can run. With the mouse you can control the view and it has the sound of steps. It’s a good starting point to start forming an idea.
Build the project
Now we will generate a standalone version of the project, ie a set of folders and executable file that can run on our operating system without having the Unity engine open.
Go to the File tab and click on Build Settings to configure the compilation parameters.
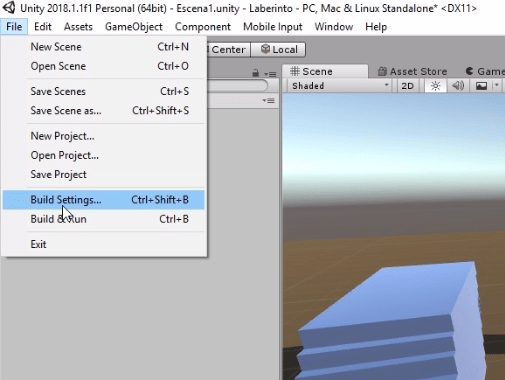
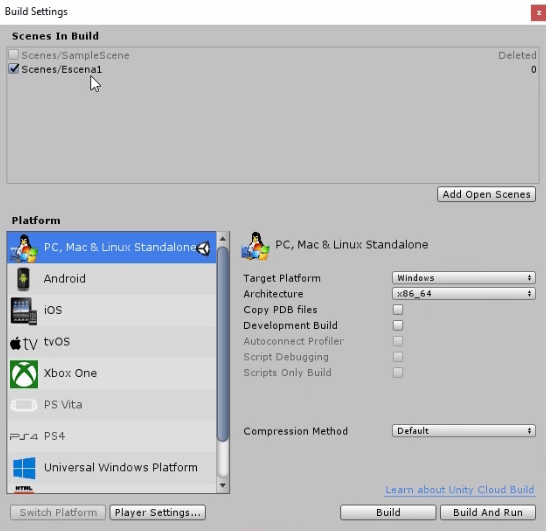
We get the window illustrated in figure 39, there we can select the target platform.
If you look at the top is where the game scenes are listed. At that time we don’t have any scenes added to the compilation.

By clicking on the Add Open Scenes button we are going to add the scene we were working on throughout the video. As you can see in figure 40.
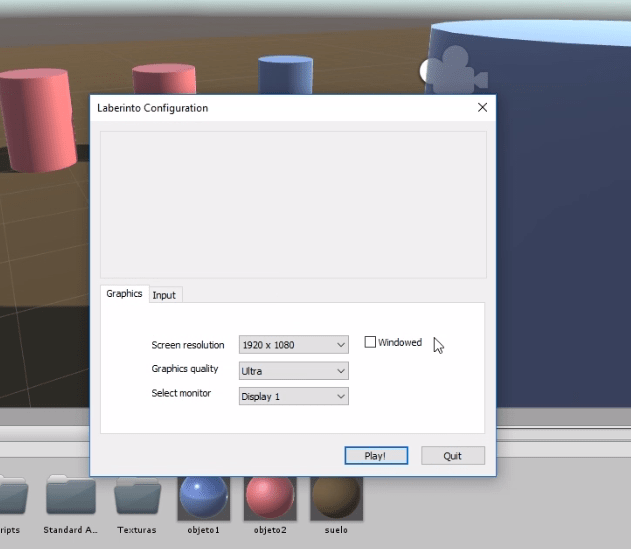
Now all that’s left is to click on Build And Run and choose the folder where to place the generated files. At the end of the compilation process the game runs and a window appears in which we can select the resolution and quality. Press the Play! button and the game starts.
Conclusion
In this article we saw the first steps in starting a game at Unity. We put emphasis on organization, which will benefit us in the long run in development.
We saw the scenes of Unity, each scene is a world apart and contains a certain amount of elements or GameObjects that are listed in the hierarchy of the project.
We import files from both the Standard Assets library and the Asset Store. At the beginning the most important thing is to try to give form to the ideas that we have, for this the assets of the bookstores facilitate the things to us.
We saw something about the parentship that exists between GameObjects and how changes applied to a parent object also impact their child objects.
We create materials that give color and texture to objects.
The directional light source serves us to illuminate a scene as the sun would, the shadows will be projected according to the rotation that this light source has.
We made a simple ladder using the primitives that can be created with Unity and applying transformations to them, that is to say changes of scale, rotation and position.
We place the Standard Assets prefabricated “FPSController” which is a first person control. Quickly we already have a character that can go around the stage, run and jump.
In the process there were bugs that we had to fix in order to get into game mode. Debugging errors is a difficult task when we start programming, but with practice we make fewer mistakes and it’s easier to correct them.
Finally we made an executable compilation from the operating system. There are a lot of platforms to which we can export our game in Unity. In principle we are going to export to Windows and Android.